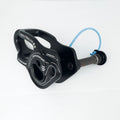
Alpine WebLock 6.2


Alpine WebLock 6.2
Our general purpose webbing anchor, refined
QUICK SPECS:
- MBS
- 60 kN (13,489 lbf)
- WLL
- 12 kN (2,698 lbf)
- Primary material
- Anodized Aluminum Alloy 7075
- Weight
- 242.0 g (8.5 oz)
- Approved Webbing Widths
- 24.0 - 26.0 mm (0.94 - 1.02 inches)
- Diverter Diameter
- 38mm (1.50 inches)
Description
Pre-Order — ships Late October.
Say hello to the all new Alpine WebLock 6.2, the next iteration of our Alpine WebLock 6. With this new model, we've added a few very useful features:
- The center diverter now has sidewalls that extend all the way around. The bottom of the diverter now has walls as well as the rest of the diverter, protecting the most critical part of your device and giving the webbing a clear channel to sit in all the way around.
- The pin is now fully round, allowing it to spin while tensioning with the Buckingham method.
- The pin now has a parking spot to allow you to pre-install it without the risk of it falling out while in a critical spot during rigging.
All other features of the AWL6 are intact with this version, including the massive anchor, 2 beckets, large center diverter, and superior strength.
Made in China, assembled in Colorado.
A Culmination of AWL

Taking features from every generation of Alpine WebLock
In the design stage of the Alpine WebLock 6.0, we took into account the communities love for the various generations of Alpine Weblock. Starting with the 3.0, we have done either a 2-piece or a single billet design. This allows for some pretty sleek geometry that also offers substantial strength and usability that we definitely wanted to include with this new iteration.
Stemming from there, we took the large diverter with a mostly round shape from the Alpine Weblock 3 and added additional size to it, making for one of the largest diverters on the market. This gives substantial surface area for the webbing to grip to the AWL within it's wraps. This helps with slippage, strength retention, and, curiously enough, tensioning.
Furthermore, we took the shape of the widely loved AWL4, and added a bit more size to the anchor hole, lengthend the distance from the diverter to the back rails, added soft release rails, and opened up the center diverter slightly. This gives us a rough AWL4 shape with the added strength of the higher grade aluminum and billet design with soft release compatibility and additional rigging points.
Lastly, the AWL5. This generation of weblock brought a lot of cool features to the world of webbing anchors. We saw the first billet designed weblock, the first weblock with both a large anchor hole and direct soft release compatibility, and the first weblock with a functional becket. The AWL6 incorporates all of these features in a stronger, and more complete way. It retains the form and function of a more standard weblock while having the features of a more modern weblock.
We will look at all these features further below
All the Beckets!

Two Beckets for max functionality
Through the ages of weblock usage, it has become quite clear that this device is used for much more than locking webbing. In fact, the weblock has turned into our progress capture for our tensioning systems, a rigging point for tagging and tensioning, and a master point for large systems. For this reason, having certain functionality built in to the weblock has become a must!
This starts at a functional becket: somewhere you can reliably rig off of. We've had beckets before on our AWL devices, however, the AWL6 has two (2) fully functional beckets: one for over the webbing and one for under!
The upper becket has a working load limit (WLL) of 8 kN, the perfect amount for using that pulley system to tension your longline in the park. This becket is located within the large anchor hole. The front of that hole is designed to have the load path sit above the webbing when it's installed in the device. This makes tensioning with an external tensioning system quite easy and streamlined.
The lower becket has a working load limit (WLL) of 10 kN, more than enough to rig with a compound Buckingham system, or connect various other components of your rigging. This becket is located within the diverter hole. The dimensions of the weblock are such that the load path when using this becket puts your rigging below the installed webbing. A perfect point to add a redirect for a multiplied Buckingham or install your low stretch sling for a compound system.
It's recommended to use a small sling when rigging off of the beckets. Directly connecting hardware to either location is not recommended due to the width of these connection points.
An Anchor Hole For All

The largest anchor hole we've ever made in an AWL
Anchor holes, gotta love them! We use so many different connectors, slings, and hardware when rigging our anchors, having a lot of space to connect things is very beneficial and adds a lot of ease to the setup of a slackline or highline.
The AWL6 packs the largest anchor hole we've ever included in an Alpine WebLock. You can fit 4 strands of green spanset, 12 strands of 9mm rope, and essentially every shackle that we use in the slackline world (pin or bow side). All these things can fit while still retaining enough room to tie a backup AND do your tail tie-off in the anchor hole! It's massive!
Sporting a size of 62.8mm long by 30mm tall and an area of 1,390 mm 2, it's 55% larger than the AWL5 anchor hole and 15% larger than the AWL4 anchor hole! All within a package that's smaller than both!
Not only can you attach the AWL6 with most connectors and soft rigging, it has also been optimized to work directly with a soft release! Simply pass your soft release strands down through the device and the back rails align perfectly to guide the soft release in an optimal way. Truely an all-in-one device.
All that room, plus you get a fully usable diverter hole! So much space for rigging!
The Front Pin
Fully round, free to spin, and very hard to drop
The front pin is the part of a weblock you handle the most, so it is where the Alpine WebLock 6.2 changed the most. The pin is now fully round and free to rotate in the body. When you tension with the Buckingham method, the webbing runs over the front pin as you pull slack through the device — with a round pin that can spin, the webbing rolls over it instead of dragging across it.
It is a push-button quick-release pin with a large pull-ring handle. Press the button in the center of the handle to retract the two locking balls, slide the pin through both sides of the body, and release. Before you load the weblock, check that the pin is fully installed and that both locking balls have popped out on the far side.

New to this version is the pin's parking spot. While you are threading your webbing, the pin has a place to live on the weblock itself, so you can pre-install it and rig with both hands without the risk of it falling out at a critical moment. When the webbing is in place, pull the pin from its parking spot and push it home.
Every pin is also tethered to the body with a short length of shock cord, so even out of its parking spot it stays with the weblock.
Full Diverter Coverage
The diverter now has full sidewall coverage all the way around. No more exposed diverter at the bottom of the device. No more sections of the diverter that do not have a webbing guide. This allows for smoother tensioning and protection on a critical part of the hardware. Keep your webbing and weblock pristine.

The Tie-off

Two tie-off locations, depending on your setup
The AWL6 does not come with a built-in tie-off method like the AWL5 did. We saw many problems arise from that sort of system, so we ditched that idea with this iteration of the weblock. Instead, we have provided two locations on the device where you can install a standard knotted tie-off.
Depending on what you want to have access to after the rig is done, you can choose where to tie-off your webbing from one of two locations. You can either use the standard ISA or poppable fishermans hitch on the anchor hole of the AWL6 or you can do the same through the diverter hole! Either spot will do the job just as well as the other, but will provide access to different spots on the weblock after complete.
If you want to have access to the anchor hole for additional backups, further rigging, or just to be able to inspect your anchor strands or soft release after rigging is complete, it is recommended that you do your tie-off through the diverter hole. If you want to have access to the diverter hole for easy tensioning, backup attachment (do not rely solely on the AWL6 as your backup anchor, you must have a secondary connector here), or an easy place to clip, it is recommended to do your tie-off through the anchor hole.
Close Up
Dimensions
Front view
- Length
- 126.0 mm (5.0 in)
- Width
- 74.2 mm (2.9 in)
- Diverter Diameter
- 38mm (1.50 inches)
- Length Behind Diverter
- 32.0 mm (1.26 in)
- Pin Diameter
- 12.0 mm (0.47 in)
End view
- Height (with pin)
- 77.4 mm (3.0 in)
- Body Thickness
- 44.2 mm (1.74 in)
- Pin Usable Length
- 44.3 mm (1.74 in)
- Pin Overall Length
- 77.4 mm (3.05 in)
- Pin Handle Diameter
- 24.0 mm (0.94 in)
- Weight
- 242.0 g (8.5 oz)
- Approved Webbing Widths
- 24.0 - 26.0 mm (0.94 - 1.02 inches)
Strength
- MBS
- 60 kN (13,489 lbf)
- WLL
- 12 kN (2,698 lbf)
- Upper Becket MBS
- 56 kN (12,589 lbf)
- Upper Becket WLL
- 8 kN (1,798 lbf)
- Lower Becket MBS
- 70 kN (15,737 lbf)
- Lower Becket WLL
- 10 kN (2,248 lbf)
- Design Factor
- 5 to 1
Material
- Primary material
- Anodized Aluminum Alloy 7075
- Pin Material
- CRES 17-4 pH Stainless Steel
- Handle Material
- Anodized Aluminum Alloy 2024
- Ball Material
- CRES 440C Stainless Steel
Compatible webbings
Pick a webbing to see it installed:
1-inch webbings — thread directly
20mm webbings — spacers required

Thread the webbing directly — no spacers neededSpacers MUST be used for 20mm webbings — install the Alpine Weblock Spacers
1-inch webbings — thread directly
 Blue 25.4 mm · 26 kN · 55 g/m
 Feather PRO 25.4 mm · 26 kN · 55 g/m
 Green 25.4 mm · 26 kN · 53 g/m
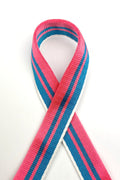 Jelly PRO 25.4 mm · 57 g/m
 Mantra MK4 25.4 mm · 40 kN · 76 g/m
 Paradigm 25.4 mm · 22.2 kN · 44 g/m
 Paradigm MK2 25 mm · 22 kN · 49 g/m
 Paradigm Signature 25.4 mm · 40 g/m