You have no items in your shopping cart.
- SALE
- Tension Calculator
- Webbing Stretch
- Contact Us
- Free Shipping on U.S. Orders $89+

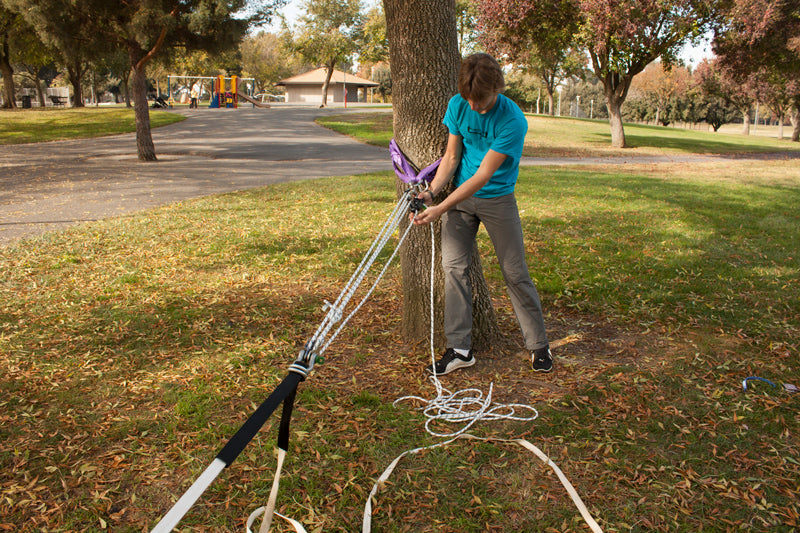
A step-by-step guide to properly detensioning a slackline in a safe and controllable manner.
Introduction
Due to the nature of slacklining, there can be a significant amount of tension and force involved. Sometimes the tension on our slacklines can exceed 1,000 lbf (even 2 and 3,000 lbf)! With this much force comes great danger (potentially). For this reason, detensioning can be one of the most dangerous parts of the whole process. This is why it is important to follow a few simple guidelines when detensioning your line to ensure it's a controllable and safe process.
Step 1
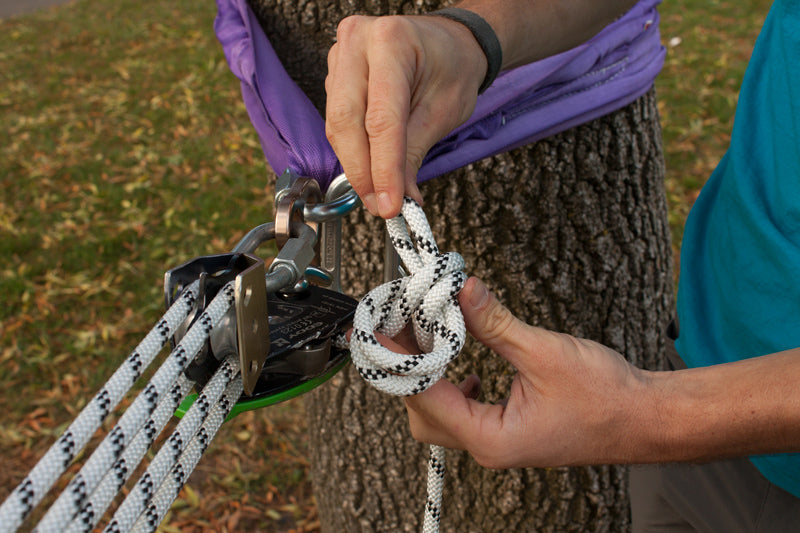
Alright, before we begin the detensioning process, you should remove any and all backups you have installed for your pulley system and line. This includes the tail from your Webbing Anchor that you should have tied off to the anchor, as well as the tail coming from the brake. If you neglect to do this before starting to detension, you will end up with a tensioned backup and will have to retension your line to remove it. It's best to form the habit of removing these backups before you start detensioning in order to prevent this sort of malfunction.
Step 2
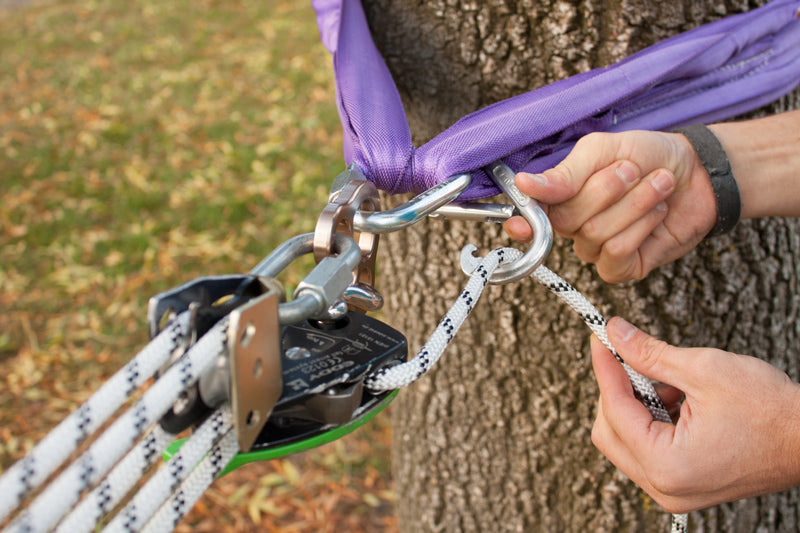
Now, take a carabiner and clip it somewhere on your anchor. If you are using the Right-Angle Reeving technique, a good place to clip this biner is to the vertical shackle that your static pulley is connected to. Otherwise, you can simply connect this carabiner to your spanset, or any other location that is behind your brake.
Grab the tail of the rope coming from your brake and pass it through this carabiner attached to your anchor. The reason we do this is because it will add additional friction behind the brake, making the release much more controllable and allowing us to control the speed at which we detension.
If the tension is especially high or you are using a small diameter rope, you can wrap the rope around this carabiner again to add even more friction.
Step 3
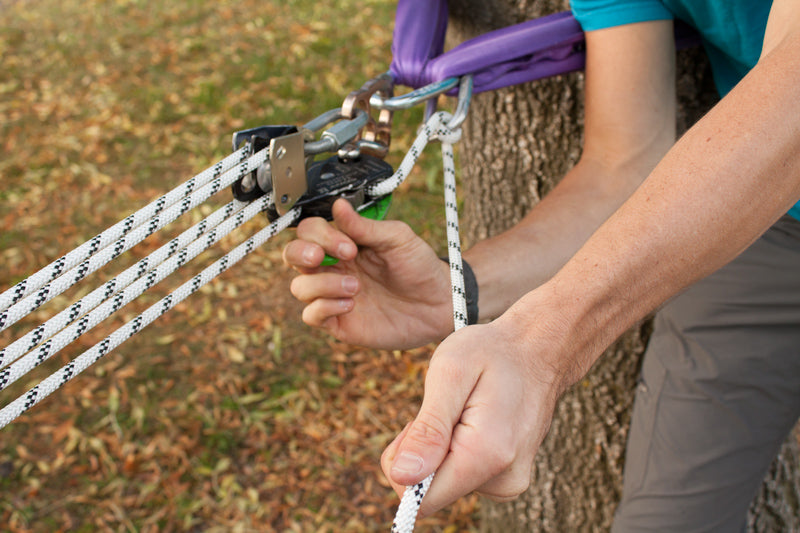
Take a firm grasp on this tail coming from the brake and start to slowly open your brake. Make sure that you have a firm grasp on the tail and that you have a bit of tension applied to the rope.
Step 4
Now you can start to let tension out slowly by holding the rope a few feet away from the carabiner and slowly allowing your hand to travel towards the carabiner as you hold the handle open. This can be quite dangerous! Release the rope very slowly and in a controlled manner. Once the initial tension has been released, you can allow the rope to slip through your hand slowly.
Do not allow the rope to slip through your hand initially! You can severely hurt your hand if you do this! Keep a firm grasp on the rope and slowly allow it to travel towards the carabiner, holding on to the rope the whole time. Once the initial bit of tension has been released, it is okay to allow the rope to slip through your hand.
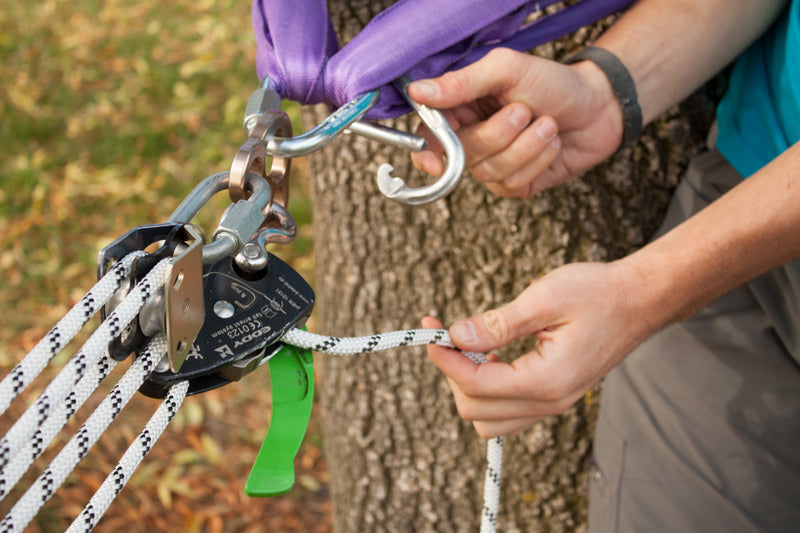
Step 5
Once the line gets loose enough to not need the added friction that the carabiner adds, you can take the tail out from the carabiner and just hold it with your hand while releasing tension. You will be able to tell when the tension is low enough by how fast the rope will want to travel through the brake. When it starts to become super slow, you know that you can safely release the remaining tension without the added friction.
Once there is enough tension released and you can easily hold the whole force with your hands, you can remove your brake and hand-over-hand the rest of the tension out of the system.
Discussion
This method is a very easy and safe way to make detensioning your line controllable.
Tag Cloud
- 7/16" Twist Shackle
- A-Frame
- Adjustable Anchor Webbing
- Aero 2
- Alpine WebLock 4.0
- Alpine WebLock 5.0
- Alpine WebLock 6.0
- Alpine WebLock 6.1
- Anchor Slings
- BC LineBag 2.0
- BC LineGrip G5
- BC Roller
- BC SS Shackle
- Blue
- Blue Spansets
- brake
- Buckingham System
- CMC MPD
- Drop Test
- Dyneema
- Edelrid Eddy
- Feather PRO
- Fiber-Reinforced Slackline Tape
- Gear Information
- Gear Storage
- Gear Test
- Gear Testing
- Gear Usage
- GGBY
- Green
- Green 20
- Guest Article
- Handled Ascender
- Hang Frame
- Highline Festival
- Highline Gear
- Highline Rigging
- Highline Safety
- Jelly PRO
- Lift
- Lift 2be
- Linebag
- LineGrip
- Longline Kit
- Longline Rigging
- Mantra MK4: Flight
- MightyLock
- Multiplier
- Paradigm
- Paradigm Signature
- Petzl Grigri
- Petzl I'D
- Petzl RIG
- Pharaoh
- Pulley System
- Pulleys
- Purchase Guide
- Rigging Plate
- Rock Exotica PentaPlate
- Rock Exotica Pulleys
- Rodeoline
- Safety
- SBI Pulley System
- Secondaire
- Shackle Line-Locker
- shackles
- Slackline Kit
- Slackline Webbing
- SMC 3-Inch Double PMP
- SMC 3-Inch Single PMP
- SMC CRx
- SMC Large Rigging Plate
- Soft Shackle
- Spansets
- Spider Silk MK4
- Static Rope
- Tape
- tensioning
- Testing Procedures
- Threaded Highline Leash
- Van Beest 1/2" Anchor Shackle
- Van Beest 5/8" Bolt-Type Shackle
- Velcro Line-Sleeve
- Wafer 2.0
- Wafer XL
- Walking Techniques
- Webbing Sleeve
- webbing tests
- Wind Dampener Kit

← Older Post Newer Post →
0 comments