You have no items in your shopping cart.

Webbing slips in weblocks, it's a fact. In this article, we will discuss why this is happening and a simple way to prevent it, with detailed explanations for what to consider when preventing it.
Webbing slippage is a major issue with the current weblock design that has become a standard. In numerous studies performed by a number of individuals, it has been shown that no matter how webbing is installed or what model of weblock one uses, webbing slippage still occurs.
Infact, this is issue has become so pronounced, that of the few highline failure scenarios we have encountered in the field, webbing slippage has been the culprit in a sizeable percentage of them. If you are interested in reading about these failures, I recommend checking out the Accident and Incident Report from 2017 - https://data.slacklineinternational.org/slacked-data/accident-reports/sonya-iverson-accident-and-incident-reports-isa-safety-event-2017.pdf
On top of webbing slippage, another issue has surfaced with weblocks that is caused by the same mechanism: tail walking. This is when the tail of your slackline webbing gradually shifts to the side of the weblock, working it's way out from under the walking strand, eventually causing a complete failure of the device.
Video above courtesy of the International Slackline Association (ISA) - www.slacklineinternational.org
What's Causing Webbing Slippage?
Recently, the ISA has undergone a series of tests involving the strength and functionality of weblocks. During this testing, they discovered the mechanism behind webbing slippage and tail walking.
To read the full details of their findings, please checkout their publication here - https://data.slacklineinternational.org/slacked-data/highline/webbing_slippage_warning_in_weblocks_2018_v1_en.pdf/
Basically, when load decreases at a rapid rate on the slackline, the unstretching of the webbing within the weblock actually pulls the tail into the device, imparting a small amount of slippage with each rapid decrease in tension. These rapid decreases occur during dynamic events, such as catching, leash falling, surfing, bouncing, etc...
You can actually see this occurring in this short slow-motion video of a weblock during one of our drop tests:
Another important thing they discovered in this testing is that slippage does not stop. It will continue until the very of the webbing gets sucked into the weblock.
How Do We Solve It?
Ultimately, the weblock industry needs to change as the current designs are not able to actually lock the webbing, particularly when rigging with tensions under 4 kN, as most highlines are rigged these days. However, for now, our best solution is tying the tails off on your weblock.
Now, webbing tail tie-offs are not just simply tying your webbing coming out of the weblock off to something. There are other factors involved with webbing tail tie-offs that are important to consider when choosing a method for tying your webbing tail.
1.) It Must Sit Well When Loaded
As we discussed above, every current weblock design slips. So, if we tie our webbing tails off to something, we know that tie-off is going to be loaded. That means that we should not be using a tie-off that sits akwardly or causes complications with the utility of the device or any of our other rigging. The tie-off should sit well while under load.
2.) It Must Be Releasable
Again, as mentioned above, we know weblocks slip and so our webbing tail tie-off will be loaded. If we choose a method that isn't easy to undo after it's been loaded, this will cause major complications during derigging. If it's loaded enough, you may end up having to cut the line!
3.) It Mustn't Interfere With Your Other Rigging
The tail tie-off should be a stand-alone feature in your rig. It should be able to be done and undone without the need to alter anything else besides the tie-off. If it interferes with other parts of the rig, it's not a good method.
4.) It's Easily Inspected
Most of the time when we are slacklining, particularly highlining, we are not alone. It's important to have this very critical part of your rig be easily inspected so that the next person that gets on your line will know what's going on with your tie-off. On that same note, this is a highly critical part of any highline rig that should always be checked before getting on, Making sure your method is easily inspected makes this task less daunting and easier for everyone using the line.
5.) It Mustn't Compromise The Anchor When Loaded
There are many methods of tying the tail off that involve going to a singular point in the anchor. This is not a good practice because it has the potential to load that single point and unload the rest of the anchor. As we have seen above, the webbing slippage is a sure thing and so tying your tail to a singular point can and will compromise your multi-point anchor. A better solution is to go to the master point or the connector for your weblock, or to the weblock itself.
6.) It Must Be Able To Be Tied Tightly
Any sort of slack that is left between your webbing tail exiting the weblock and the tie-off will ultimately slip through the weblock during your session, increasing the chances of weblock failure. In order to prevent this from occurring, there should be as little slack left between these two points as possible.
Enough Webbing In Tie-Off For Changing Tension of Line
This is an optional feature, but one that greatly improves upon the handling of your line, particularly if you will be changing the tension at all during your session. Put enough material in your tie-off such that when it's undone, you have enough to tension or detension your line with. This is especially useful if you are using a simple 3:1 Buckingham system with a linegrip and webbing roller. I typically go with 2m of material in the tie-off.
A Tail Tie-Off Method For The Alpine WebLock 4.0
Here we will show you step-by-step instructions for tying the tail off on your Alpine WebLock 4.0. For a more generalized recommendation for tying off tails, checkout the publication the ISA put out on the topic - https://data.slacklineinternational.org/slacked-data/highline/slackline_webbing_tie-off_recommendation_2018_v1_en.pdf/
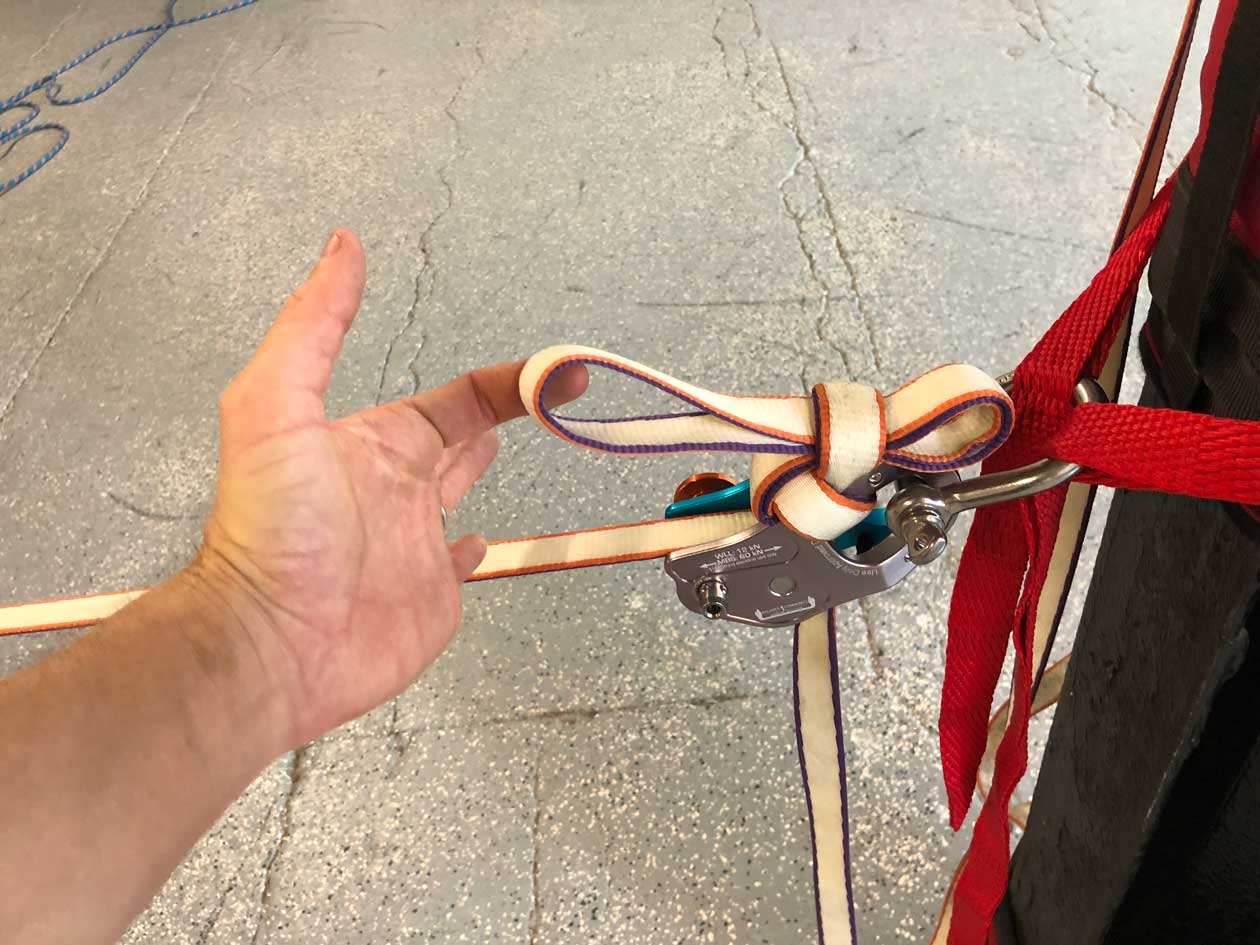
Step 1
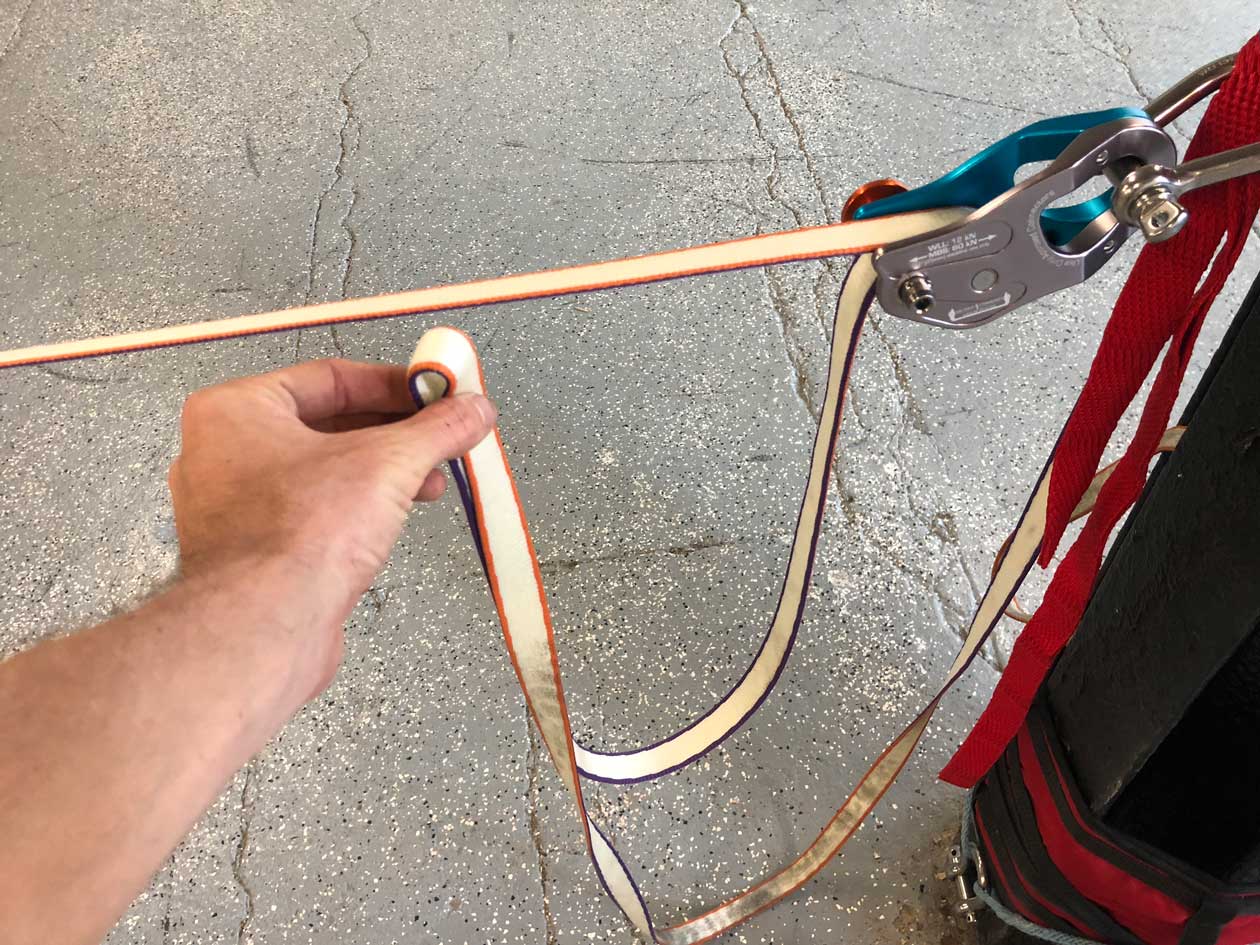
Form a bite in your weblock tail about 1 meter from the exit.
Step 2
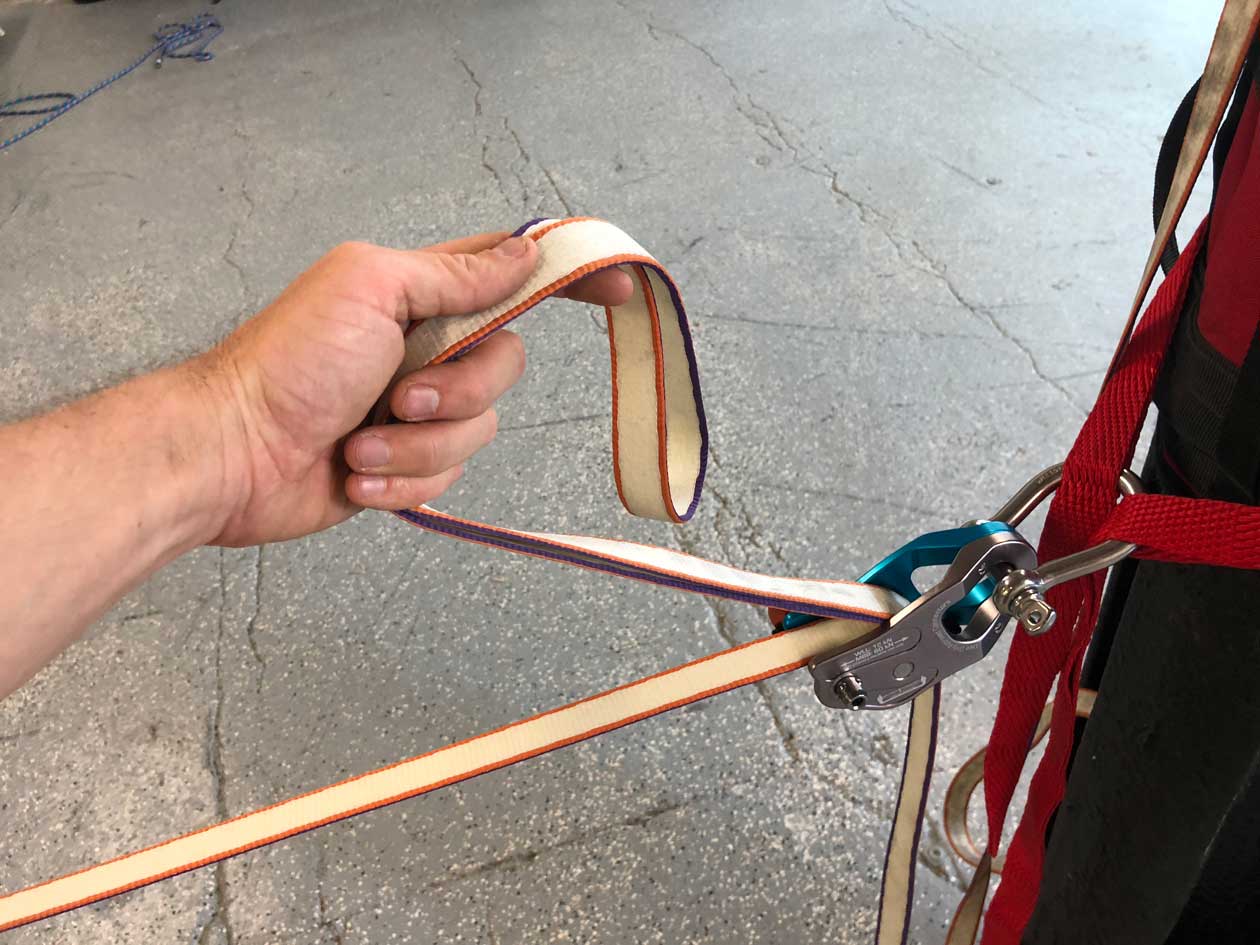
Pass the bite up behind the center diverter, ensuring all the slack is taken out and that there are no twists.
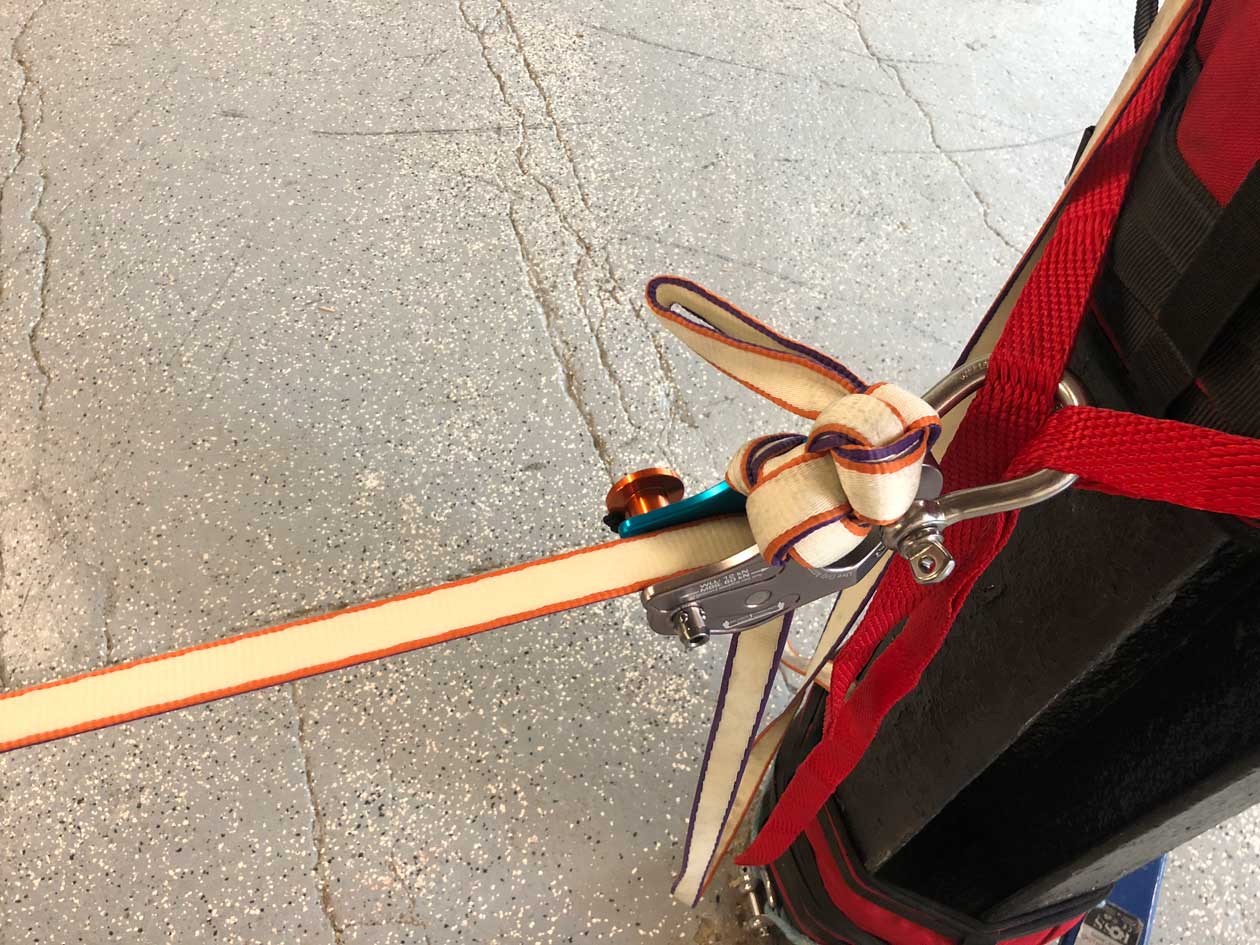
Step 3
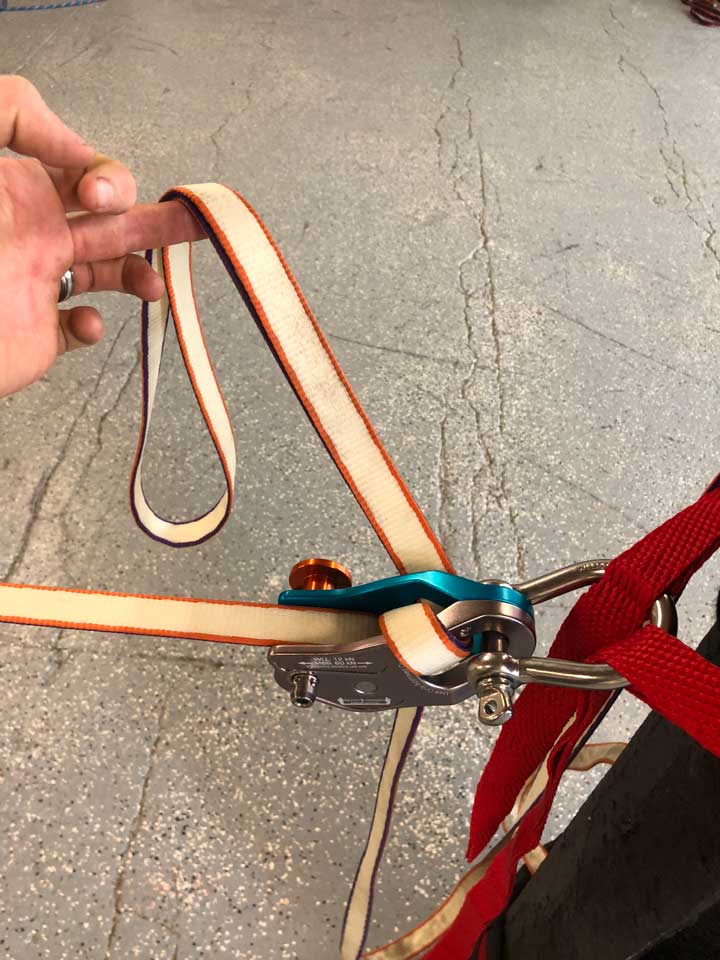
Pass the bite up over the side of the weblock, with the tail side of the bite in contact with the weblock. Continue by passing this bite through the anchor hole.
Step 4
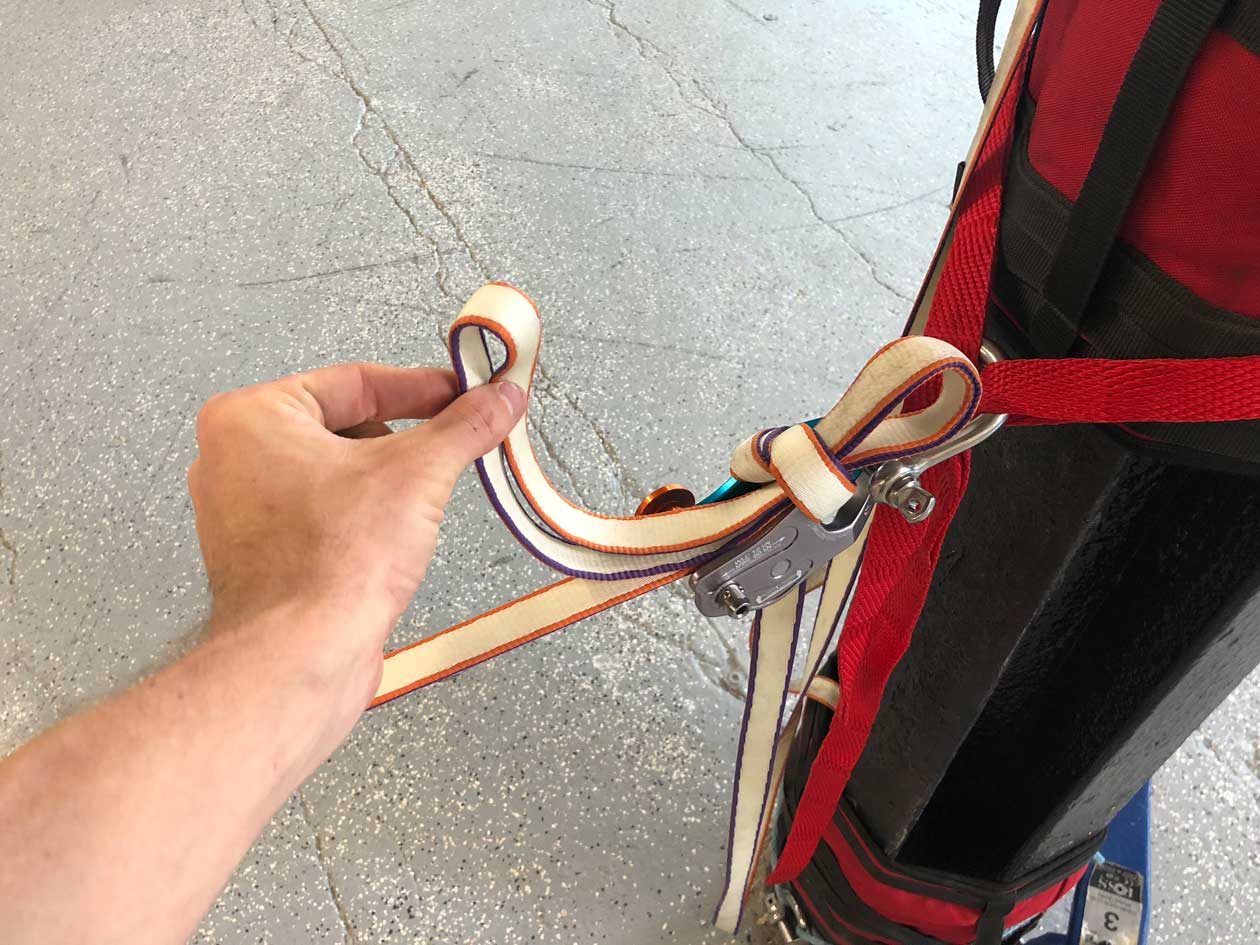
Pass the bite all the way through the anchor hole and up around the other side of the weblock, passing over the previous strand. Form another bite with 4 strands and pass this under the previous pass, forming a slip-knot.
Step 5
Form another 4 strand bite and pass it through the bite you just created, making sure to cinch down the previous bite, locking this one in place. Continue doing so until about 15 - 20 cm (6 - 8 inches) remain.
Step 6
Pass the end of your bite through the last bite and cinch it down.
Step 7
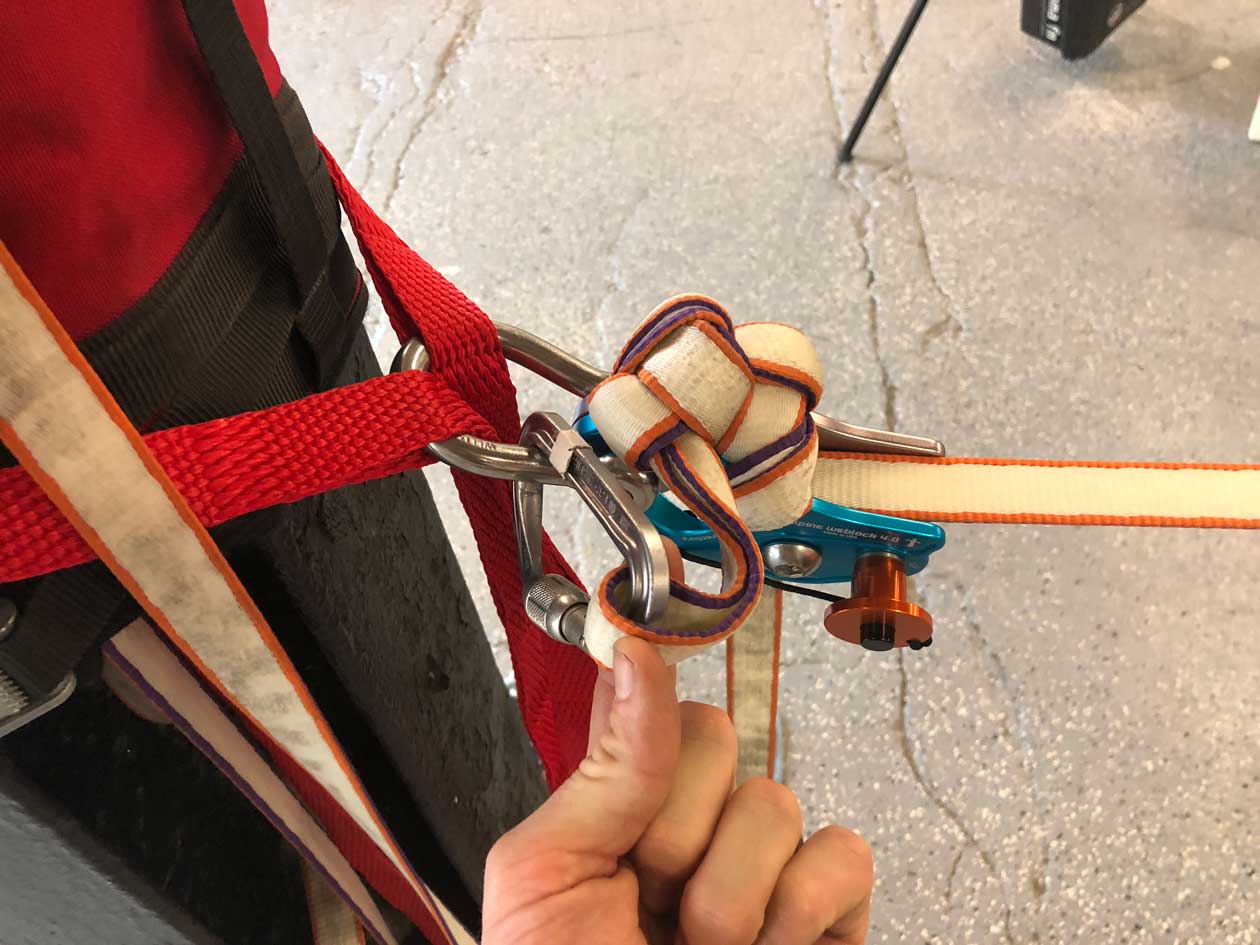
Clip this bite to your anchor connector or master-point.
There we have it, a weblock tail tie-off that sits nicely under tension, is easily untied, doesn't interfere with any of the other rigging, inspectable, non-rig-compromising, and is tightly tied with enough slack for retensioning. This method works with any configuration you choose to rig the Alpine WebLock 4.0 in and is quite simple to learn.
If you would like to see a video of this method plus a verbalized version of the criterion above, please checkout the video below. Any questions and comments are welcomed.
Other Resources
Here are a few of the publications on webbing slippage that you can read for more information:
Webbing Slipping in low-tension highlines (P. Gesing et al. 2015) - https://data.slacklineinternational.org/safety/warnings/slippage/webbing_slippage_2015_v3_en.pdf/
Tie-offs in slacklining (O. Ross 2017) - https://data.slacklineinternational.org/slacked-data/safety-event-slides/olivier-ross-tie-off-arbeitsversion-isa-safety-event-2017.pdf/

← Older Post Newer Post →
0 comments