You have no items in your shopping cart.

An article all about equalizing bolts. This mostly deals with the sliding-x anchor that is most commonly used for highline setups with bolts. This technique works for any number of bolts beyond two.
I've been getting a lot of questions regarding equalizing multiple bolts with Spansets, so I thought I would write an article about it that will hopefully provide enough information to get you started making your own highline anchors.
Note: The method of equalizing multiple bolts shown in this guide does not follow the SARENE-SA acronym for building rock climbing anchors. There are a number of ways to mitigate this, but we will not go into them here. This is to be used solely as a guide for building sliding-x anchors with multiple bolts using spansets. Please make sure that you backup your anchors to ensure maximum redundancy.
Before I get into the juicy stuff I would like to define a few things:
- Sliding-X: The sliding-x method for equalizing anchor points configures the sling in such a way that if one anchor point were to blow, the entire anchor would not completely fail. This method offers extremely good equalization, but fails in reducing extension in the event of an anchor failure.
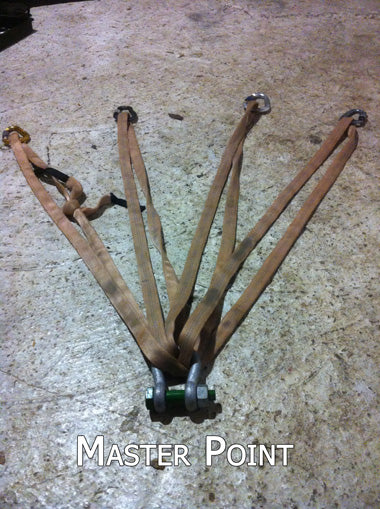
- Master-Point: The Master-Point of an anchor is the point in the anchor where all the ends meet and you attach your load. In most cases with highline anchors, this will be the spot where you have yourmain shackle.
Now that we have some definitions to play with we can start building our anchor.
The first step in building a sliding-x anchor with your spanset is to analyze your bolt placements (or whatever anchor points you are trying to equalize), and decide which two are on the outside. To do this, you will have to imagine where in space your master point will lie once the equalized anchor is finished and then from that location, determine which two anchor spots have the largest angle.
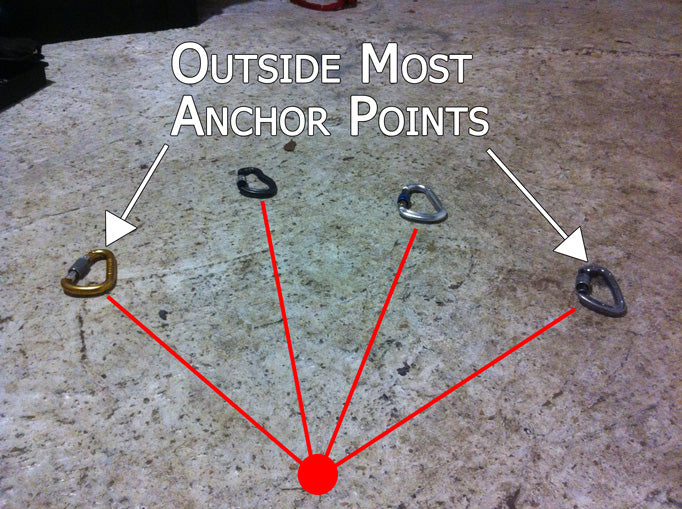
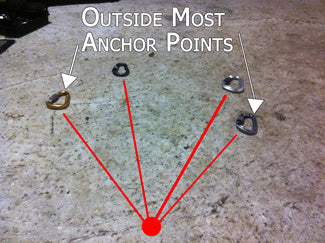
For instance, in the above picture it's quite easy to spot that the leftmost bolt and rightmost bolt are on the outside of the anchor. But in the picture below on the left, the right side is a little unclear which bolt is the most outside. If you look at the right picture below, you can see that with the master-point visualized, it's easy to see which anchor is the most outside.
The reason we need to do this is that it will affect how we build our anchor in later steps.
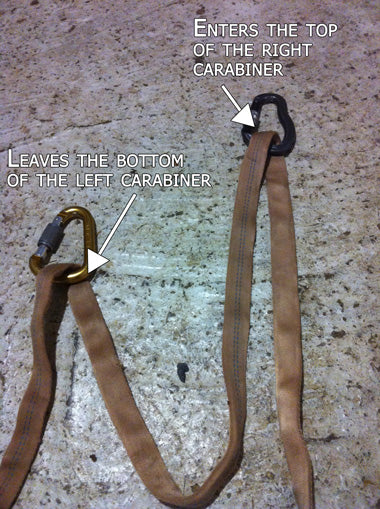
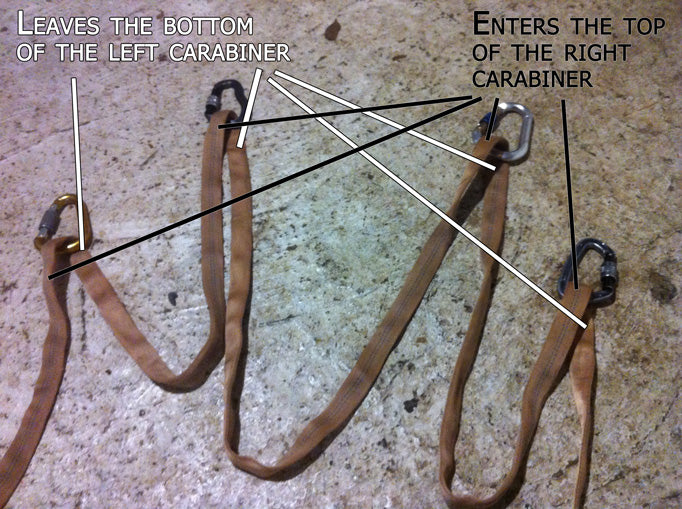
Now that we have our two outside anchor points picked out, let's start threading our spanset through. I usually like to start with the left-most anchor point (looking at the anchor from the master point). Pay close attention to the strands coming from each point. As you can see in the picture below, the strand that is coming from the bottom of the left carabiner enters the top of the next carabiner. This holds true for the next carabiner as well: the strand coming from the bottom of the previous carabiner enters the top of the next carabiner. All the anchor points should follow the same pattern. This will ensure that the final equalized anchor will have no twists and will sit perfectly horizontal no matter how many bolts are being equalized.
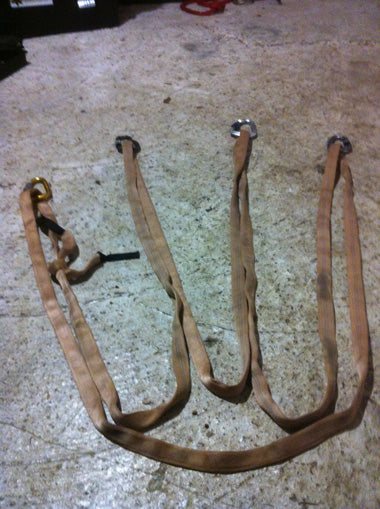
Now that all the anchor points are threaded with the spanset, you need to pull all the loops together so that they look like the picture below.
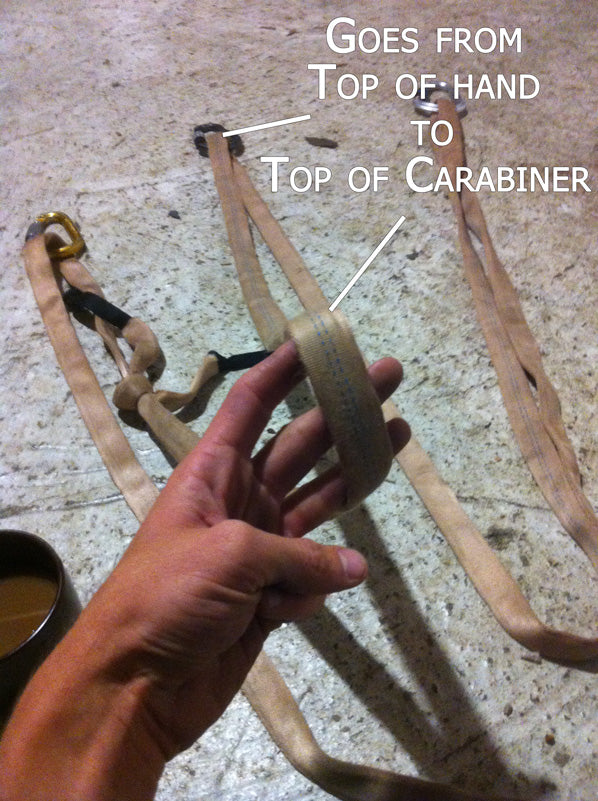
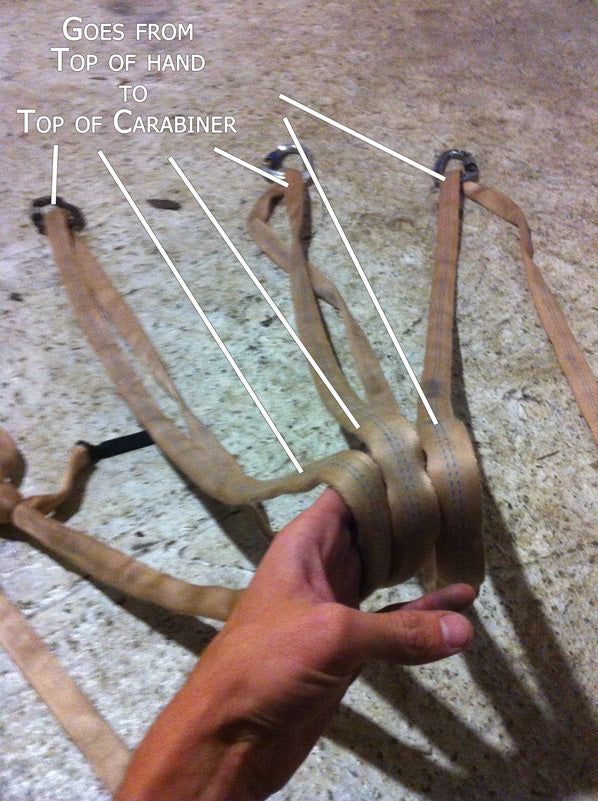
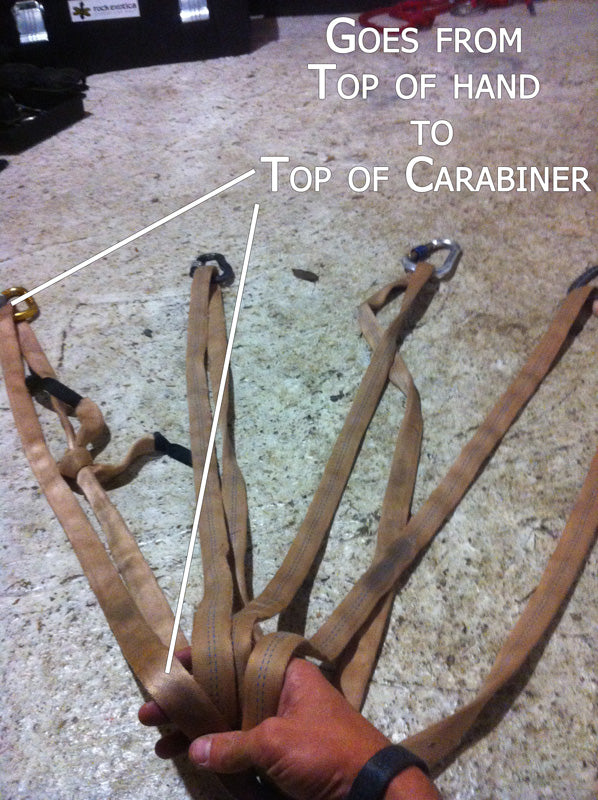
This next part is a bit hard to explain in writing so bear with me. Okay, starting with the left loop that connects the leftmost anchor-point to the anchor point just to the right of it, rotate said loop such that the strand coming from the leftmost anchor-point enters your hand from the same side that it left the anchor point on. For example, in the photo below the strand leaving the left-most carabiner is coming from the bottom, so it enters my hand from the bottom. Notice also that the strand leaving my hand on the top enters the next carabiner from the top. Now do this with the second loop, making sure that you don't over-twist the loops and create a twist in one of the legs of the anchor. Do this with all the inner loops.
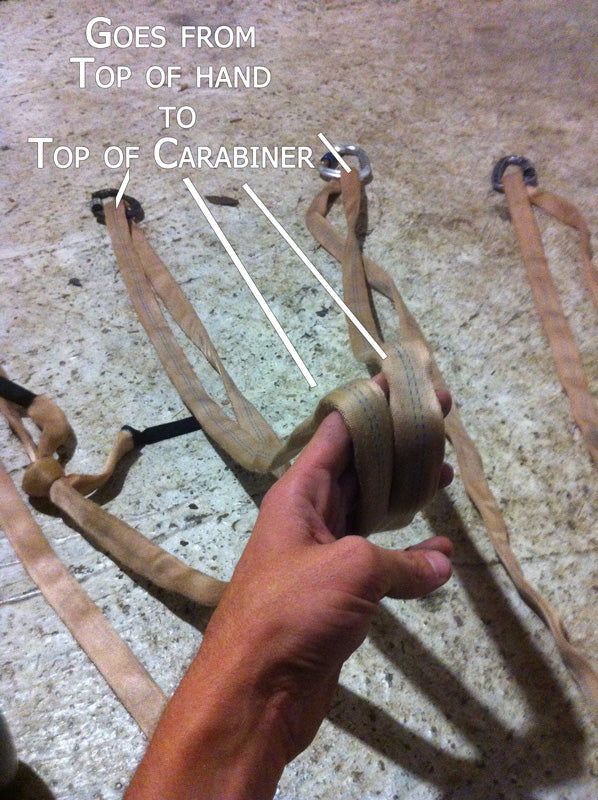
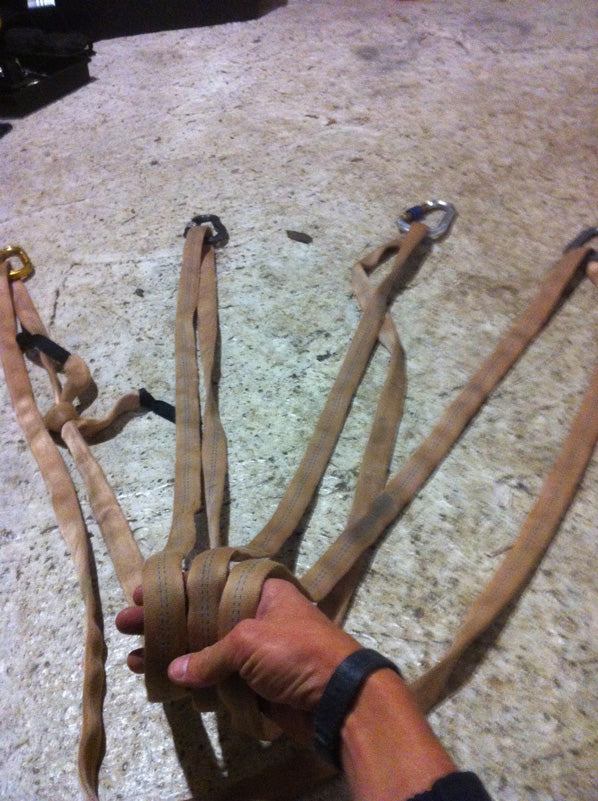
Now that all the inner loops are sitting in your hand such that there are no twists in the legs of the anchor, you can do the same technique as above on the final loop that connects the outside anchor-points that we found in the first step. You should notice that you have to rotate this loop in the opposite direction as the inner loops, which is what makes this method work.
If all goes well, your sling should sit in your hand like it is below. Now you can put your shackle where you hand is and pull in the direction that your line will be rigged in to get the best equalization.
This can be a bit frustrating to get at first, but it will come with practice. If you have any questions or comments, please don't hesitate to ask in the comments section below, I will try and get back to you with as much detail as possible. Hopefully this helps some people out.
Good Luck and Slack On!

← Older Post Newer Post →
2 comments
What connectors would you recommend
Don’t you need to add a twist in one-three of the lines? Without a twist there is no X, this looks equalized but it is a sliding U. Am I mistaken?