You have no items in your shopping cart.

An article discussing the importance of posture during slacklining (written by Ivan Belostenko)
Introduction
The following article will briefly cover the topic of posture and proper body position when slacklining in different disciplines ranging from dynamic tricklining to more static things like simply walking on a line with various lengths and tensions. These principles are of utmost importance when it comes to tricklining since the body is subjected to very high forces compared to simply walking on the line. The purpose of this article is to hopefully raise the awareness of the importance of posture and how it affects our health and the chances of getting injured both on and off the line. It is just an initial piece and as we increase our understanding of the topic further in-depth articles should follow focusing on specific aspects.
Basic Anatomy
Basic anatomy – In this article we will focus on skeletal structures, spinal (central) and peripheral (remote) nerves, joints and muscles and how these can be affected by slacklining. To put it simply, (anatomy 101) the bones are the solid branches on which muscles, ligaments, joints connective tissues and nerves rest/sit. Nerves control/affect the function of organs, muscles, glands or in general the tissue they connect to. Thus any distortion or dysfunction of the nerves can have a very strong and sometimes even instant negative effect on the function of the organ or other connected tissue. This can compromise circulation of fluids and electrical signals (communication with the central nervous system), or distort the function of the organ itself depending on the amount of damage/obstruction caused to the relevant nerve. So, these things have very powerful effects on our body and well-being.
Discussion
We are primarily concerned with the way some of the line tension involved in certain disciplines of slacklining can multiply the damage caused by bad posture. Without going into all the different deformities of the spinal column and skeletal system, we shall focus on the three most common forms of posture (or spinal alignment). As with many things in life there is indeed a right posture and a wrong posture. Most people would agree on what a bad (wrong) posture looks like, but very few people would be able to describe and even less explain the elements of a good posture.
The most common basic types of posture are:

Figure A
Everyone would agree that this is a bad posture, with hunched shoulders, rolled back and tucked pelvis, parked hips and bad neck alignment.
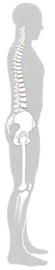
Figure B
Ideal posture with lengthened flat spine from the lowest L5 vertebra to the top of the neck, with anteverted (tipped) pelvis, soft (not locked knees, the chest is flushed with the abdomen.

Figure C
Swayed lower back held in place by tensed muscles, straight locked knees and parked hips with the chest sticking out and rounded upper thoracic spine.
Figure E
Figure F
Figure G
My husband had hunched posture as a teenager and into his twenties. He developed an interest in my work and attended classes occasionally over the years, resulting in some profound changes in his appearance and muscle health. On the left he is 28 years old; on the right he is 48. – Esther Gokhale
"When we evolved from being quadrupedal to bipedal, the L5-S1 disc became wedge-shaped.Anteverting the pelvis preserves the wedge-shaped space that accommodates this disc perfectly (fig. F-25a). Any other pelvic position compromises the L5-S1 disc. Retroversion puts pressure on the anterior part of the disc, forcing the contents toward the posterior and wearing its fibrous exterior (fig.F-25b). Disc damage ranges from bulging to herniation to sequestration."
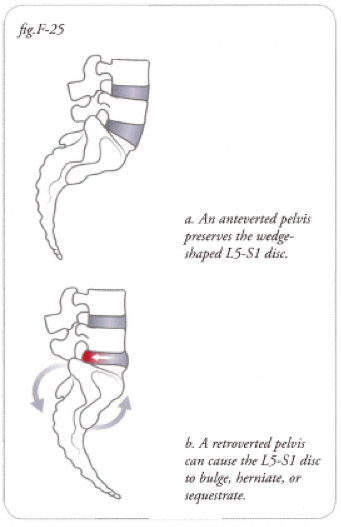
"Note that a lumbo-sacral angle is different from a sway back. The lumbo-sacral angle is a natural curve very low in the spine (between L5 and S1); a sway is an unhealthy curve higher up in the lumbar spine."
Esther Gokhale – 8 steps to pain-free back
The problem with the hunched posture (fig. a) is that it causes compression of the discs at the anterior (front) portion of the spine leading to protrusion of the discs at the posterior (back) side of the spine, which may result in pinched nerves and many other degenerative conditions, such as compromised function of major organs, decreased circulation of body fluids, and adverse effects on the limbs, leading to further damage.
The over upright tense posture (fig b.) puts a lot of pressure and tension on the muscles to hold the whole structure in place. This can be maintained for some time, but will eventually cause pain and discomfort. This will then cause a person to hunch for some time while they forget about the posture or feel tired, until they remember and become “uptight” and tense again. In addition, both over upright and hunched postures cause incorrect stacking of the bones in the legs usually resulting in (forward) parked hips and locked knees which we will not go in details in this article.
Now how is this relevant to slacklining? Due to the significant amount of tension and force involved in slacklining, with some tensions reaching anything from 2,000 lbf to 4, 5,000 lbf and beyond (which is the case with very tight tricklines and longlines, as well as leash falls), an incorrect posture, compromising the safety of the disks as described above, coupled with a very large force produced by the tension of the line upon our contact with it, can multiply the damage caused to the spinal structure, leading to very serious injury, pain and eventually entire days of inactivity or total paralysis caused by pain. The effects sometimes have very slow onset and can take days or even months to manifest (due to small but repetitive strain).
Solutions - Stay safe and protect your spine
We have covered the problems and their effects; now let’s briefly cover the solutions and how you can protect those structures of the spinal column:
- Anteverted pelvis and lengthened spine - as already mentioned above anteverted (tipped forward, not tucked underneath you) pelvis and lengthen spine from the lowest L5 vertebra all the way to the top of the cervical spine in the base of the head, allows proper stocking of the body weight on the weight bearing bones and helps to prevent slipped disks. Anteverted pelvis should be adhered to throughout your activity on the line (as well as off the line). Please see the images below examples and highlight of the key muscles and areas involved.
- Engage your core muscles to lengthen and protect the spine – This information is not new in competitive sport. Many trainers have long advocated the use of core muscles for back protection. A good example of this knowledge is the use of heavy lifting belts and the practice of keeping a long spine when doing the lifts. Most of us engage the front and back core muscles (what Esther calls the inner corset) naturally when we anticipate a hard fall or a large impact. See images for key muscles of the inner corset below.
Caution: The solutions outlined in this article are nothing but a brief introduction to the techniques fully covered in Esther Gokhale’s book and shouldn’t be considered a medical advice. Furthermore it is highly unlikely to properly learn the full technique after years of incorrect posture just by reading this article alone. The purpose of this publication is to draw the attention of the reader to the importance of these issues in order to prevent further injury and to raise the awareness of possible solutions.
Although the techniques covered in this article are generally considered safe, anteversion of the pelvis done by an individual with a herniated disc can be dangerous (especially when tried on the line) and can cause the disk to get pinched by the vertebrae.
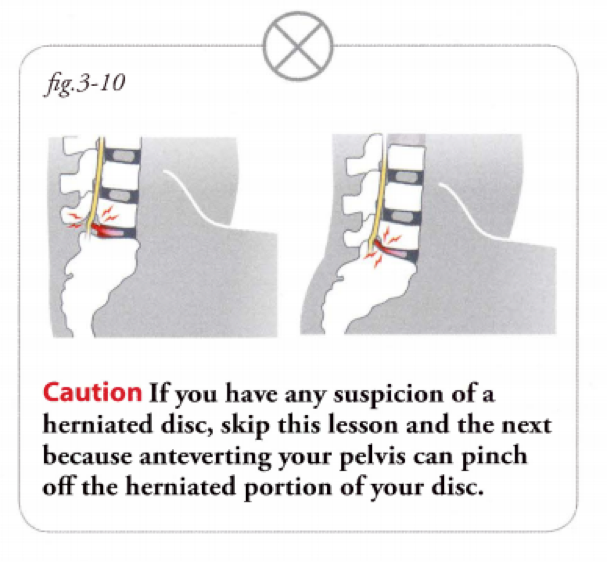
Figure H
If you suspect you have a herniated or slipped disk, do not antevert your pelvis! Doing so prematurely before the disk had the chance to heal properly, though more safer and supportive techniques such as stretchsitting, stretchlying and inner corset can cause pinching of the herniated portion. Please consult a medical professional before attempting the procedure outlined in point 1 (below). Engaging the inner corset (point 2), is a much safer technique. Both point 1 and 2 should be learned and practiced on and off the line. Proceed slowly; doing these exercises aggressively may lead to further damage.
Additional Descriptions, Examples, and Illustrations
- Anteverting the pelvis and lengthening the spine - this technique will help to decompress the disks and allow correct stacking of the weight over weight bearing bones of the body
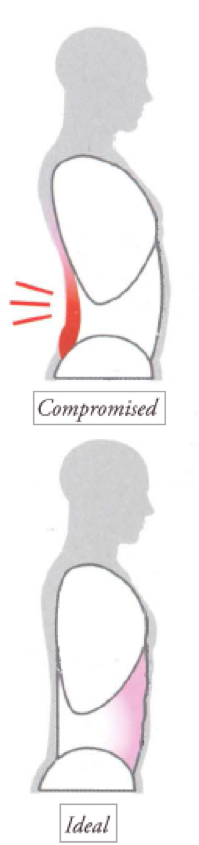
Figure I
Figure J
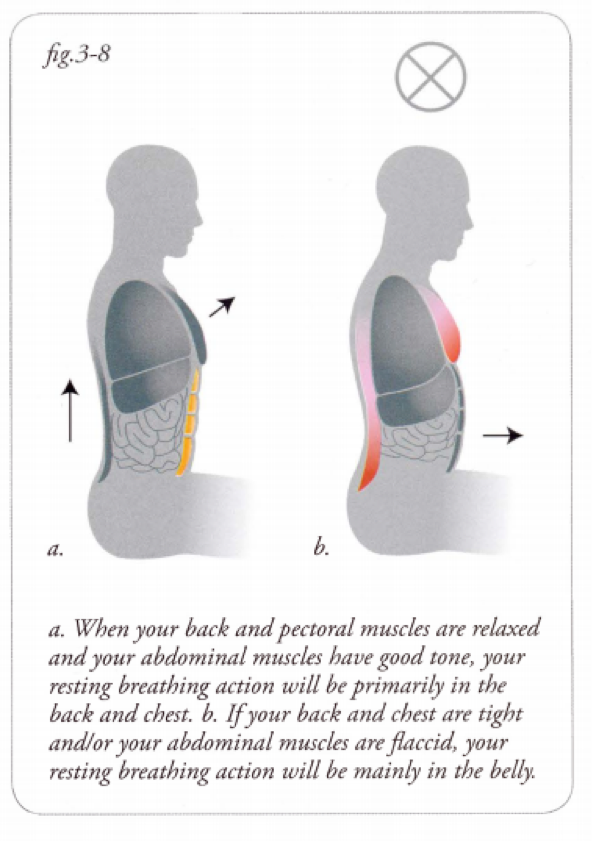
Figure K
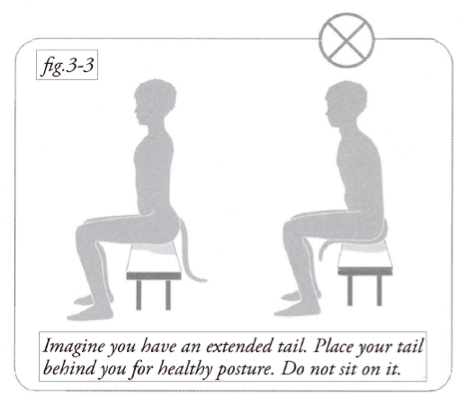
Figure L
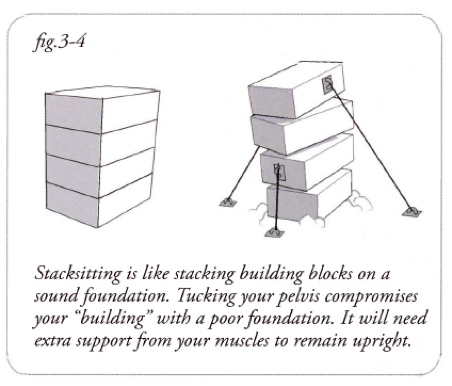
Figure M
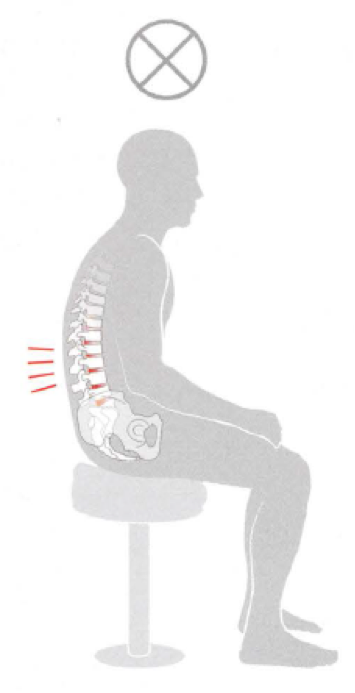
Figure N
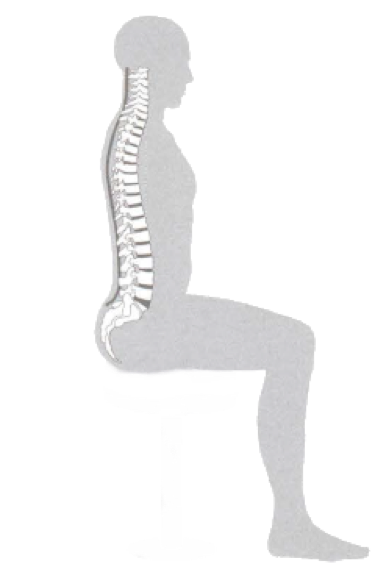
Figure O
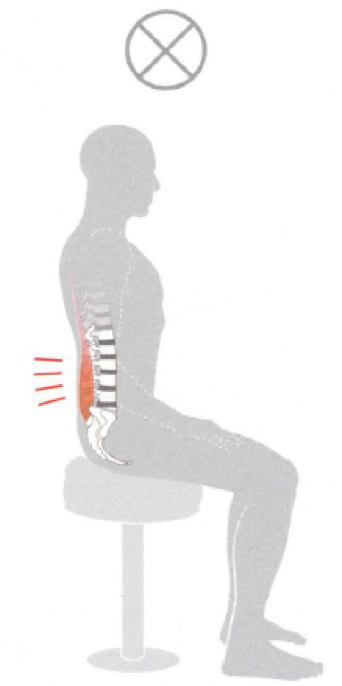
Figure P
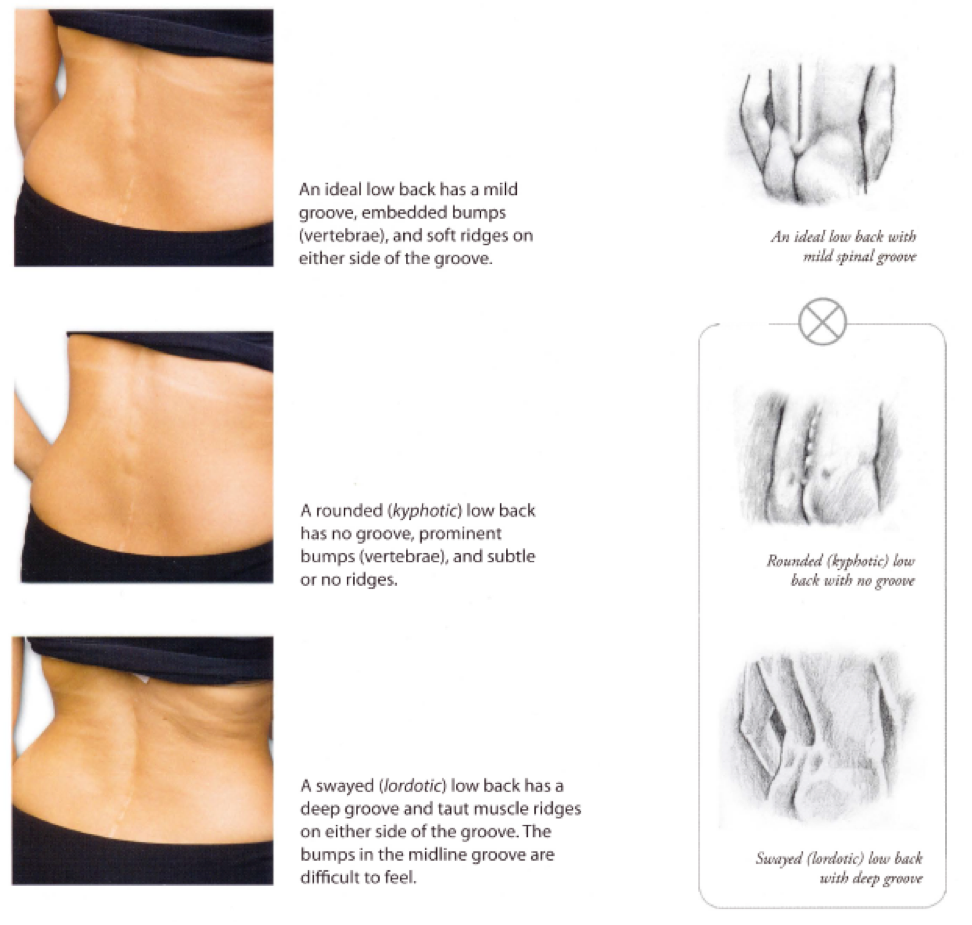
Figure Q - Esther Gokhole describes ideal curvature of the spine
Compare the images above with some of the athletes below to see if you can spot the affected areas and risks involved.
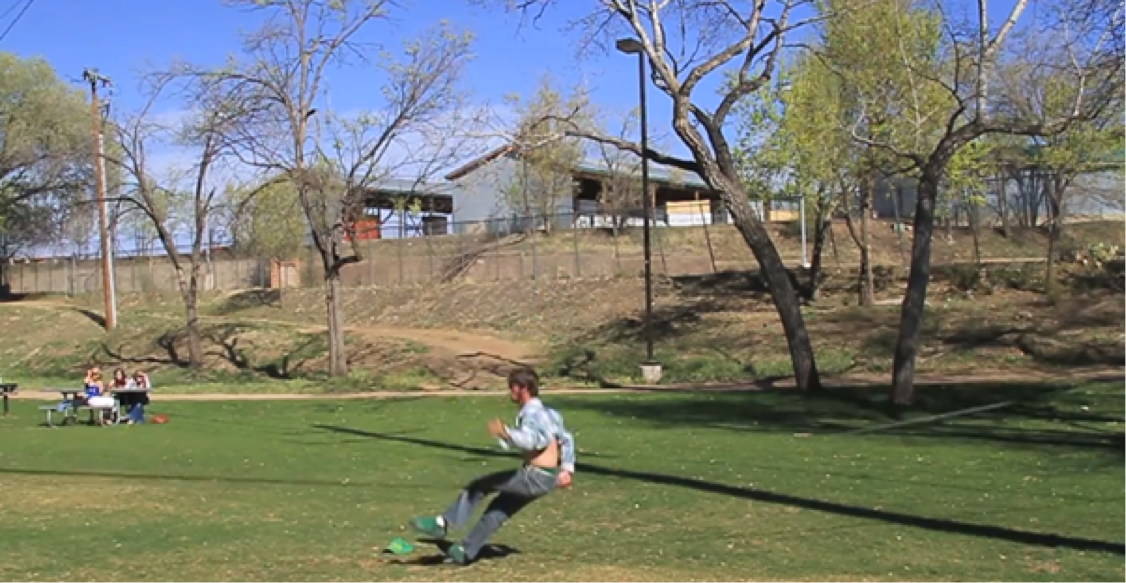
Figure R - Brenden Gebhart performing a butt bounce with tucked pelvis
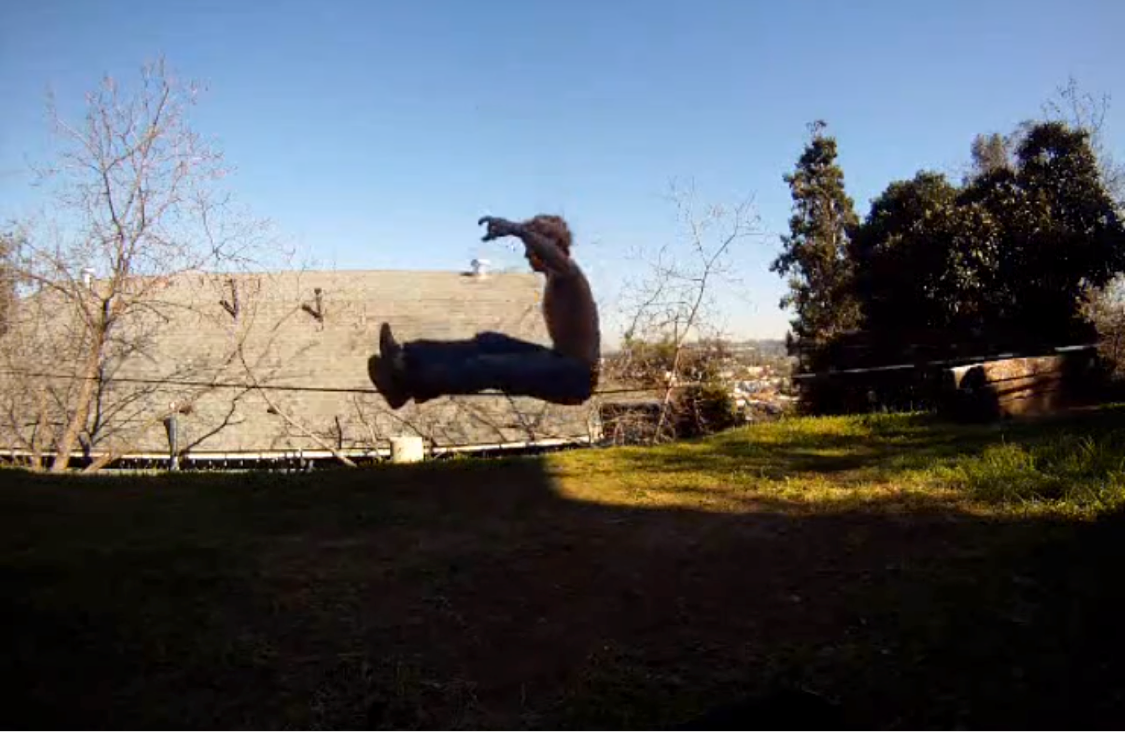
Figure S - Jan Galek butt bounces with tucked pelvis
Figure T - Jan Galek butt bounces with tucked pelvis
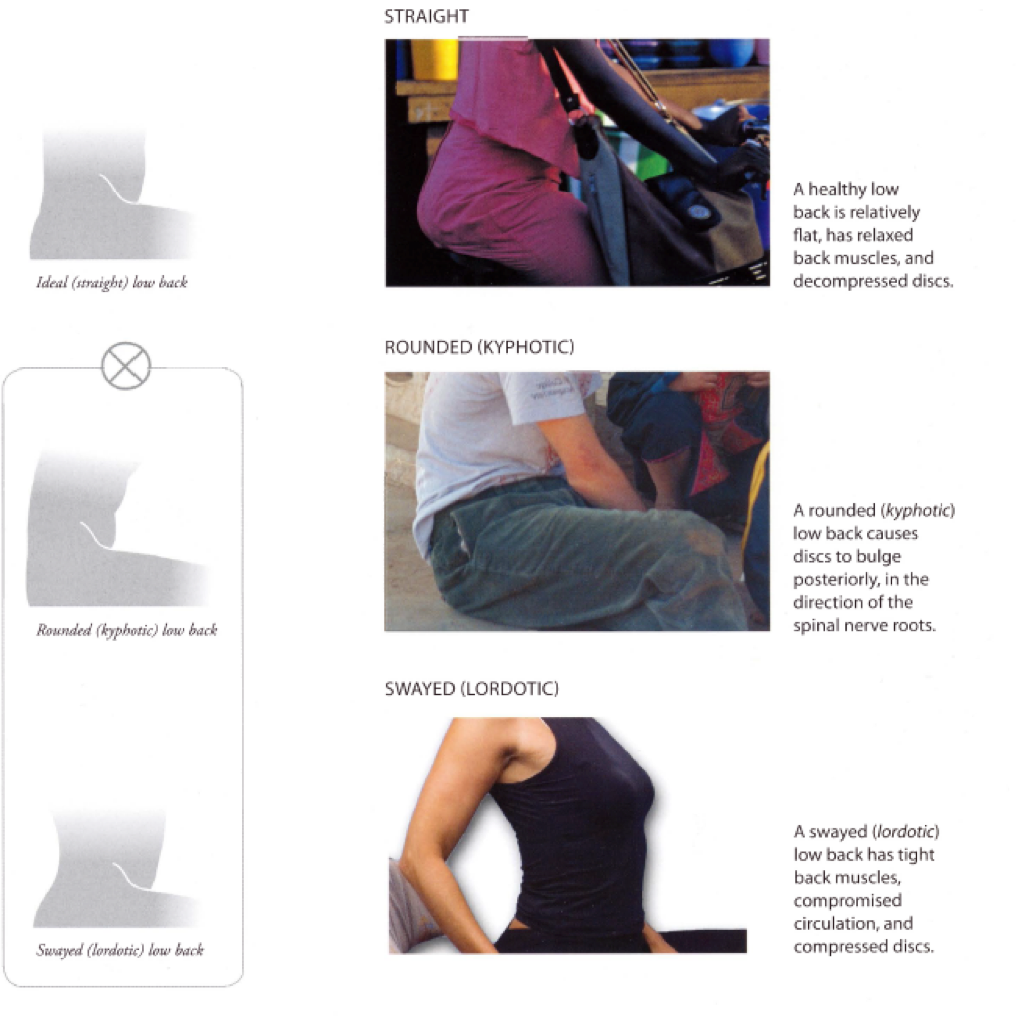
Figure U
- Engaging you inner corset allows you to protect the delicate structures of the spine. We do this unconsciously sometimes, when we are anticipating an impact or a physically demanding and potentially dangerous activity. Can slacklining be one of those activities? If it is, the benefits of it are immense and are yet to be fully appreciated/understood.
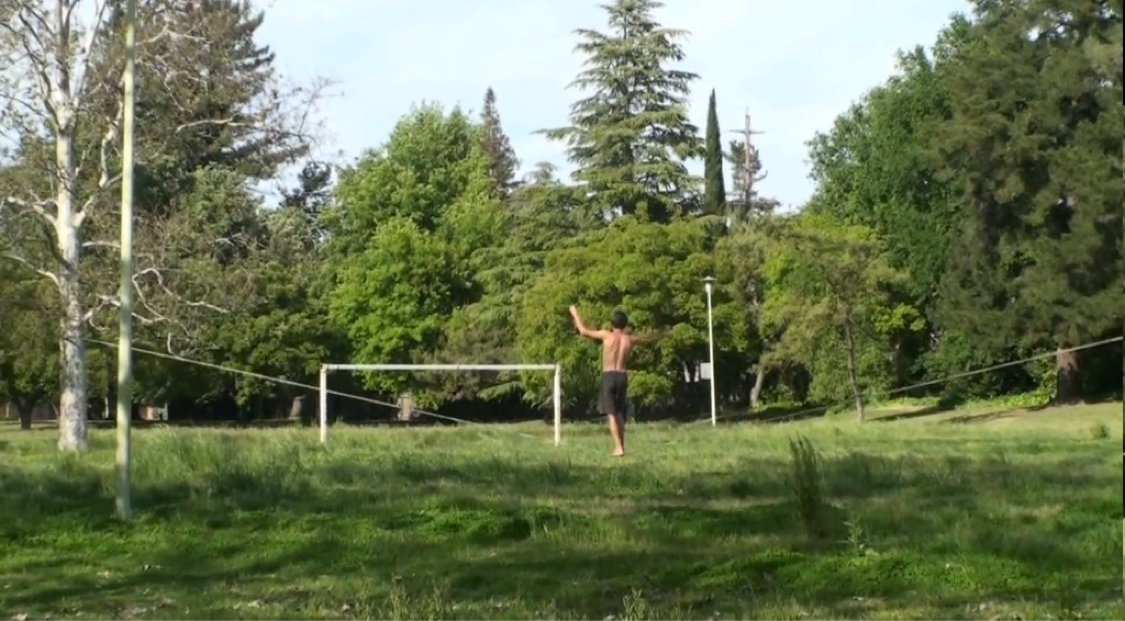
Figure V - Jerry Miszewski walking a longline (note the even groove all throughout the spine)
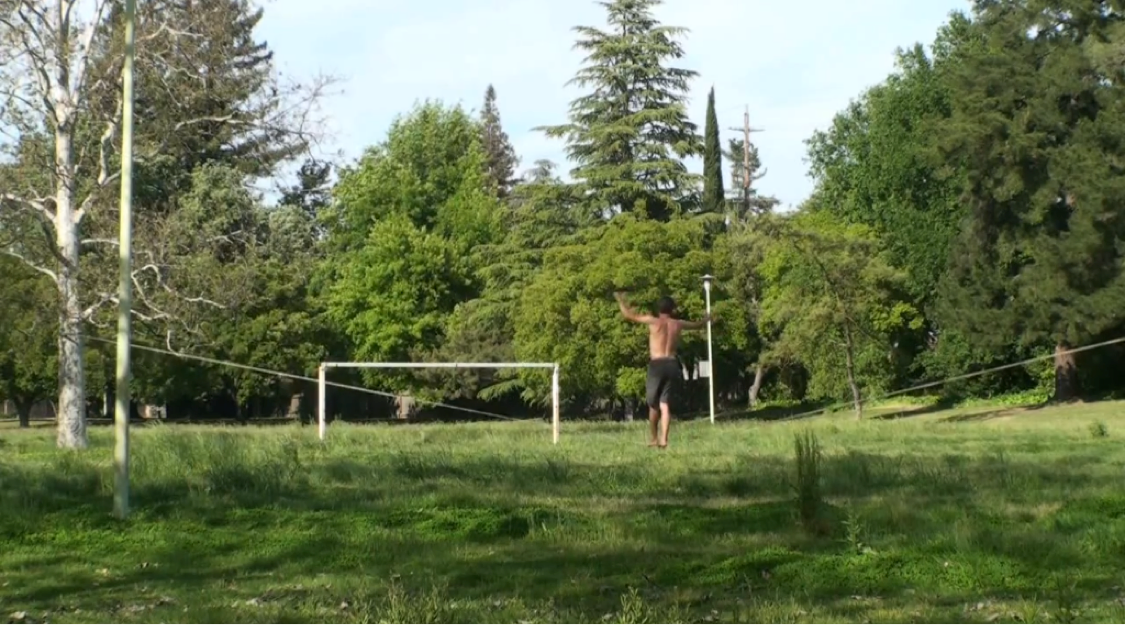
Figure W - Jerry Miszewski walking a longline (note the even groove all throughout the spine)
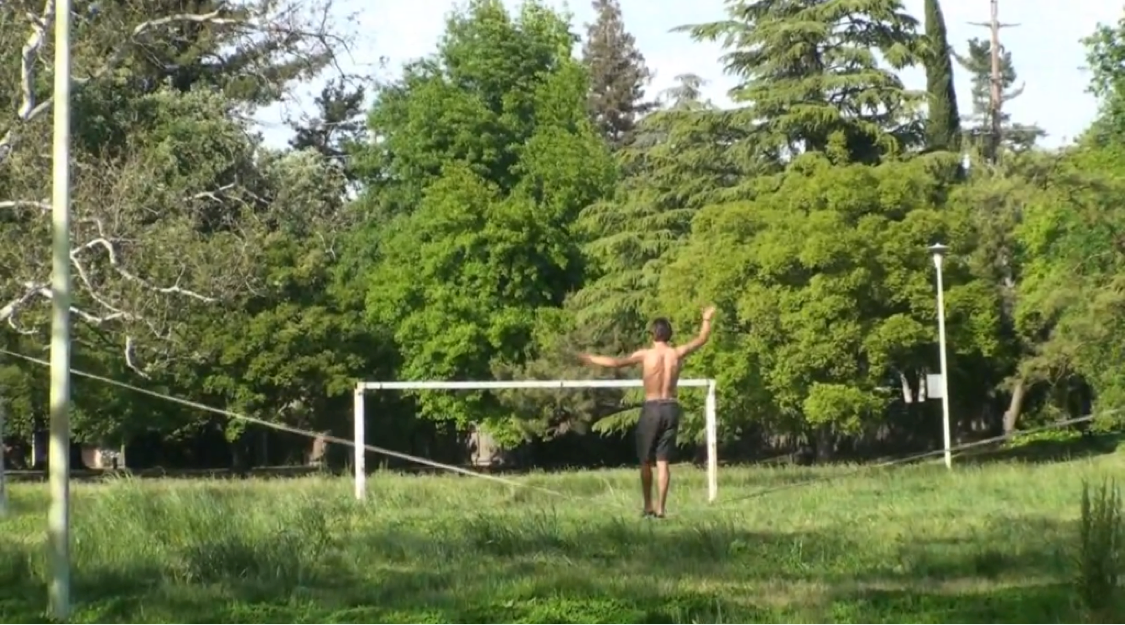
Figure X - Jerry Miszewski walking a longline (note the even groove all throughout the spine)
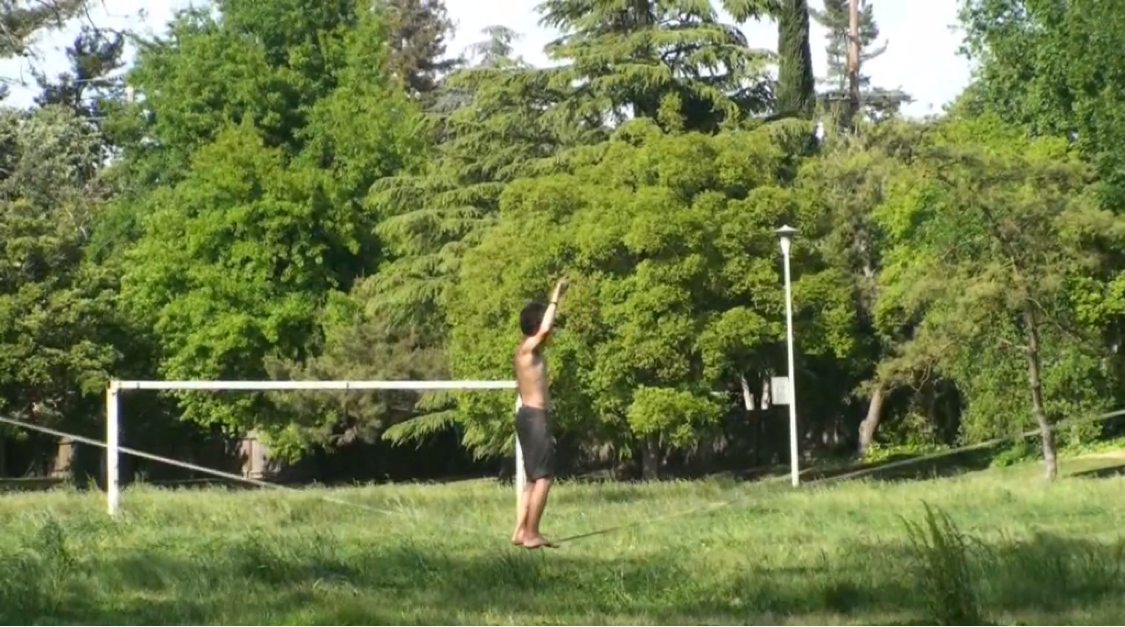
Figure Y - Jerry Miszewski (note the straight back and low arch at the L5 sacral area) it may appear that the upper thoracic area is rounded, but it’s the muscles that are bulging out and the actual spine is fairly lengthened and straight.
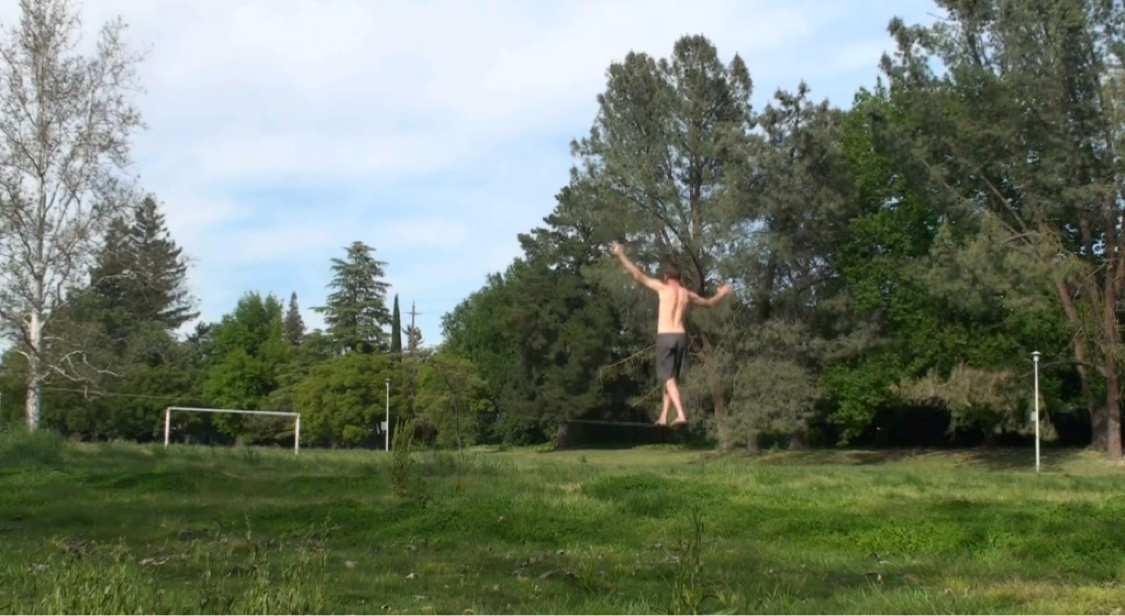
Figure Z - Chris Rigby walking a longline (even spinal grove with a tipped anteverted pelvis)
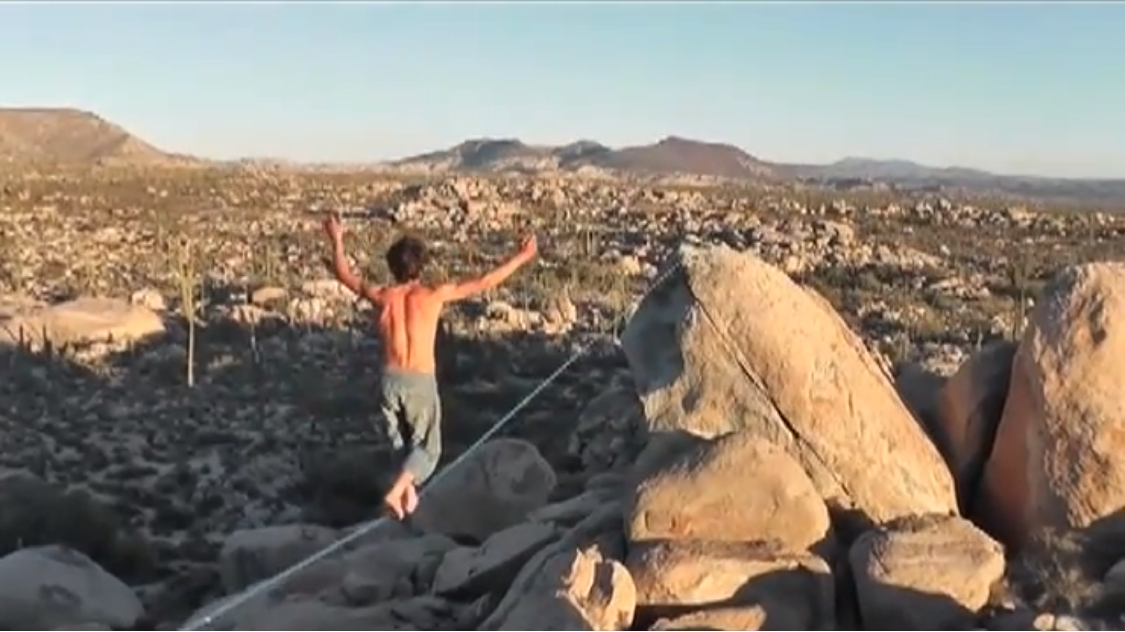
Figure AA - Jan Galek on a highline - note the groove (straight spine) exaggerated by the engaged paraspinal muscles. Janek must have been anticipating an impact that day, since he is doing a highline solo, though I doubt engaging the inner corset would provide adequate protection in this scenario.
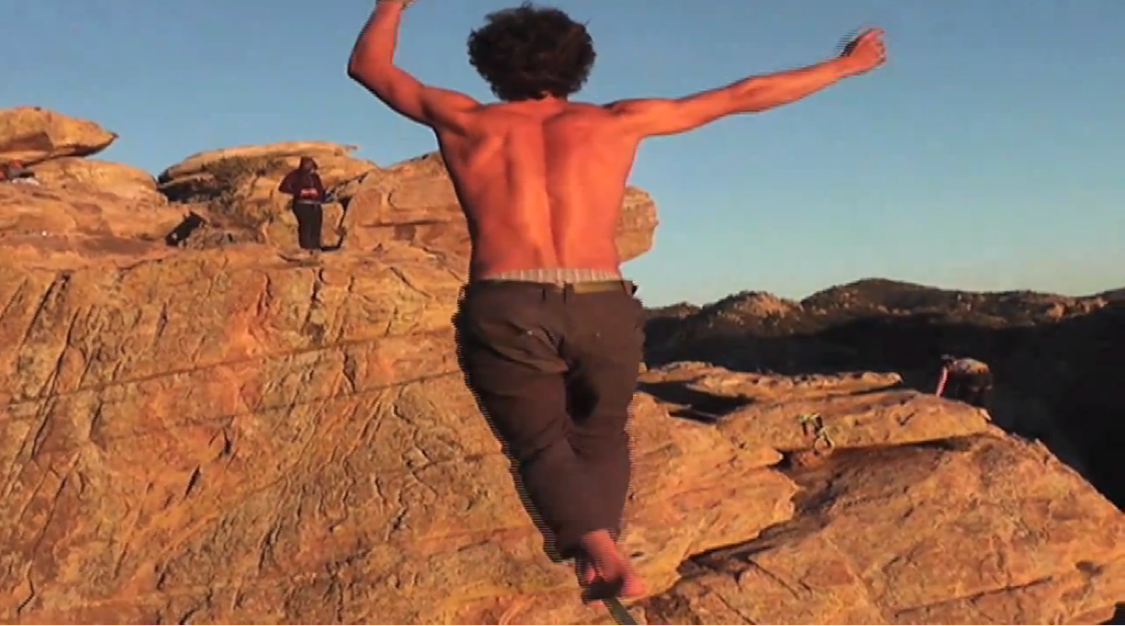
Figure AB - Jan Galek on a highline - note the groove (straight spine) exaggerated by the engaged paraspinal muscles. Janek must have been anticipating an impact that day, since he is doing a highline solo, though I doubt engaging the inner corset would provide adequate protection in this scenario.
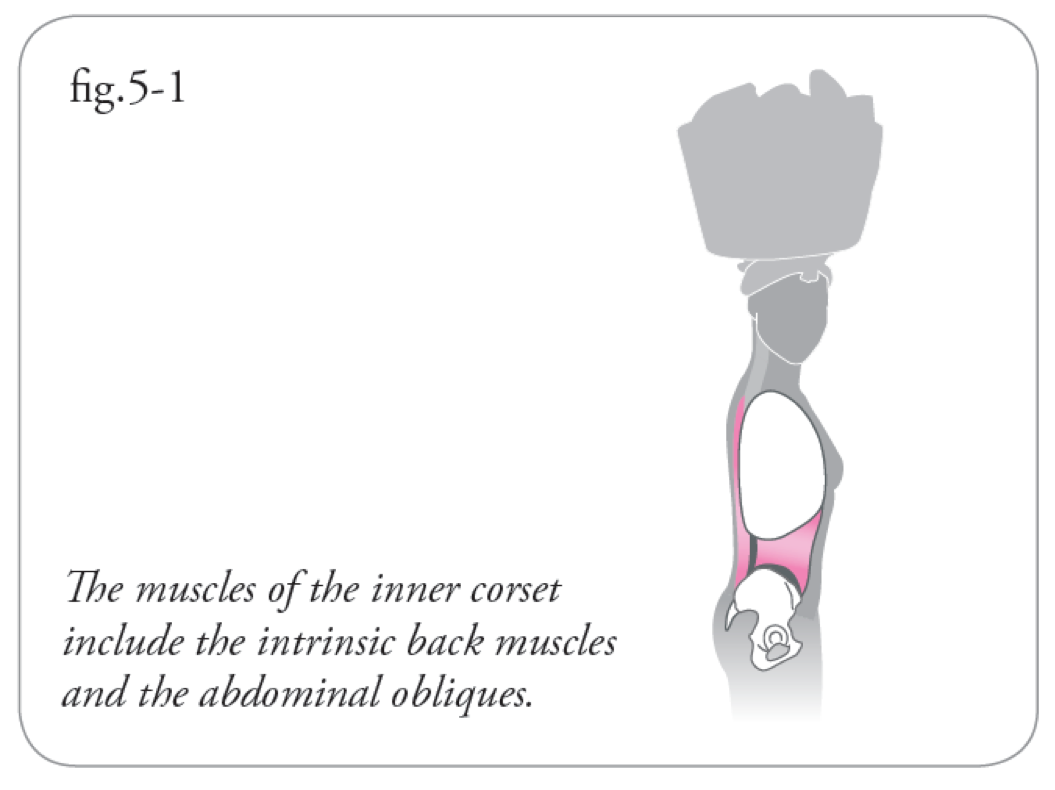
Figure AC
The above longline/highline pictures are quite close to (and maybe are) ideal or might be a bit on the swayed side. A deeper analysis will be required to determine this. This will take place in the following articles on this subject.
To summarize, the sport of slackline is still very young and a lot of what we know already is a result of trial and error. As a continuous effort to insure ultimate safety and minimize risk, it would be conducive to study this topic in exhaustive details to prevent or at least minimize as much as possible the chance for potential injury. We are hoping to collaborate soon with medical professionals on this topic in our future articles and videos on the Slack Science blog and other venues. To summarize, the sport of slackline is still very young and a lot of what we know already is a result of trial and error. As a continuous effort to insure ultimate safety and minimize risk, it would be conducive to study this topic in exhaustive details to prevent or at least minimize as much as possible the chance for potential injury. We are hoping to collaborate soon with medical professionals on this topic in our future articles and videos on the Slack Science blog and other venues.
Disclaimer
The above article is not intended to be considered as a professional medical advice, nor is it a substitute for one. Slackline is a dangerous sport and it is the reader’s own responsibility to take care of his/her health and prevent injury. Following the steps mentioned above may result in injury and aggravation of your condition and shouldn’t be attempted without consulting a medical professional.
Further Information
All images, contents, concepts, trademarks and copyrights are reserved to their respective owners. Posture images, analysis and detailed information are provided courtesy of Esther Gokhale Method® Institute.
Esther Gokhale (Go-clay) has been involved in integrative therapies all her life. As a young girl growing up in India, she helped her mother, a registered nurse, treat abandoned babies waiting to be adopted. This early interest led her to study biochemistry at Harvard and Princeton and, later, acupuncture at the San Francisco School of Oriental Medicine. After crippling back pain during her first pregnancy and unsuccessful back surgery, she began her lifelong crusade to find a solution to back pain. Her studies at the Aplomb Institute in Paris and years of research in Burkina Faso, India, Portugal, and elsewhere led to her development of the Gokhale Method℠, which she has been teaching at her Palo Alto wellness center for the past fifteen years.
Visit her online at http://gokhalemethod.com or through email at esther@egwellness.com.

← Older Post Newer Post →
1 comment
Love this article , I am a highliner and due to issues with the back I had to unfortunately give it up but this article makes me realise the benefits of just going back to basics and enjoying parklines .