You have no items in your shopping cart.

A overview of a few ideas for increasing the efficiency of taping a highline. A few different tips and tricks to make the tedious process easier and faster.
In this article, we will be going over best practices for taping a highline in the most efficient way possible. For longer highlines, taping can be quite the chore. Also, when taping a line that you plan to leave taped for a while, it's important to do it well once so that you don't have to keep re taping your line, wasting lots of tape in the process.
Step 1 - Prepare The Taping Area
The first step to taping your line is to prepare the area in which you will be taping. Clear a nice space with adequate room and a comfortable spot to sit. If you are in an area with a lot of dirt or where cars have parked before, it's best to lay down a tarp or blanket before putting your webbing on the ground. There can be harmful chemicals left behind from vehicles that can damage your webbing in a non-visible way.
See Slackline Webbing Usage Guidelines for more info on webbing care.
Step 2 - Flaking The Lines
The next step in the taping process is to flake your lines flat such that you don't have to deal with twists and tangles while trying to tape. The less you need to think about while actually taping your lines, the better. A sloppy and inconsistent tape job can result in a poorly behaving or even potentially dangerous highline.
Using A Single Piece of Webbing for Main and Backup
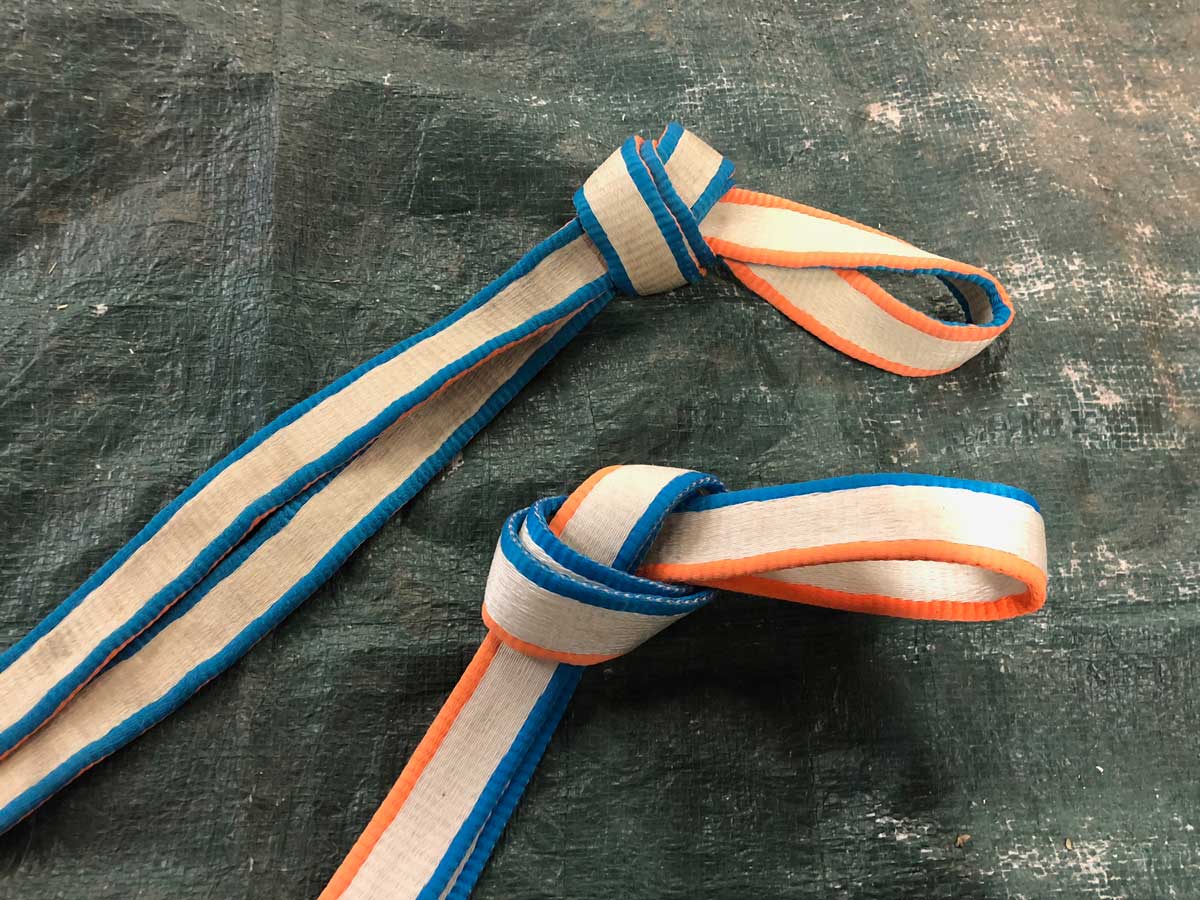
The process of flaking is a little different when you are using a single line for both the main and backup. First, you must find the middle of your piece of webbing. Do that by taking both ends in your hand and pulling both until you reach the middle. Make sure you have your ends situated how you want them for your static anchor before starting to find the middle. Then ensure whatever line you want to be on the top, stays on the top while finding the middle. Don't worry about twists at this point in time, just line orientations.
Once you arrive at the midpoint, tie an overhand knot to mark the spot. Make sure that the orientation of your main and backup are correct and that the colors align. For webbings that have different colored edges, fold the webbing such that the colored edges match on mainline and backup. If the face colors of the webbings are different colored, make it so one color is up and one color is down.
This orientation check will help with twist detection while rigging. If you set your main and backup lines with opposing colors or non-matching colors, it becomes hard to differentiate what line is up when rigging. Always plan your line orientations to optimize for twist detection while rigging. Finding a twist on your rigged highlines can be one of the most frustrating things, especially if you are slightly OCD like myself.
Now that you have the middle, time to flake the webbing back the other direction. Starting at the midpoint knot, flake the like towards the ends, with a finger between each line, making sure both lines remain flat the whole way. If done correctly, you should end up at the two ends at roughly the same time and in the same orientation as you started.
Once at the end, form a knot with the line orientations intact.
Using Two Separate Pieces for Main and Backup
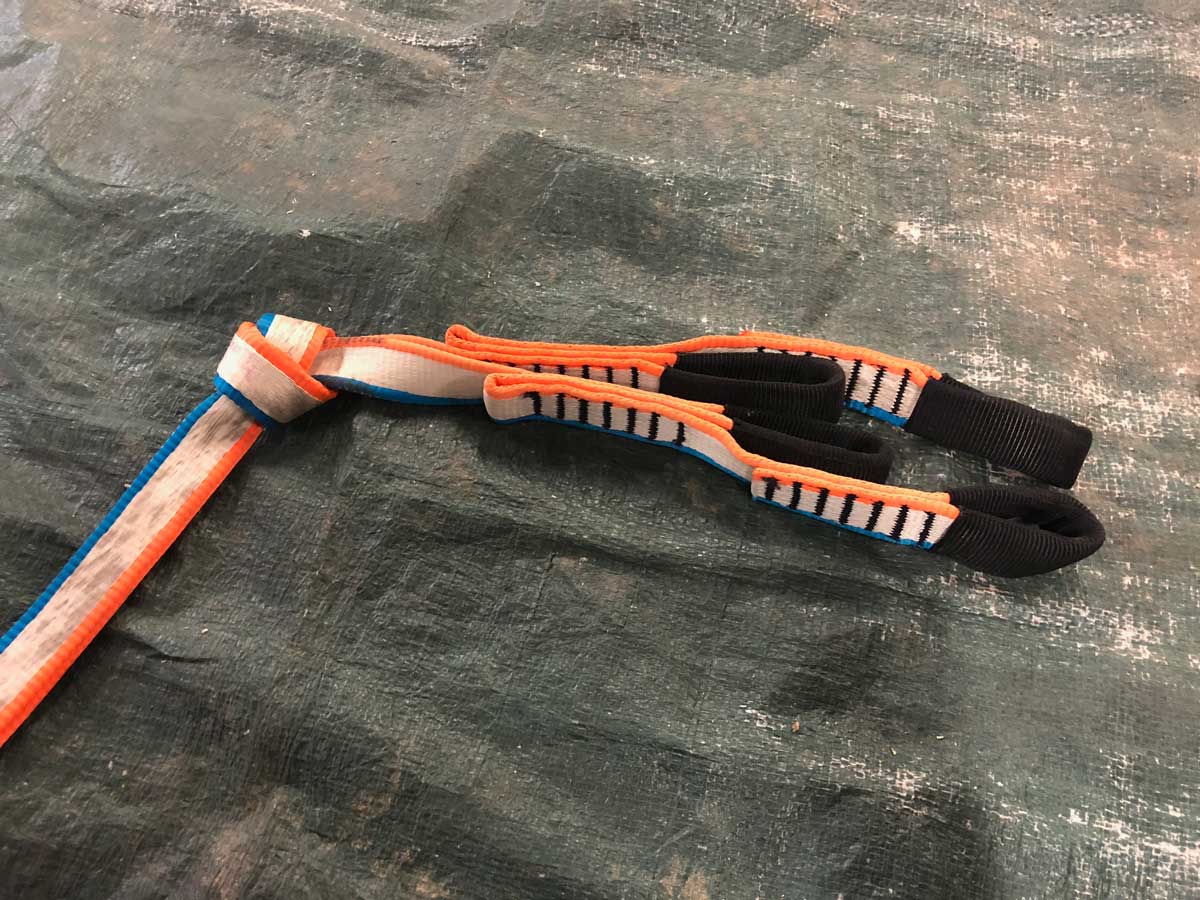
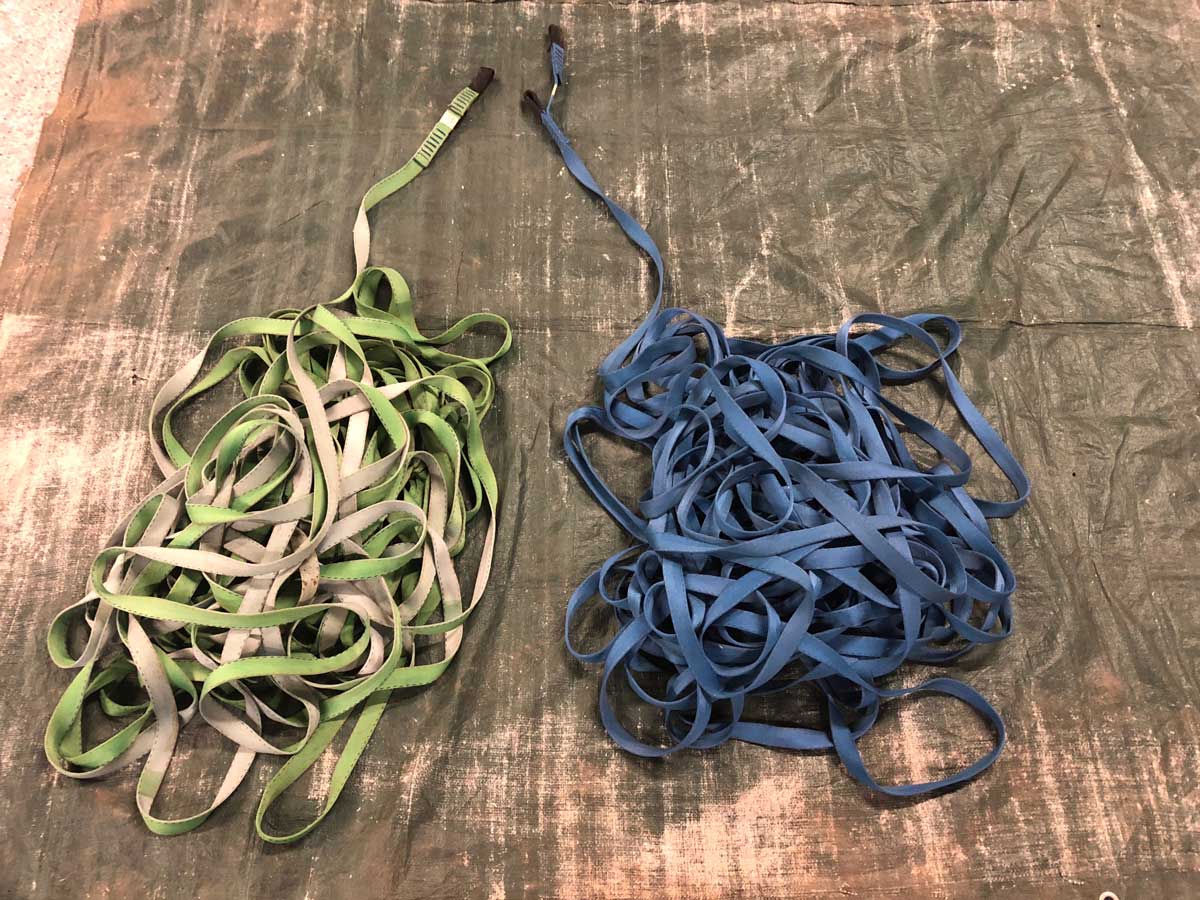
The flaking process when using two separate pieces for main and backup is much simpler. First decide which line you want as main, what face you want to be up, and which end you want to be the static side and flake your line flat starting at the opposite side that you want to be static end. This should leave the static end on the top of the pile, ready to be taped.
Do the same thing for the backup line, forming a pile near the main, but far enough away that it won't interact with the main while taping.
Step 3 - Measuring and Cutting The Tapes
The next step deals with the actual tape that we will be using for the line. First, you need to select what type of tape you will be using. For help with this, checkout our article on Slackline Tape: All About The Different Slackline Tapes.
Next, you will need to know how many tapes you will roughly need. To do that, you need to know how long your highline is and/or how long your webbing is that you are taping. Then, you need to know your average tape spacing. To figure this out, use our guide for tape spacing here: All About Highline Tape Spacing. To find the number of tapes needed, divide the length of your line by the average tape spacing. For example:
- Line Length = 100 meters
- Average Tape Spacing = 3.5 meters (2-5 meter random spacings)
Number of tapes = 100 meters / 3.5 meters = 28.57 = 28 tapes
Always round down the answer because you do not want to have extra tapes leftover at the end of the tape job. You can always measure and cut more, so it's best to underestimate.
Lastly, we will need to decide what taping method we will be using for this line. You can checkout all the different methods here: The Different Taping Methods for Highlines
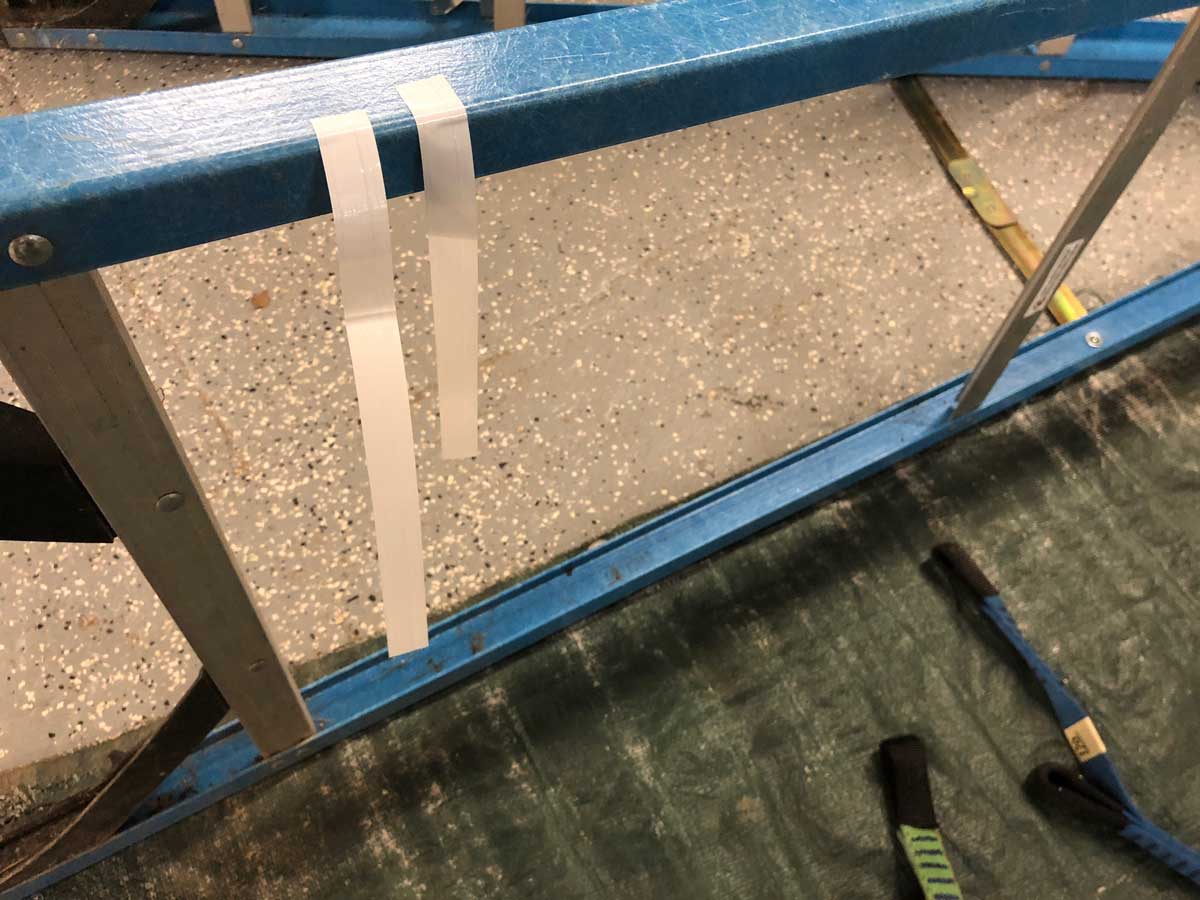
So now we can pre-cut all of our tapes that we need. I find it's best to use a metal surface, such as a table or bench, to stick one end of each tape to. The tape removes easily from this type of surface and will typically retain most of its adhesive. Knowing the taping method chosen, measure out how long each tape needs to be and pre-cut the number you calculated above. Stick each tape end to the metal surface and let it hang down.
Step 4 - Taping The Line
So now we are ready to tape the line! Set Up a chair in front of your metal surface where your tapes are hanging and position both near your pile(s) of webbing. Take the ends that are at the top of your pile(s) and undo the knot, ensuring you do not lose the line orientations.
The First Tape
The first tape is a special tape. It needs to be quite strong, and close enough to the anchoring spot to keep the lines close together near the anchor. I find it's helpful to do an especially long piece of tape for this particle spot to ensure it's strong enough to hold just about anything.
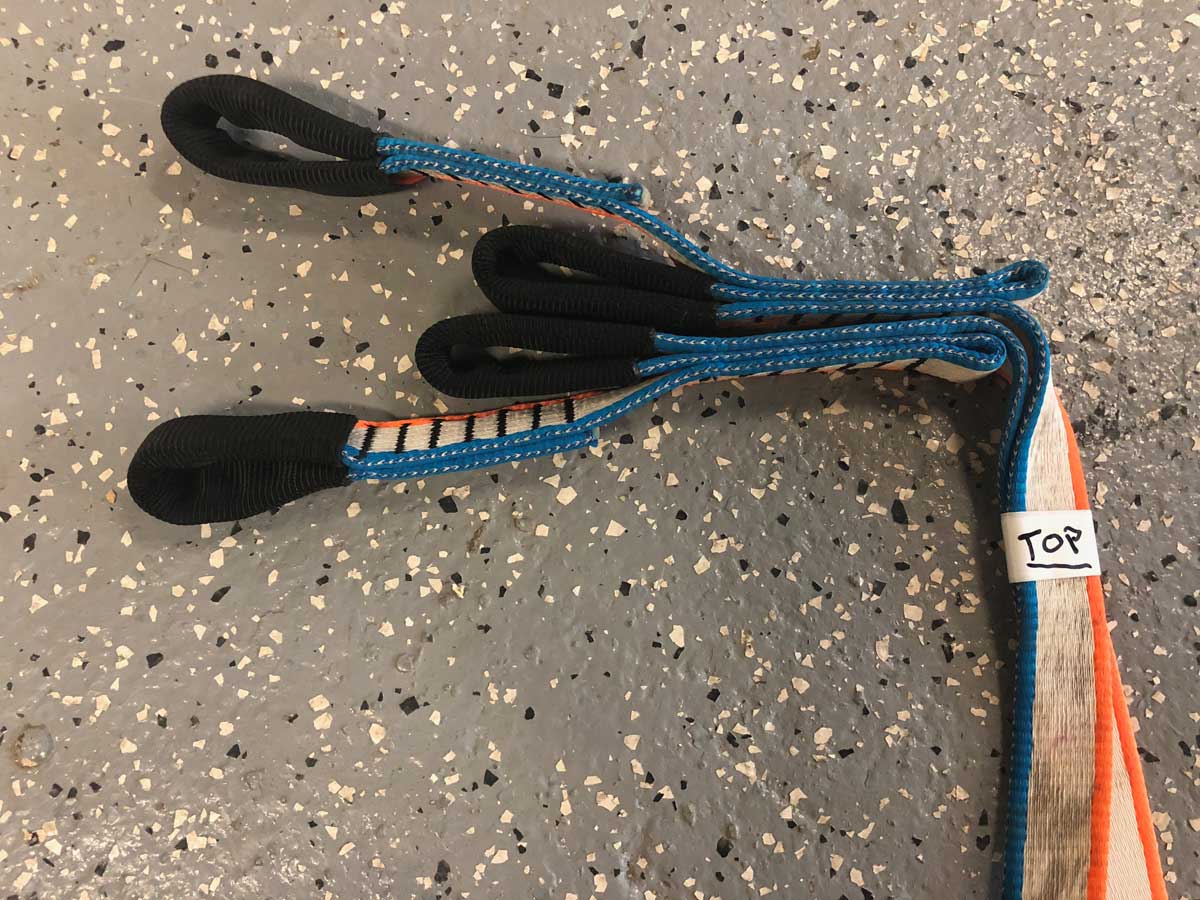
Also, to help with rigging communication with regards to which line is the top, I find it's helpful to write "TOP" on the first tape on the side that is supposed to be up. This guarantees there is no miscommunication with respect to which line is the mainline and which is the backup.
The Tapes Near The Anchor
As discussed at the bottom of our Tape Spacing Article, the tapes near the anchor should have smaller tape spacings compared to most of the line. Keep the spacings random, but use the lower end of the spacing spectrum when taping close to the ends.
The Trick Zone
Also discussed in our Tape Spacing Article linked above is the "Trick Zone". This is an area near the middle of your line where tricks tend to be done. I've found that having smaller tape spacings, even smaller than the lower-end of the spacing spectrum, is a good idea in these areas. I find a spacing of 1 - 1.5 meters (3 - 5 feet) works very well. Read the article above for more info on this.
If you run out of tapes before you get to the end, try and approximate how many more you need and pre-cut them in the same fashion as above. Continue taping until you reach the end, remembering to also use the near-anchor tape spacing mentioned above for the other end as well.
Step 5 - Flaking or Coiling Your Taped Line
Once you have finished taping your line, it's time to pack it for transportation and rigging. I find that any line over 60m is best to be flaked in a LineBag with the static end on the top. This is convenient because we setup the tape job such that you will finish taping with the tensioning end, so you can flake the line right into the bag such that it's ready for rigging.
The same applies for smaller lines, just coiling the webbing instead of flaking. Here is a nice video on how to coil a large rope or webbing into a butterfly coil: https://www.youtube.com/watch?v=hBXGaLHMb6I
That pretty much covers the whole taping process. If you have any questions, feel free to comment below. Here is a video of the process as well:

← Older Post Newer Post →
1 comment
Can this tape be used to reinforce a “clipped” area of a slackline where an accessory is attached via the clip or buckle? How would you attach the tape? Lengthwise or horizontally?