You have no items in your shopping cart.

A comprehensive guide on how to purchase a longline kit piecing together components yourself.
Introduction
Progressing in the world of slacklining can sometimes be a very daunting thing. When you see how much equipment is required to setup a longline, it can be a bit overwhelming. What I aim to accomplish with this article is to simplify this process by providing you with as much information as I can about how to purchase yourself a longline kit. There is quite a lot of information below, but if you go through it all, you should end with a solid understanding of what gear you need to set up the type of slacklines you want.
How To Use The Guide
This guide walks you through the various parts of a longline by suggesting components for each, depending on type of line you are wanting to setup. We give a number of ideas for you to choose from as well as provide you with additional resources should you need more information.
Overview
To start off, I should say that it's a good idea to invest in high quality equipment that will last right from the get-go to prevent any unnecessary upgrades in the near future. When I was first starting to build my longline/trickline kit, I made a lot of intermediate gear purchases which I grew out of very quickly. In the end I found that I had spent nearly three times as much as I should have because I didn't get the best gear from the beginning.
That being said, going for a high quality longline kit is a great upgrade for you to make. You will find that your line will be incredibly versatile and will last you years and years to come, provided you take care of the gear. I am still using my first real longline kit after 6 years, and it's still going strong!
Now, you should know that every single slackline has 4 basic components:
- Webbing
- Webbing Anchors (Static and Tensioning End)
- Anchor Slings (spansets)
- Tensioning System
I will be going through each of these sections and highlight what products are best for different types of lines, as well as link you to other Slack Science articles that are relevant to the topic.

I will be referencing the Custom Slackline Kit Builder, which is a fantastic tool for building yourself a slackline kit. With this builder, you can be sure that all the components you need come with the kit you build. We have set it up so all the correct connectors are automatically added to your cart for you, depending on what you choose from the builder. It's a nice tool that will aide you in purchasing your slackline kit. In addition to this, all these components you purchase through the Custom Slackline Kit Builder will carry on with you if you decide you want to go longer as you can just tack on a few more components to add another 300 feet to the possible lengths, or another 1,000 pounds of total tension to the system.
Webbing
The webbing is the line you will actually be walking on. The type you get depends on a lot of factors, including personal preference. I have written a pretty in-depth guide on the subject in this Slack Science Article: Slack Science - All About Slackline Webbing. I will outline my personal favorites for different types of lines below.
Longlines Under 300 feet long
If you are looking for a line that has a very smooth and controllable walk without much movement, both Spider Silk MKII and Mantra MKIII are great lines for this. They both have quite low stretch, so they will be easy to rig, and are both extremely stable to walk on at these lengths.
If you are looking for a line with a little bit more pep and play, then both Aero and Type 18 MKII are great options. Both of these lines have a bit higher stretch and will give you more to play with. If you are especially into big movements and dynamic tricks on your longer lines, then Type 18 MKII is the right choice for you.
Longlines Over 300 feet long
This is where longlines start to get very interesting. For the most part, I am using both Mantra MKIII and Spider Silk MKII for these lengths, but I will sometimes switch over to Type 18 MKII. The biggest issue with a line of this size is the time it takes to rig. If you use a webbing with lower stretch, it will take less work to get it tight. This translates to more time on the line. But, at the same time, if you want a powerful longline that is capable of extremely dynamic movements, using Type 18 MKII will be the way to go.
Tricklines
At the moment, we carry two trickline specific webbings: RAGEline and PowrLine. Both of these lines have different characteristics and are good for different types of tricklining.
The RAGEline is good for fast paced tricks and long combos when precision and speed are of importance. The lower stretch of the RAGEline gives it this faster speed while maintaining supreme power for big tricks as well.
The PowrLine has been built solely for power. If you are into tricks that require big air and long air time, the PowrLine is the way to go. It's 100% nylon, so it has quite a bit more stretch. This added stretch coupled with the tight weave structure provide an excellent platform for big aerial tricks.
Highlines
The two lines in the shop that I most recommend for pretty much any size highline are Aero and Type 18 MKII. Both of these have fantastic features that make them ideal for highlining: TruRound Edges, LineSkin (optional), and good stretch characteristics.
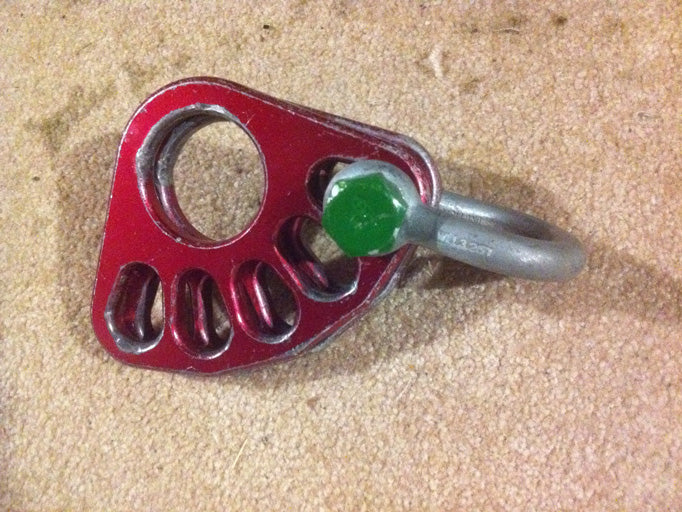
Webbing Anchors
The Webbing Anchors are how you attach your webbing to your anchor and tensioning system. This is what will be holding tension on the line. A good webbing anchor will hold a high percentage of the breaking strength of your line, is easy to install your webbing into, and will not your harm your webbing when it's under tension. I will explain a few of the benefits of our Webbing Anchors below.
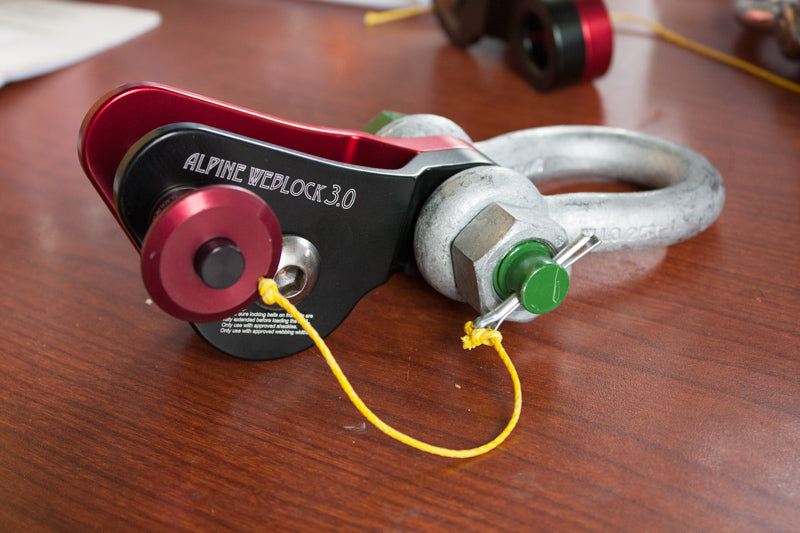
For any line under 800 feet in length, the absolute best option for both the static and tensioning side is the Alpine WebLock 3.0. It holds a very high percentage of the breaking strength of all our Slackline Webbing, is extremely easy to use, and does zero damage to the line under tension. A great solution indeed.
Another option that is a bit cheaper, is our ⅝" and ½" Shackle Line-Locker Kit. These are a bit more cumbersome to use a they require positioning of a line-sleeve, but they are super strong and work in just about any situation. The one thing to consider with this type of webbing anchor is that you will start to damage your line at higher tensions. So, if you plan on rigging lines longer than 200 feet, or plan on going to very high tensions (above 8 kN), then you should consider getting the Alpine WebLock 3.0 instead. This will be a better solution in the long run and will make your rigging experience much more enjoyable.
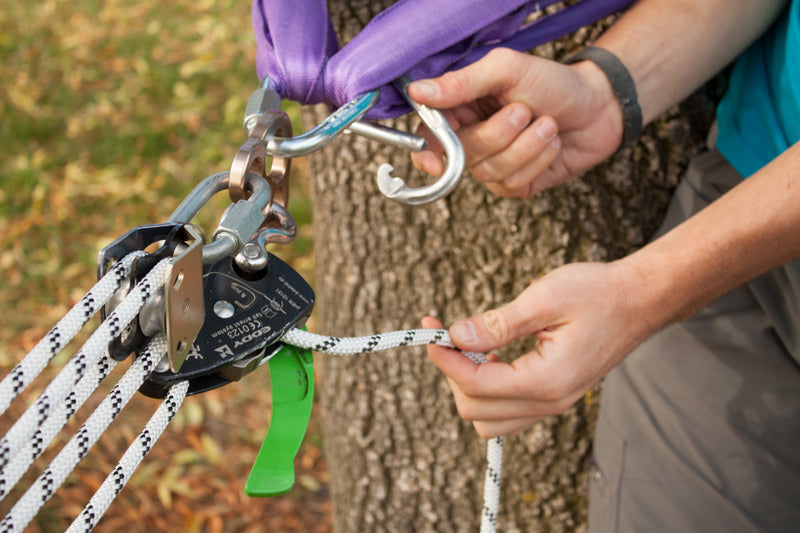
Anchor Slings
Anchor slings are the things you wrap around the trees or clip to the bolts on a highline. Because they wrap around trees and bolts, they are inevitably going to see a lot of wear and tear. For this reason, they need to be extremely rugged and strong. The slings we carry are called Spansets. They are built with a protective cover to protect them from abrasion and are built with big safety margins. These are the best slings you can get for slacklining.
We carry two colors of Spansets: Green and Purple. The color indicates strength. For most of our purposes, the Purple Spansets are more than adequate. However, if you plan on setting longlines longer than 800 feet or super tight tricklines, the Green Spansets are the way to go.
Another thing to consider when picking your Spansets is what length to get. The length is measured from one end to the other when they are laid out flat, as described in this Slack Science Article: Slack Science - All About Spansets. In order to determine what length you require for your slackline setup, you will need to know the approximate size of your trees. A good size that works for most trees in most areas is 10 feet. Just remember, you can always make your slings shorter, but you can never make them longer. So, getting a size that is slightly bigger than you need won't be so bad.
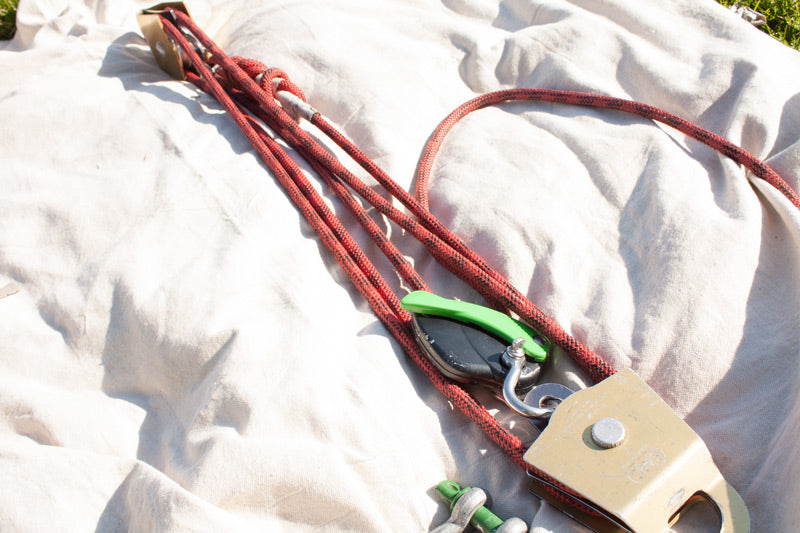
The Tensioning System
Out of the whole system, this is likely the most daunting. Luckily, I have written a number of articles outlining the various components within a pulley system that will help you decide what is best for you. Here is an excellent article going over the entire pulley system: Slack Science - All About Pulley Systems: The Complete Guide.
The first thing you will want to consider when building your pulley system is how much power you want to have. There are a million ways to build a pulley system and they all have different amounts of mechanical advantage. If you goal is to make tensioning your line as easy as possible, you will want something with a higher mechanical advantage. However, there are downsides to higher mechanical advantages. For one, having a higher mechanical advantage means it will take longer to tension your line. So, with that being said, there are really 2 roads that I would suggest going when it comes to mechanical advantage:
- 9:1 Base
- 5:1 Base
I won't go too deep into what these numbers mean, but basically, with a 9:1, with every 100 pounds of force you pull on the last strand of rope on pulley system, you are applying 900 pounds of force to your slackline. It basically multipliers your force by 9. The same for the 5:1, but it multiplies it by 5 instead. These two systems are known as your Base Pulley System. We will refer to them as the 9:1 Base and 5:1 Base, respectively (read nine-to-one and five-to-one, respectively).
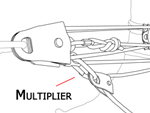
In addition to your base pulley system, you will also need a multiplier. This multiplier increases your mechanical advantage further by basically multiplying the advantage that the base pulley system has already given us. I always recommend a 3:1 multiplier, which will give is 27:1 and 15:1 mechanical advantage, respectively for the two base systems above.
The second thing to consider when building your tensioning system is how lightweight you want to go. There are ways to build a pulley system that is under 5 pounds, but you often sacrifice power and ease of use with supreme lightness. There are two basic kits that I usually recommend to people, which I will outline in the steps below. Each of these kits scores differently on the power and lightness scale. Take a look at the guide below for more information about each kit.
VERSATILITY - 5:1 BASE
The Versatility pulley system is a very streamlined and powerful kit that is built out of our strongest components. This is the best all around pulley system for any slackline up to 500 feet in length. It's not so heavy, it's very strong, and is quite powerful.
SUPERLIGHT - 5:1 BASE
This is the lightest pulley system out there! Don't let its size fool you though, this kit packs a serious punch. I would recommend this kit for anyone who is worried about the weight of their system, but still wants to be able to easily setup lines up to 300 feet in length.
Below are the selections for each component that will work for the above systems.
Main Pulleys
As described above, the main pulleys define what your base pulley system is. A 9:1 base will require four double pulleys and a 5:1 base will require two. Keep in mind, the main pulleys will be holding the full force of your line, so often times strength is a big factor in which pulleys are right for you.
For more information on what characteristics are most important when choosing a main set of pulleys for your tensioning system, check out the following article: Main Pulley Characteristics.
VERSATILITY - 5:1 BASE
The main pulleys required for this kit are 2x SMC 3" Double PMP's. This selection comes with 1x 5/16" Dee Shackle to connect the static rope to the becket and 2x Van Beest ½" Anchor Shackle (1 to connect the pulley system to the anchor sling, and one to connect the ends of the anchor sling together if you end up using the Right Angle Reeving Method).
SUPERLIGHT - 5:1 BASE
The main pulleys required for this kit are 2x Rock Exotica Mini Machined Double Pulleys. This selection comes with 1x 5/16" Dee Shackle to connect the static rope to the becket and 2x Van Beest ½" Anchor Shackle (1 to connect the pulley system to the anchor sling, and one to connect the ends of the anchor sling together if you end up using the Right Angle Reeving Method).
Brake
The brake is an extremely important part of your pulley system. Not only is the one component that is holding the tension on your line, but it also is how you release tension from your line. A good brake will be very good at holding tension and also very easy to release. To view a comparison of different brakes and what to look for in a brake, here is a good article: Slack Science - All About Pulley Systems Part 2: Brake Characteristics.
VERSATILITY - 5:1 BASE
The required brake for this kit is the Edelrid Eddy. This selection comes with a ⅜" Twist Shackle to connect the brake to the becket of the static pulley.
SUPERLIGHT - 5:1 BASE
The required brake for this kit is the Edelrid Eddy. This selection comes with a 10mm Oval Maillon Rapide to connect to the becket of the static pulley and a 7/16" Dee Shackle to connect the brake to the quicklink.
Connection Point
The connection point, also known as rigging plate, is a way to organize your pulley system all on one piece of gear. Not all the systems I suggest require rigging plates, but sometimes they are nice to have for organizing your tensioning system. You can get around using a rigging plate by using what is known as the embedded brake technique, which you can learn more about here: Slack Science - All About Pulley Systems Part 3: Connection Points.
VERSATILITY - 5:1 BASE
None. This kit uses the embedded brake technique, described here: Slack Science - All About Pulley Systems Part 3: Connection Points.
SUPERLIGHT - 5:1 BASE
None. This kit uses the embedded brake technique, described here: Slack Science - All About Pulley Systems Part 3: Connection Points.
Rope Size & Length
The static rope is a very important part of your pulley system. Not only is the length important, but the size is as well. You must be sure that the size you get works with the type of brake you are getting. Since the kits we are building here all use the Edelrid Eddy as the brake, this will work with the full line of ropes we carry in the shop, which range from 9mm to 11mm in diameter.
Another thing to consider is what length of rope you should get. You don't want to get so much that you are burdened by carrying around a huge piece, but you also don't want to get too little. Below I have suggested a good length for the scope of the pulley system. For a nice trick on how to use less rope, check out this article: Slack Science - How To Get By With Less Static Rope.
VERSATILITY - 5:1 BASE
The suggested type and length of rope is 130 feet of PMI 11mm Access PRO Static Rope. This much rope will give you plenty of room to rig any slackline up to 500 feet in length (provided you use the tricks in this article: Slack Science - How To Get By With Less Static Rope).
SUPERLIGHT - 5:1 BASE
The suggested type and length of rope is 100 feet of PMI 10.5mm Global PRO Static Rope. This much rope will give you plenty of room to rig any slackline up to 300 feet in length (provided you use the tricks in this article: Slack Science - How To Get By With Less Static Rope).
Multiplier Rope-Grab
This is the part of the pulley system where you install your multiplier. This piece of gear basically grabs on to the rope going into your brake and allows you to multiply your pulling force. For a more in-depth guide on multipliers, check out this Slack Science Article: Slack Science - All About Pulley Systems Part 5: Multiplier Characteristics.
It's important to note that the rope-grab that you choose should be compatible with the size of static rope you are using for your pulley system. The kit builder shouldn't allow you to choose an incompatible rope-grab, but this should be known in case you are building your own kit piece-by-piece.
VERSATILITY - 5:1 BASE
The suggested multiplier rope-grab for the Versatility Kit is the Heightec Compact. This is the best rope-grab we offer. It has a very high strength and is non-abrasive to your rope, making it a solid rope-grab solution. This selection comes with a Rock Exotica PIRATE Screw-Lock Carabiner, Omega Pacific Oval Carabiner, and a 6 foot long reset cord for easy multiplier resetting.
SUPERLIGHT - 5:1 BASE
The suggested multiplier rope-grab for the SuperLight Kit is the 11" Prussik. This is the smallest and lightest option for multiplier rope-grabs. It's a classic solution that works very well and is virtually weightless. This selection comes with a Omega Pacific Oval Carabiner.
Multiplier Pulley
This part of your multiplier is where the power comes from. The multiplier pulley is responsible for 2/3 of your pulling power. So, having a pulley that is extremely efficient will be of great value to you. For a more in-depth guide on multipliers, check out this Slack Science Article: Slack Science - All About Pulley Systems Part 5: Multiplier Characteristics. For a comparison of different multiplier pulleys, check out Slack Science - Multiplier Pulley Comparison
VERSATILITY - 5:1 BASE
The suggested multiplier pulley for this kit is the SMC 3" Single Pulley. This is the absolute best multiplier on the market. It's big, strong, and SUPER efficient. Tightening any line with this multiplier pulley is a breeze.
SUPERLIGHT - 5:1 BASE
The suggested multiplier pulley for this kit is the Rock Exotica Machined Rescue Pulley. This pulley is very lightweight, but it packs a serious punch! It's very efficient and will aide you in getting any line up to 300 feet tight.
Optional Gear
These are a few items that are not necessary for a fully functioning slackline kit, but they are very nice to have.
Handled Ascender
The Heightec Pulsar Handled Ascender is basically like a handle that you can attach on to your tensioning rope to aide in pulling. I have found that this type of device can seriously increase your efficiency when applying tension on your slackline.
Haul Bag
The BC Haul Bags are fantastic tools for storing and hauling your gear to and from the park. They are virtually indestructible and can hold some serious equipment.
For any slackline setup that is for lines under 300 feet in length, the medium is the best size bag to have. For lines from 300 - 500 feet in length, the Large is the best bag. Anything beyond this length would require the XXLarge bag, which is a whopping 170L.
Keep in mind, if you use the Custom Slackline Kit Builder, all of the connectors and hardware you need will come with the selections you make. This is to ensure you have everything you need to properly setup the line.

← Older Post Newer Post →
0 comments