You have no items in your shopping cart.

An all-in-one guide to rigging and using a 9:1 base pulley system for ultra longlines and high tension slacklines. We cover both the side-by-side and embedded 9:1 techniques.
Recently, there has been quite a bit of chatter about the 9:1 base pulley system on the internet, so I thought I would write an all-inclusive article on the various methods and techniques of 9:1 pulley systems.
Before we get started, I want to make a few definitions that will help through-out the article:
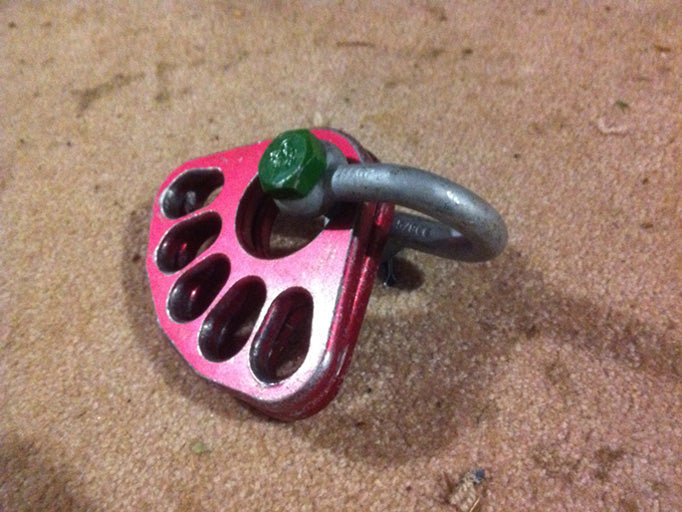
- Moving Pulley: In a slackline pulley system, there are typically two main pulleys: the moving pulley and the static pulley. The moving pulley is the pulley that is connected directly to your slackline. This pulley will progressively move closer and closer to the static pulley as you add tension to the line. This is the point in your system where all the mechanical advantage is achieved.
- Static Pulley: The pulley that is attached directly to your anchor point is called the static pulley. This pulley does nothing more than redirect the ropes leaving the moving pulley.
For clarification, the base 9:1 pulley system is characterized by the mechanical advantage that is achieved by just the main pulleys in your pulley system. With a 9:1 base pulley system, for every pound of force that you apply to the last strand of rope going to the brake, you add 9 pounds of force to the connection point of the moving pulley.
Also remember that the best way to add mechanical advantage to your pulley system is with multipliers, not additions of extra pulleys to the main pulley system. The main reason to use a 9:1 base pulley system over a simple 5:1 base pulley system is to minimize the load that is applied to the brake. In a 5:1 pulley system, the brake is holding 1/5th of the force that is on the slackline. With a 9:1 base, the brake only sees 1/9th of the total force. This is especially important when a LOT of force is needed (i.e. longlines). Keep in mind, if you have a phenomenal brake (like the CMC MPD), then there is no need to use a 9:1 base pulley system because the brake is more than strong enough to hold 1/5 of the load of any slackline you could ever rig.
Okay, now on to the juicy stuff!
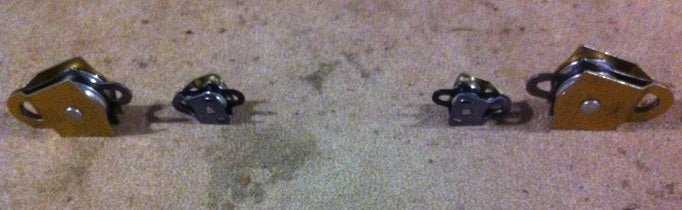
All methods of 9:1 base pulley systems that are used today require two sets of Main Pulleys (4 double pulleys total). The kind of pulleys you get totally depends on the type of 9:1 base you are aiming to do. There are two main types of 9:1 pulley systems that are widely used in the slackline world: the Side-By-Side 9:1 Base and the Embedded 9:1 Base. Both of these methods are highly efficient when used with quality Pulleys (like the ones in the BC Shop). I will define each below and explain their respective benefits.
The Side-By-Side 9:1 Base Pulley System
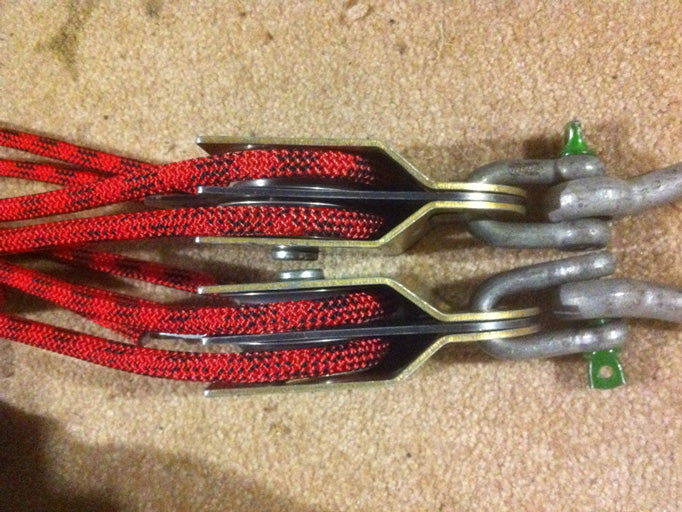
The defining characteristic of this type of 9:1 base pulley system is that the moving pulleys are rigged side-by-side in such a fashion that it looks like a pulley with 4 sheaves rather than two double pulleys (see picture below).
Typically people use four of the same type of pulley for the side-by-side method, but this is not necessary. You can use any four double pulleys you'd like, as long as they sit nicely together on the shackles that you choose to use. I highly suggest using four of the SMC 3" Double PMP's, as they are the most efficient rigging pulleys out there and they sit very nicely together when rigged as explained below.
Out of the two 9:1 base methods, this is definitely the most efficient (when using four of the same large pulleys, like the SMC 3" Double PMP's). Unlike the embedded 9:1 base, the ropes that travel through the sheaves on the moving pulley side all go over large sheaves. This ensures the least loss of mechanical advantage due to friction. It is possible to achieve this same mechanical advantage using an embedded pulley system, but you must use a special technique that I will not go into in this guide (basically using four of the SMC 3" Double PMP's embedded inside each other and twisted).
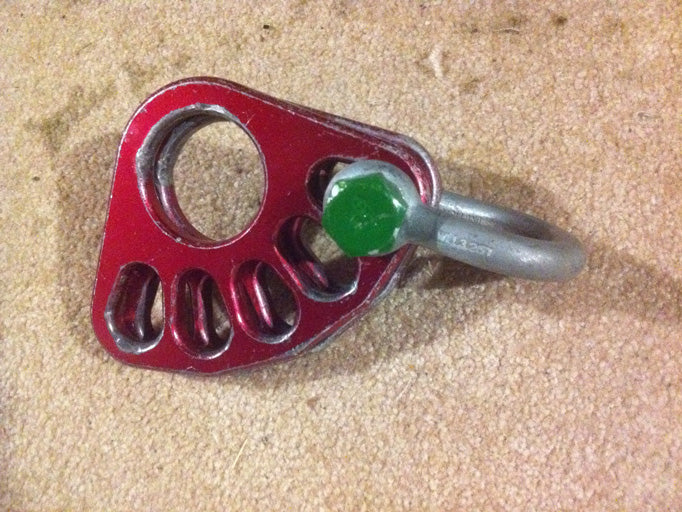
So, how does one go about rigging with a side-by-side 9:1 base pulley system? Well, there are quite a few ways to set this system up. On the static pulley side, you can either rig with rigging plates or use a separate anchor for the brake and pulleys (as described in the Connection Point Article). I always like to use the rigging plate method because it organizes all my rigging and allows me to only have one anchor sling, which is handy when you have to put your anchors WAY up on the trees. I use two SMC Large Rigging Plates, mainly because they will sit on the bolt-side of a shackle MUCH better and it's also much stronger.
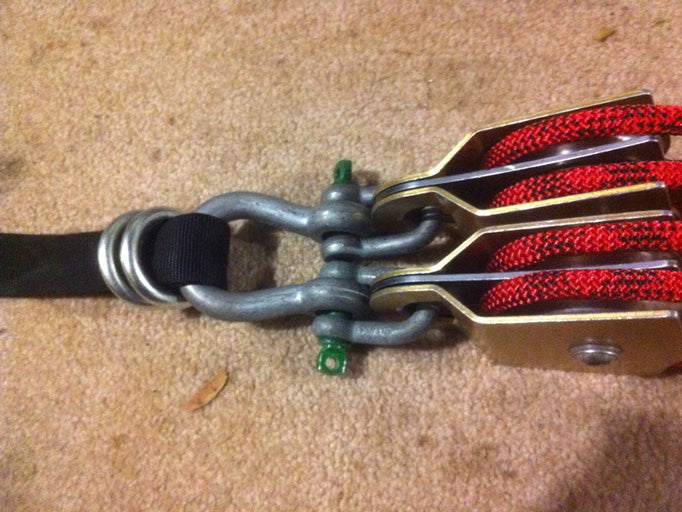
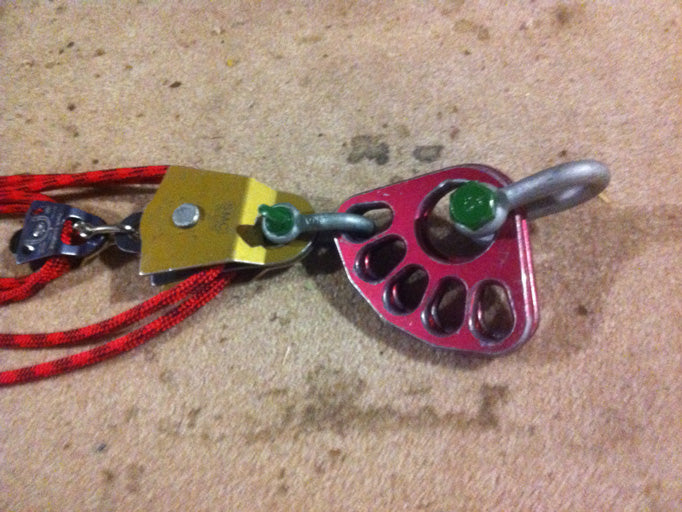
Next, you will need two 5/8" Van Beest Bolt-Type Shackles--one to anchor your rigging plates to the spanset, and one to connect your pulleys to. Notice in the picture below that I've attached the rigging plates to the anchor with one of the rigging holes on the rigging plates. Because the eye of the shackle will not fit through the rigging holes, I've turned it around.
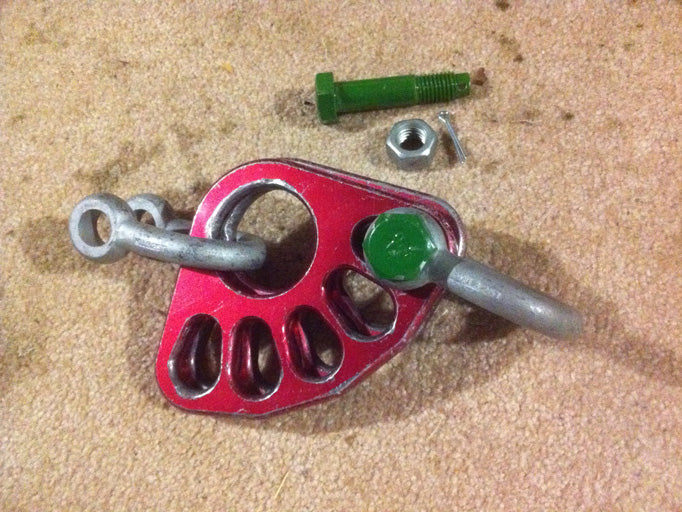
Now, pass the second Van Beest Shackle through the anchor hole of the two rigging plates and leave the bolt off.
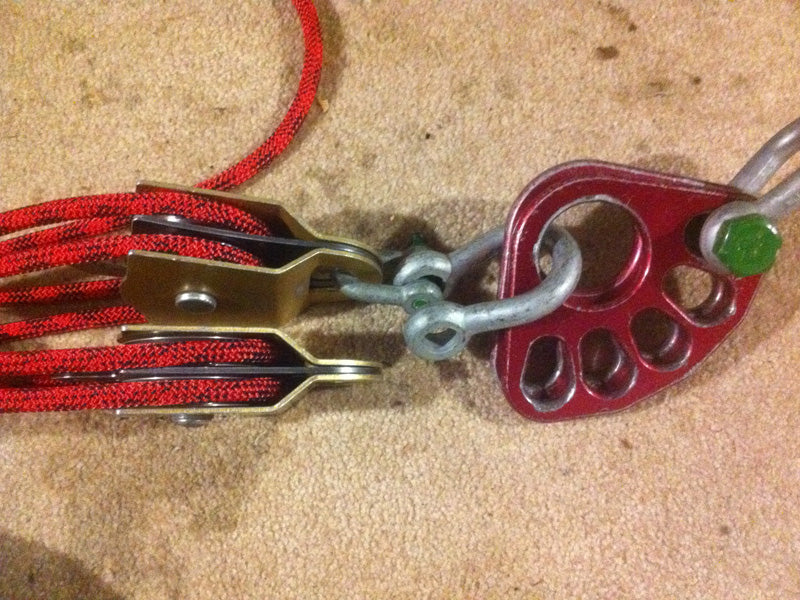
Now we will lay out our pulleys the way we plan to have them in our pulley system so that we can thread the rope through. When laying the pulleys out, be sure to have the flat side of the main bolt of the pulleys pointed towards each other so that they can sit as close to each other as possible.

Okay, now we will thread the rope through. If you are sitting with the four pulleys laid out in front of you, then you will want to start your rope on the becket of the pulley closest to you on your left. You can use a 5/16" Stainless D-Shackle for this connection point. From this becket, you will take the rope and pass it up through the closest sheave of the closest pulley to your right. Follow this rope back to the left pulley and pass it down the sheave that is closest to you. Then proceed to the second sheave of the closest right pulley and pass the rope up through. Continue in this manner until you get to the last sheave of the furthest left pulley. The rope should be leaving the bottom of this pulley. This is the strand of rope that will be going to the brake. Leave your pulleys with the rope threaded through.
Keep in mind that the two pulleys on your left will be the moving pulleys and the ones on your right will be the static pulleys.
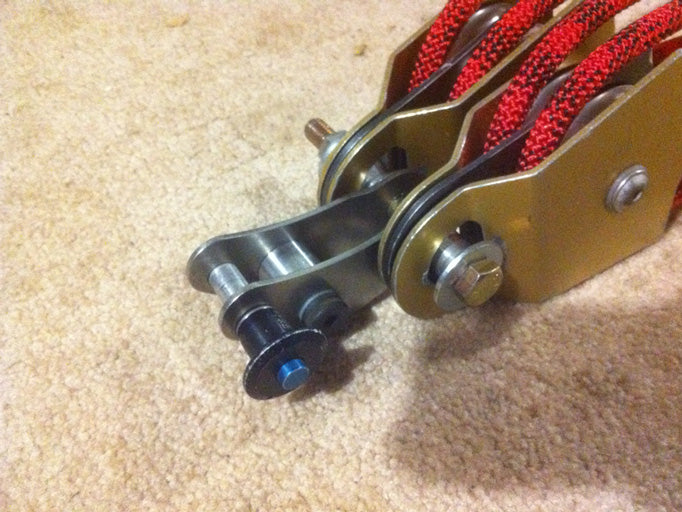
Now we will need two 7/16" Forged 316-Stainless D-Shackles to connect the two static pulleys to the Van Beest Shackle on the rigging plates. Other types of shackles that can be used include /16" Chain Shackles, or 1/2" Stainless D-Shackles. Now pass one of the D-Shackles through the anchor hole of one of the static pulleys such that the threads are on the same side as the flat side of the main bolt on the pulley. This is so that you can correctly attach it to the Van Beest Shackle. See pictures below for explanation. Please note that the shackles used in the pictures are 7/16" Van Beest Chain Shackles (available upon request).
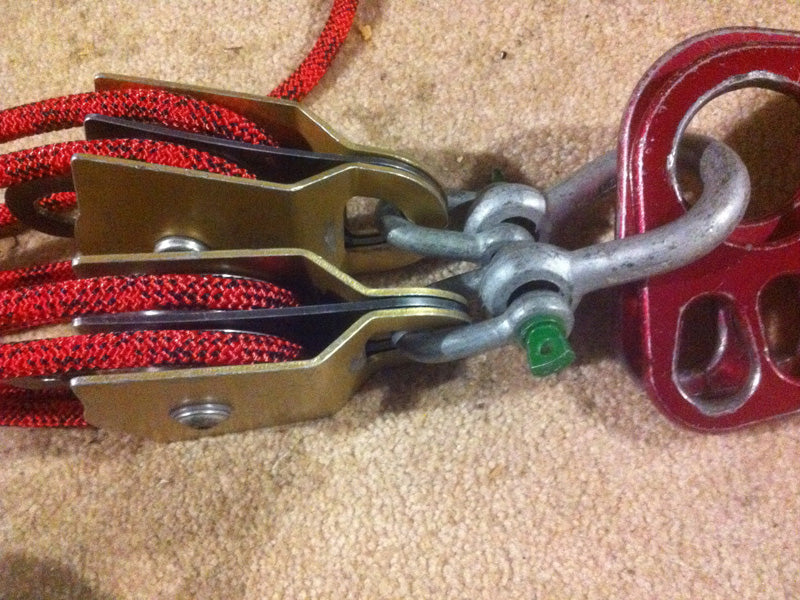
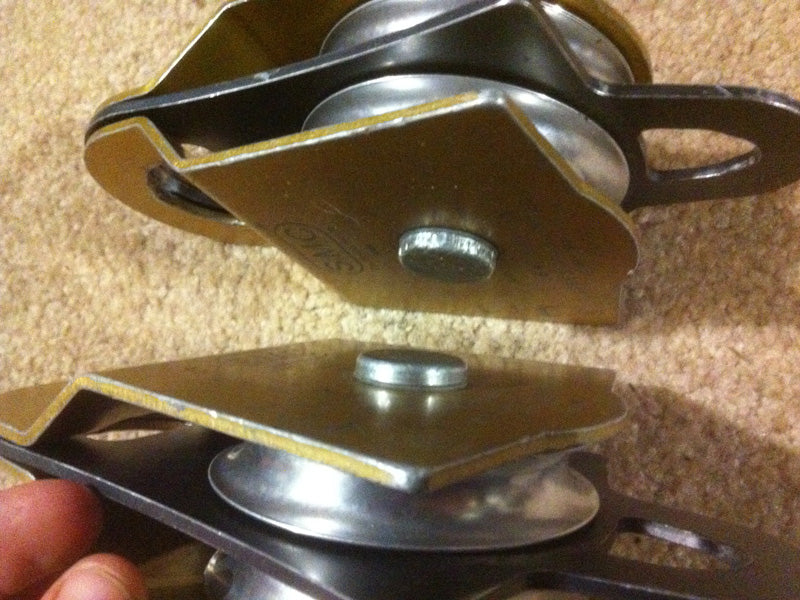
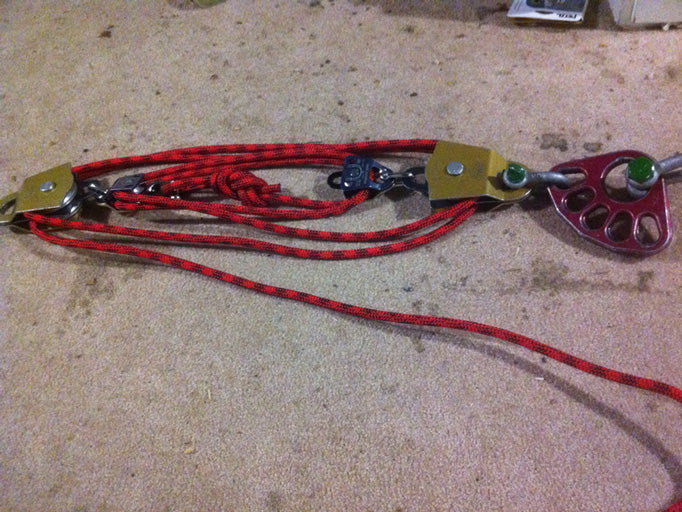
Be sure that when you attached the pulleys to the rigging plate that the last strand coming from the furthest left pulley is on the bottom, as in the picture below.
Please note: The above picture has been mirrored so that the ropes are not reeved correctly.
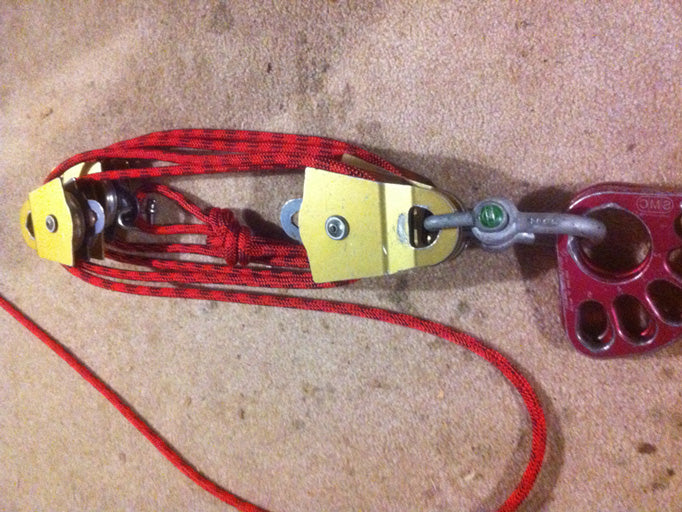
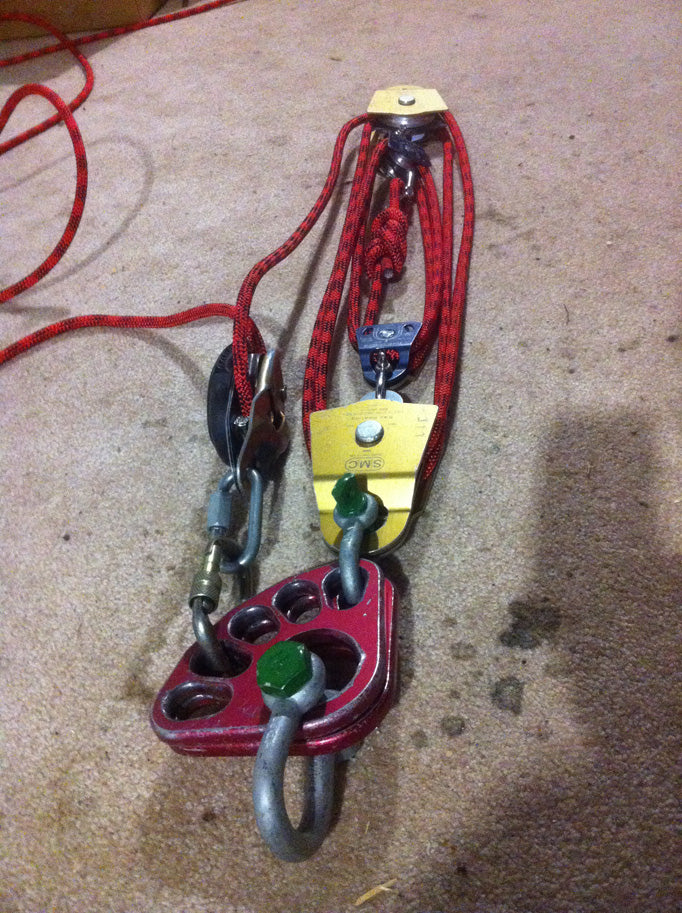
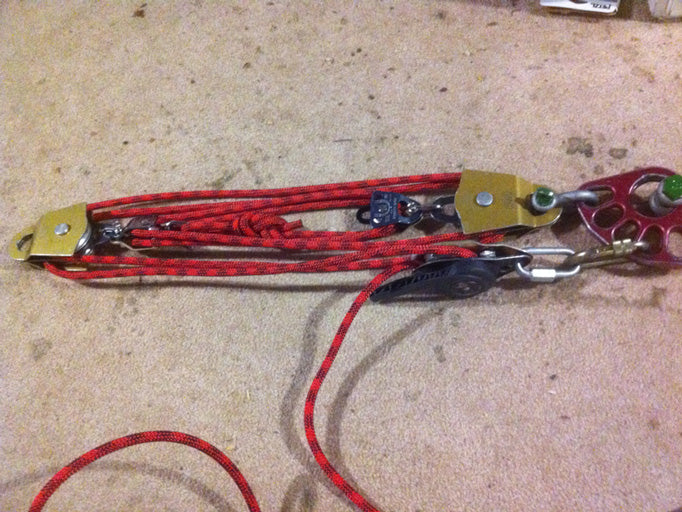
Now we can attach the brake to the bottom rigging hole on the rigging plates. I like to use a single 1/2" Omega Pacific Steel Carabiner to attach to the rigging plates, then a 3/8" quicklink to attach the brake. This will cause the brake to sit such that handle is facing downwards so that releasing tension is easy. Having the handle face downwards will also ensure that the tail of the rope coming from the brake is on the same side of the entire pulley system as the strand entering the brake. This will make multiplying the pulley system quite easy.
Now that we have the pulley system rigged, how do we attach it to our slackline for tensioning? Well, this entirely depends on what kind of Webbing Anchor that you are using. If you are using a Shackle Line-Locker Kit, then you can simply rig the line-locker on the bow part of the shackle and connect the pulleys to the bolt-side of the shackle in the same fashion as above (see picture for details).
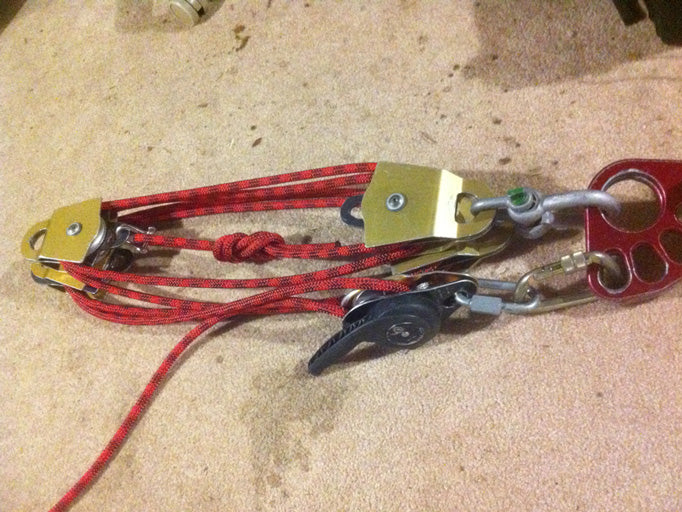
This is not the most desirable webbing anchor to use for those instances where you are using your side-by-side 9:1 base pulley system. You should use an Alpine WebLock or similar device because of the high tensions involved with slacklines rigged with the side-by-side 9:1 base pulley system. To attach the two SMC doubles to the AWL2 takes a bit of ingenuity. There are a few methods that I like to use that are all equally strong. The first would be to create a "Missing Link" from a strand of extra webbing you have laying around. Just create a 6-inch to 1-foot long sling that is comprised of several wraps of webbing tied together with a water knot. Then you can use this sling to attach the AWL2 to yet another 5/8" Van Beest Bolt-Type Shackle, which is connected to the SMC Pulleys in the same fashion as the static side. See pictures for explanation.

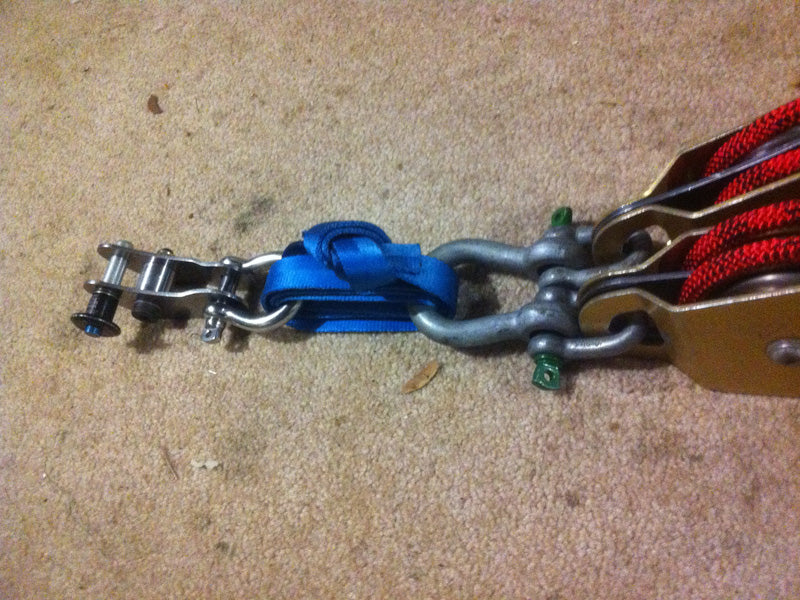
The other way to connect the moving pulleys to the AWL2 is to take a 1/2" x 4" Grade-8 bolt with nut and several washers and pass it through the anchor holes of the pulleys as well as the anchor hole of the AWL2 (with the shackle removed). This method is nice because it gives you the flexibility to adjust the distance between the pulleys as well as have the pulleys directly connected to the webbing anchor.
Please note: There is a different technique for attaching the moving pulleys for each webbing anchor. Some solutions are simpler than others. Please leave a comment below if you have any questions about certain webbing anchors and we will do our best to help).
Okay, now we are rigged! Here is a nice gear list for convenience:
- Main Pulleys: 4x SMC 3" Double PMP's
- Brake: Edelrid Eddy or CMC MPD
- Attachment Point: 2x SMC Large Rigging Plates
- Rope: 300 ft. or more of PMI 11mm Access PRO
-
Connectors:
- 2 or 3 5/8" Van Beest Bolt-Type Shackles
- 5/16" Stainless D-Shackle
- 2x or 4x 7/16" Stainless D-Shackles
- 1/2" Omega Pacific Steel Carabiner
- 10mm Oval Maillon Rapide
- OPTIONAL (for certain connection methods) - 1/2" x 4" Grade-8 Bolt with Nut and Washers (can be found at any hardware shop)
Please note: The above gear list does not include the multiplier components.
The Embedded 9:1 Base Pulley System
The defining characteristic of this type of 9:1 base pulley system is the configuration of one set of pulleys inside a set of larger pulleys (thus the 'embedded' name). There are various combinations of pulleys that will work for this type of 9:1 base pulley system, but the best (in my opinion) is having a set of Rock Exotica Machined Double Pulleys embedded inside a set of SMC 3" Double PMP's.
The main advantage of this type of 9:1 base pulley system is that it's extremely modular. Since you need two sets of double pulleys for this system to work, you basically get three pulley systems out of the same gear. You will have your small pulley system, which consists of the embedded pulleys and a brake. Then you will have your bigger pulley system for longer lines or rigging regular lines alone, which consists of the outer pulleys and a brake. Then you have your 9:1 base pulley system, which uses all 4 of your double pulleys together with a brake. This type of modularity is very nice if you like to rig a variety of different types of slacklines (trick, long, high, etc...).
Another advantage of this type of 9:1 base pulley system is that it's extremely easy to anchor to the webbing using existing techniques that are already used to connect a 5:1 base pulley system to the webbing.
Also, this method is significantly lighter than the side-by-side method, simply because you use only 2 large double pulleys and 2 smaller ones.
So, how does one rig the embedded 9:1 base pulley system? Well, there are number of ways to do it. To start, I will assume that you like to use the rigging plate technique for attaching your static pulleys to the anchor. Again, I like to use double SMC Large Rigging Plates for the static pulleys for strength and aesthetic reasons.
We will start with a single 5/8" Van Beest Anchor Shackle to connect the double rigging plates to. You can attach the shackle directly to the anchor hole of the two plates.
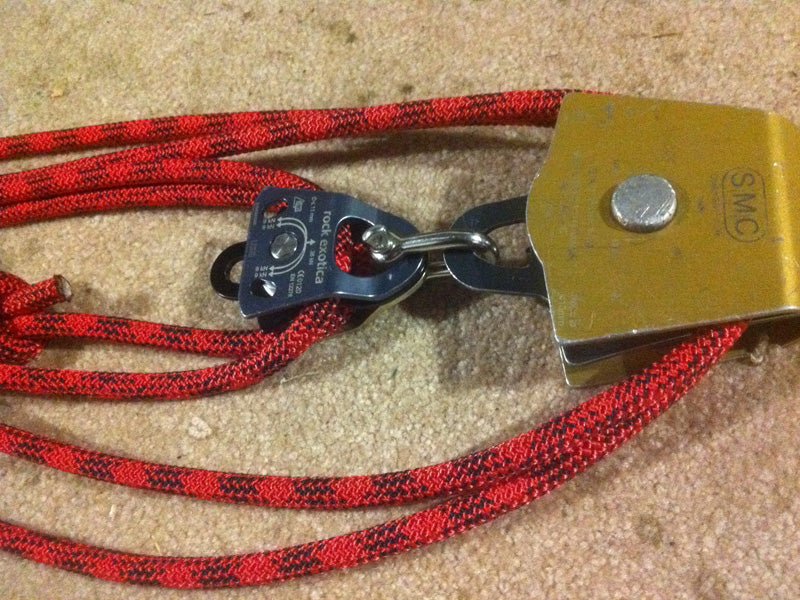
Now we need to thread the rope through our pulleys. Lay the pulleys out such that the SMC Doubles are on the outside with the Rock Exoticas on the inside like the picture below.
Now attach the rope to the becket of the Rock Exotica Pulley on your left using a 5/16" Stainless D-Shackle. Then take the rope and pass it up through the furthest sheave on the right Rock Exotica Pulley. Then pass the rope down the furthest sheave of the left Rock Exotica Pulley on your left. Then up through the closest sheave on the right Rock Exotica Pulley. Then down through the closest sheave on the left Rock Exotica Pulley. Now take the rope and pass it up the closest sheave on the right SMC Pulley. Then down through the closest sheave on the left SMC Pulley. Continue like this two more times and you will have the tail coming out of the bottom of the furthest sheave of the left SMC Pulley. See pictures for details.
Now that the rope is threaded through the pulleys, we must attach the inner pulleys to the outer pulleys. I like to use 5/16" Stainless D-Shackles for this connection point because of their low profile. Be sure to not twist the inner pulleys before connecting them.
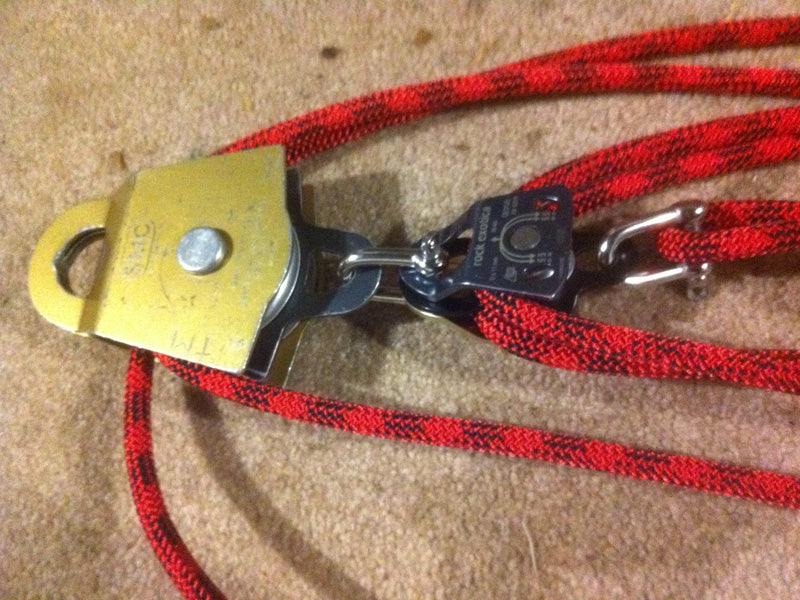
Now that the pulleys are connected, we can attach them to the rigging plates. Take a 1/2" Van Beest Anchor Shackle and connect it to the top rigging hole on the double rigging plates. This is where the pulleys will be connected.
Be sure that when you attached the pulleys to the rigging plate that the last strand coming from the furthest left pulley is on the bottom, as in the picture below.
Now we can attach the brake to the fourth rigging hole on the rigging plates. I like to use a single 1/2" Omega Pacific Steel Carabiner to attach to the rigging plates, then a 3/8" quicklink to attach the brake. This will cause the brake to sit such that handle is facing downwards so that releasing tension is easy. Having the handle face downwards will also ensure that the tail of the rope coming from the brake is on the same side of the entire pulley system as the strand entering the brake. This will make multiplying the pulley system quite easy.
To attach the embedded 9:1 base pulley system to the webbing anchor, you can use any technique that you have used to attach your 5:1 pulley system to your webbing. The AWL2 will connect directly to the SMC 3" Double PMP, as will the carabiner line-locker kit. Most other webbing anchors will have equally easy methods for attaching to the embedded 9:1 base pulley system. Any questions about specific webbing anchors can be asked in the comment section below.
Okay, now we are rigged! Here is a nice gear list for convenience:
- Main Pulleys: 2x SMC 3" Double PMP's and 2x Rock Exotica Machined Double Pulleys
- Brake: Petzl RIG
- Attachment Point: 2x SMC Large Rigging Plates
- Rope: 300 ft. or more of PMI 11mm Access PRO
-
Connectors:
- 5/8" Van Beest Bolt-Type Shackles
- 3x 5/16" Stainless D-Shackle
- 1/2" Van Beest Anchor Shackle
- 1/2" Omega Pacific Steel Carabiner
- 10mm Oval Maillon Rapide
Please note: The above gear list does not include the multiplier components.
Okay, that's it! If you have any questions about the above information, please ask in the comments and I will do my best to answer them. Thanks for reading!

← Older Post Newer Post →
1 comment
I have been looking for a way to rig a higher ratio pulley system to help pull rotting trees down that have been caught in the canopy after partially felling them. This article is extremely helpful and informative. After putting a little too much stress on my vehicle, I needed to find a better solution. I appreciate your help!! I would like to ask if you have ever used a high strength winch rope in the pulleys? They are rated quite well for weight, and are quite abrasion resistant. Thanks
Marc