You have no items in your shopping cart.

The first article in a series about maximizing your pulley system. We will take a look at how you can fully utilize a short piece of static rope to setup the longest line possible.
Introduction
Have you ever been in a situation when you are stuck with a length of static rope shorter than the necessary amount to rig the line you want? Well, this set of small tricks will help you get past that hurdle! This article will also help people who are looking to get into longer lines and want to minimize the amount of gear they need.
Methods
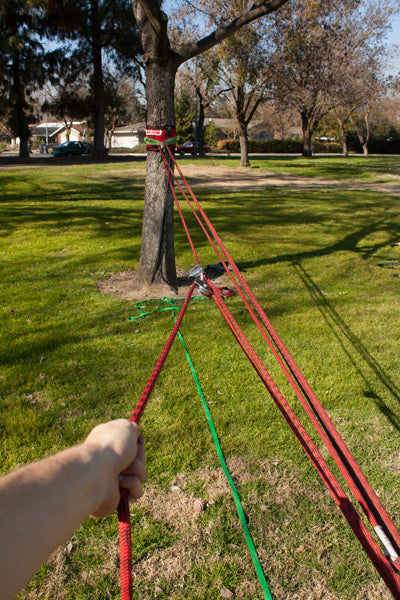
Alright, to start off, let's assume that we have a 5:1 pulley system with 100 feet of static rope. This will make the explanations much easier and the concepts easier to see.
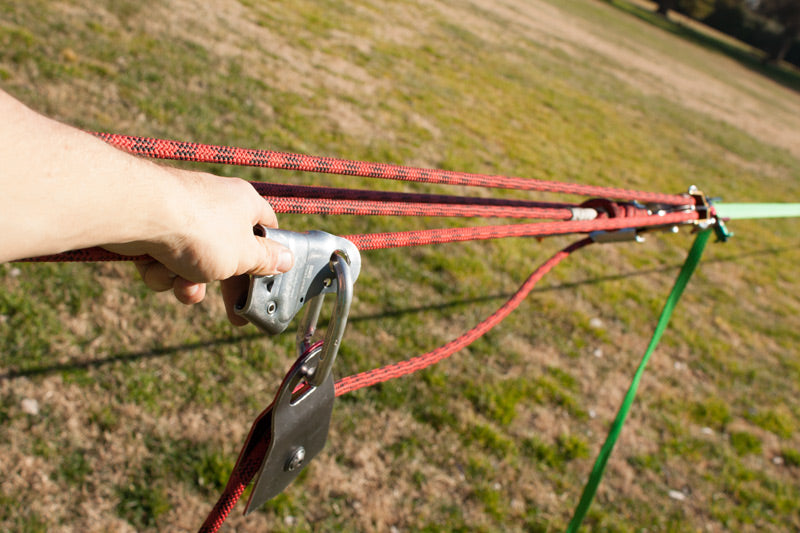
First, you need to reeve your pulley system in your desired fashion (see How to Reeve Your Pulley System for more info) and attach this pulley system to your tensioning anchor. Once it is attached, you should extend the system fully such that the end of your rope just barely reaches your brake.
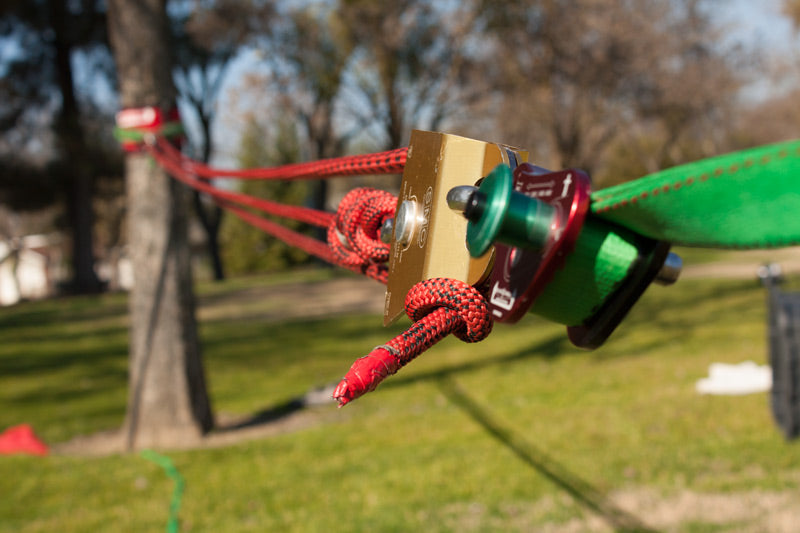
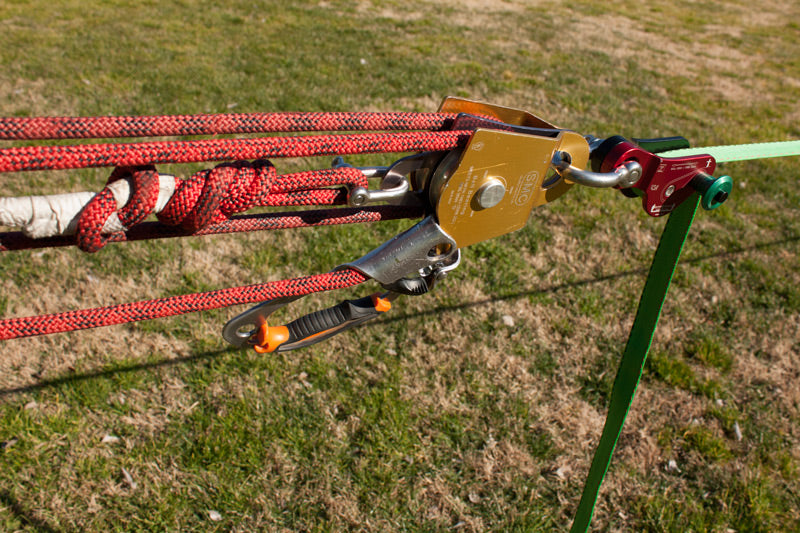
In this configuration, with the tail of your rope attached to your brake, you will have 5 strands of rope in your pulley system. So however long your rope is, divided by 5, is how long your pulley system is. Since we have 100 feet of rope, our pulley system is roughly 20 feet long. With this setup we can setup roughly a 200 foot Type 18 MKII line, or a 250 foot Aero line. Using an Alpine WebLock 3.0, you can likely get a little bit more length by pulling some slack out of the device, but not much. What limits us is the length of our pulley system. We need to make it longer!
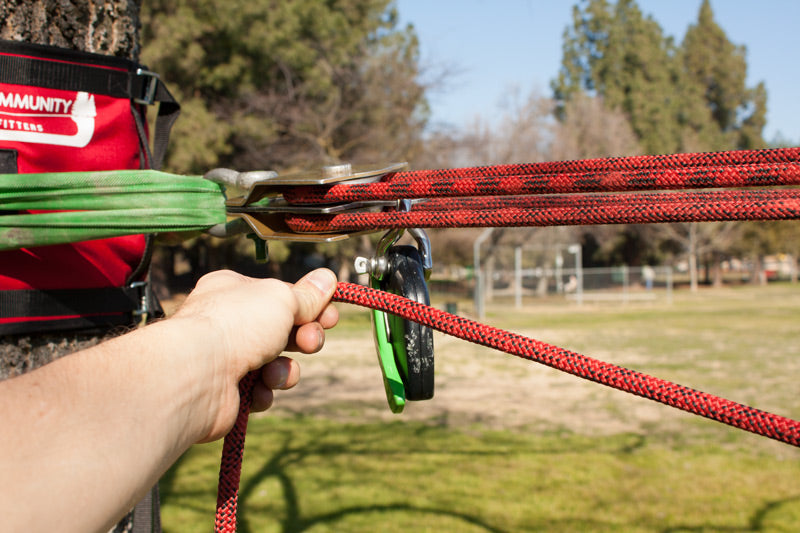
Okay, here is where the first trick comes into play. Once you have your pulley system fully extended, take the tail of your rope out of the brake and then tie a simple overhand knot at the very end. Now extend your pulley system a bit further until the knot reaches the last sheave of the moving pulley. Now we have just 4 strands of rope in our pulley system, giving us 25% more pulley system! Now with this setup we can setup a 250 foot Type 18 MKII and 300 feet of Aero.
What if we could take it a step further? Let's do it! Take that knot out of your tail and pull the strand of rope through you last sheave and tie the knot once again. Now you can extend your pulleys out to 33 feet, 67% longer than your original system! Now we can rig a full 330 feet of Type 18 MKII and 400 feet of Aero! All with just 100 feet of rope!
Now, extending your pulleys out this far with just 3 strands of rope in the system, it can be a bit difficult to re-reeve your pulleys as you apply tension to the line. Unless you have several people with you, getting the tail to your brake is nearly impossible. That is where the following techniques come into play.
Techniques
Before we begin, I should mention that the following methods require that you have a handled ascender of some sort. This is a tool you should have in your bag anyway as it adds a considerable amount of power to your pulling. I will be adding more info on this in a future article.
Step 1
Okay, let's assume that we have the 4-strand method setup. This means the knot in the end of our static rope will be right up at the last sheave on our moving pulley. Extend the pulley system out as far as you can with that knot at the end of the rope.
Step 2
With the pulley system fully extended, you should pull as much slack out of the weblock as you possibly can. This means your line is already attached to your static side.
Step 3
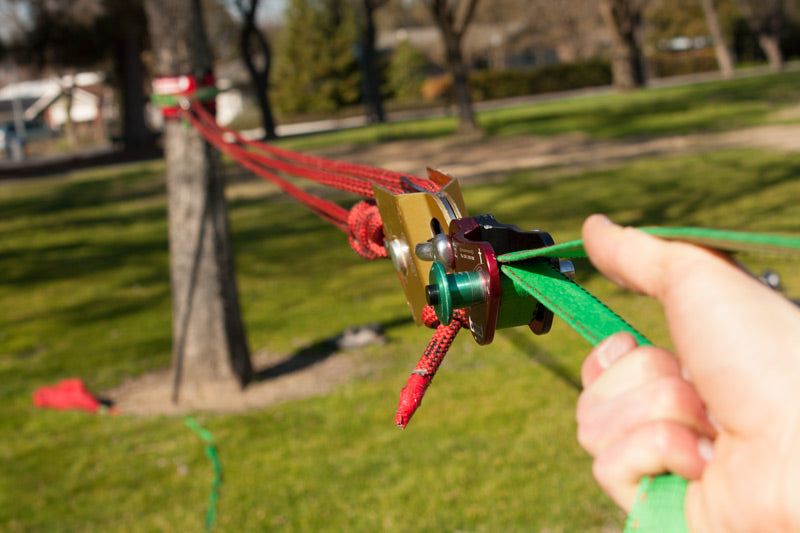
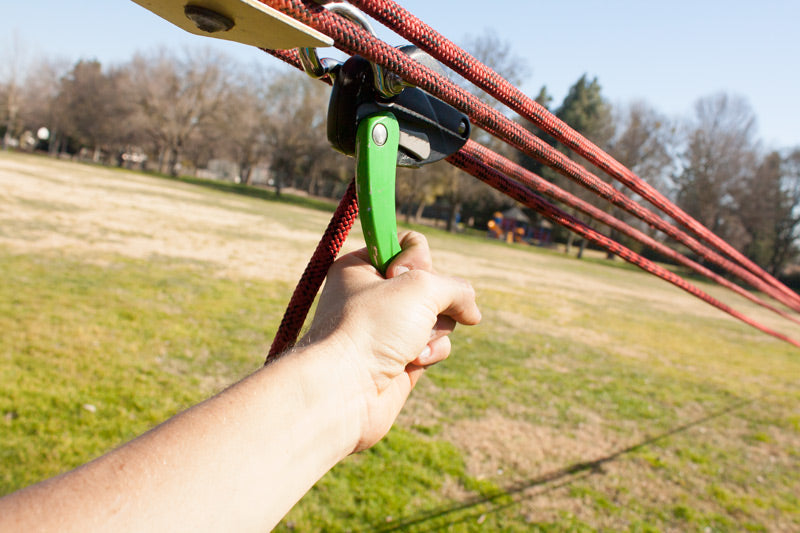
Now that all the slack is pulled out of the weblock, you can start to pull on that tail towards the brake. The objective is to get that tail installed in the brake. However, holding tension on the line and installing the brake at the same time is quite difficult. So grab your handled ascender and attach it to the tail, in front of the knot. Slide it up the tail as you pull on it.
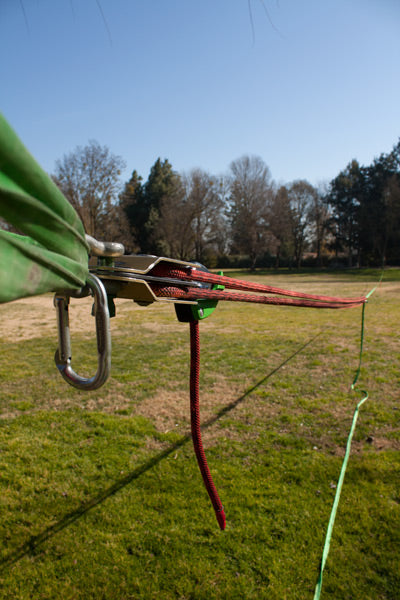
Step 4
Now let the ascender jam into the pulley to hold the tension on the line. Pull as much as you can out of the tail while sliding the ascender up towards the pulley. Once it becomes hard, just let the ascender jam into the pulley.
DANGER: You can severely damage your rope doing this method. Take extreme precaution! Do NOT simply let go of the rope letting the ascender slam into the pulley. You should gently align the ascender on the pulley to make sure it sits as nicely as it can as you let tension off the tail of the rope.
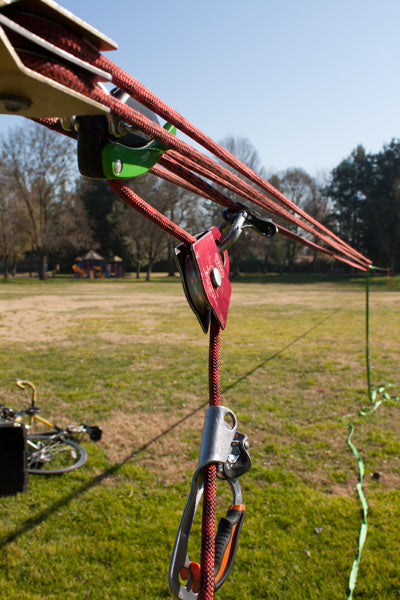
Step 5

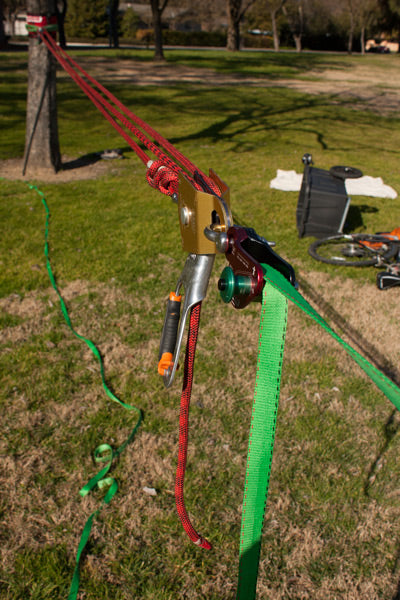
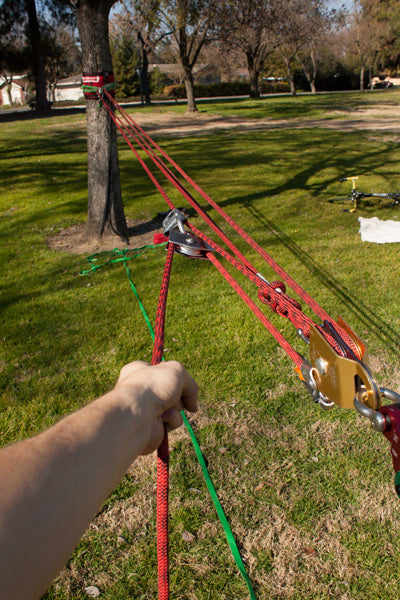
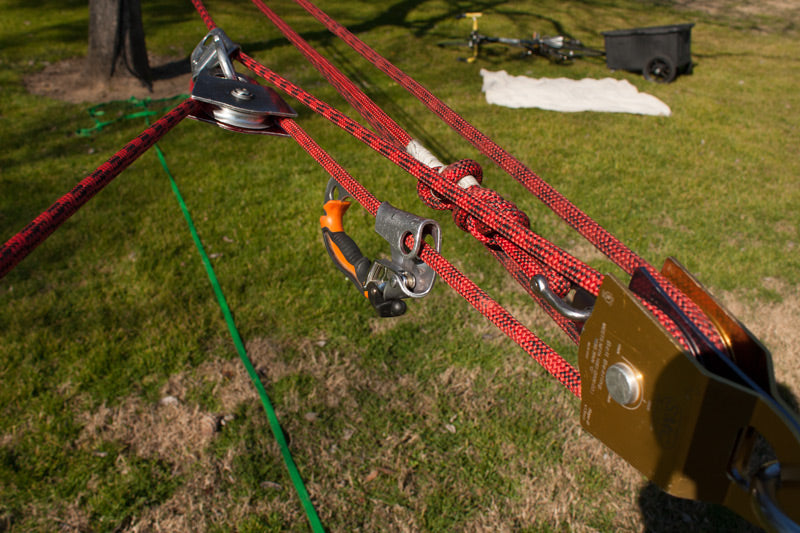
If the tail of the rope is not long enough to reach the brake and you cannot apply any more tension to the tail, grab your multiplier. You must install the multiplier on the strand of rope going to the last sheave where you ascender is connected. Run the tail coming from your ascender through the multiplier pulley and extend the multiplier out towards the tensioning anchor as far as you can.
Step 6
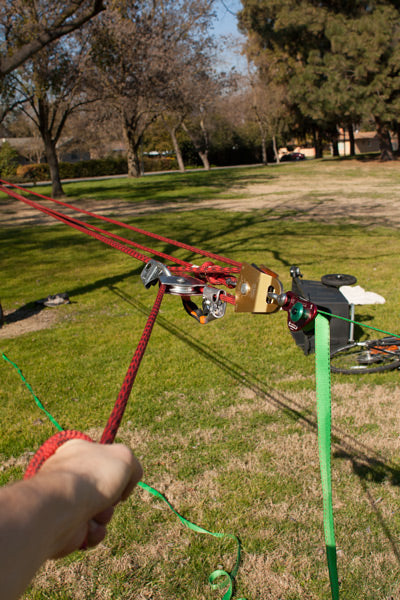
Pull on the tail coming out from the multiplier. As you pull, your ascender should move towards the multiplier. Once the multiplier meets the ascender, your pulls will slide the ascender up towards your moving pulley. Continue pulling until the ascender has slid all the way to the moving pulley once again, where it can hold the tension of the line.
Step 7
Reset your multiplier and repeat the last step until you have enough tail to reach your brake.
Step 8
Install the tail into your brake and remove the multiplier and handled ascender.
Step 9
Install the multiplier as your would normally and continue to tension your line in the normal fashion.
This same method will work with the 3-strand method as well. The video will go into more depth of the 3 strand technical details.
Derigging
One issue with this method is derigging. Most of the time this isn't an issue as your webbing will have stretched out quite a bit. When you run out of rope during detensioning, the tension is usually low enough to where you can simply hold the last strand of rope in your hand while you pull the tail through your brake and then walk the end of your rope towards the moving pulley.
However, if you use the 3-strand method, you may not be able to do this. If a situation comes up where you are at the end of your rope and there is still a considerable amount of tension on the line, follow the next few steps to finish derigging your line.
For reference, the following method is known as 'Reverse Tensioning'.
Step 1
Make sure that you have at LEAST 18-inches (0.5 meters) of tail after your brake before proceeding.
Step 2
When you reach the point where you have 18-inches of tail behind your brake, take your handled ascender and install it on the last strand of rope going to the brake and slide it up as far as you can towards the moving pulley, jamming it up into the pulley.
Step 3
Now slowly release tension off the brake, letting the handled ascender jam into the moving pulley. Try to go as slow as you can so that the ascender doesn't slam into the pulley. Before removing the tail completely, make sure the ascender is sitting nicely up against the pulley.
Step 4
Now remove the tail from the brake. Install the multiplier on the last strand of rope going to the last sheave of the moving pulley. Install it fairly close to the moving pulley. Run the tail from the handled ascender through the multiplier.
Step 5
Apply enough tension to the tail that you can remove the handled ascender.
Step 6
Now, slowly let out tension, allowing the multiplier to slide towards the tensioning anchor.
Step 7
Once you run out of tail, you need to reinstall the handled ascender so that it can jam back into the moving pulley.
Step 8

Slide the multiplier back towards the moving pulley and repeat steps 7-9 until you have let out enough to the point that you can simply walk the remaining tension out of the line.
The above steps can be a bit complicated, but it's quite easy once you get the hang of it. You will often not have to do this as your line will have stretched out enough to the point that you can simply walk the tension out. There are very few cases when this will be necessary. The only time you will encounter this is if you use the 3-strand method with a webbing with very low stretch. If you can install the 4th strand without a multiplier, then this method will not be necessary.
Hopefully this method will help some of you get some of those big lines up with less static rope! This simple technique can seriously save you pack weight for your longlines and is a technique that I use on almost every longline I rig! I have completely switched over to a 100 foot piece of PMI 11mm Access PRO Static Rope. I have successfully rigged 500 foot lines with Aero before using that piece of rope and the above methods.

← Older Post Newer Post →
0 comments