You have no items in your shopping cart.

Part two of our series on Highline Leashes - All about the connection points.
There are many ways to attach your leash to your highline as well as to your harness, but there are few principles that should always be followed in order to be sure that you are as safe as you can possibly be.
First, let's take a look at how to connect the leash to the highline. Some things to keep in mind when choosing a method to attach your leash to your highline are: surface area in contact with the highline during a fall, strength, geometry, material, and finish.
The reason why the surface area in contact with the highline during a leash fall is important is because the larger the area, the more the force of the fall is spread out onto your webbing. If you use a piece of hardware that only has 1/4" of material in contact with the line during the fall, that means all of the force you are generating during that fall is resting on 1/4" of your highline. That's a lot of force (can be upwards of 800 lbf in a bad fall) in a very small area. This has a lot of potential to damage your line. To mitigate this, you can use several pieces of hardware rather than a single piece. This makes the surface area much bigger and will spread the load out over a bigger chunk of your webbing.
The strength of your leash connection point is important because you want to be sure it won't break during your leash fall. Typically, a good leash connection point will have a strength of at least 5,000 lbf (22.2 kN), which is then doubled up for larger surface area. Your connection point should be rated for either climbing situations or overhead lifting as both of these application involve rigorous testing to be sure the hardware is up to the task at hand. Leash falls can be violent situations that produce a large amount of force. You want to be absolutely sure that how your leash is connected to your highline is absolutely fail proof.
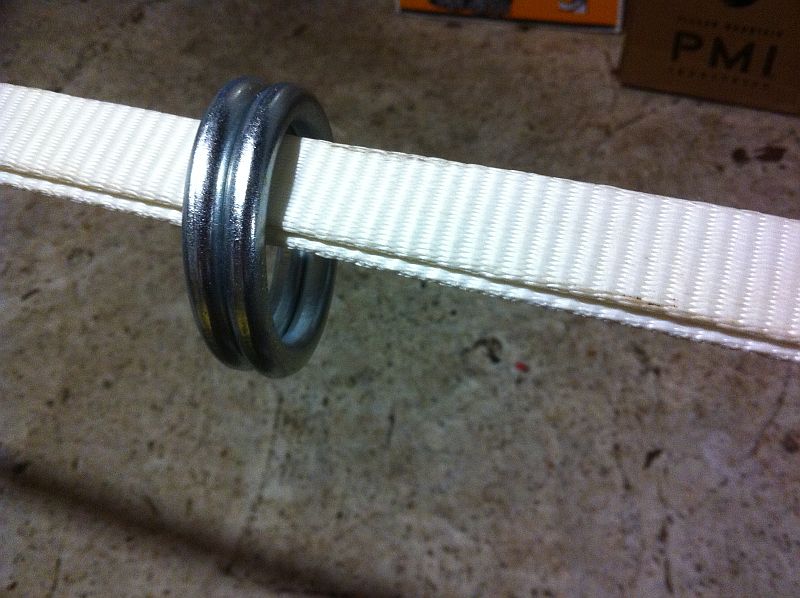
Now, the geometry of your leash attachment point is extremely critical. You absolutely do not want to use anything that has any sort of sharp edges (i.e. carabiners, shackles, quicklinks, etc...) as these edges could easily snag your line during the leash fall and potentially cut right through, causing you to end up on your backup line. The absolute best geometric shape to use would be a circle. Not just any circle will work though, you must be sure that the inner diameter of this circle is large enough to slide over your webbing very easily while you are walking and also big enough to not get caught on the Slider Tapes along the way. You also don't want the circle to be too big as it will likely be very heavy, which is quite distracting while you are walking the line. The best overall size, shape, strength, and weight circle (ring) to use would be two Steel or Aluminum Rings or .
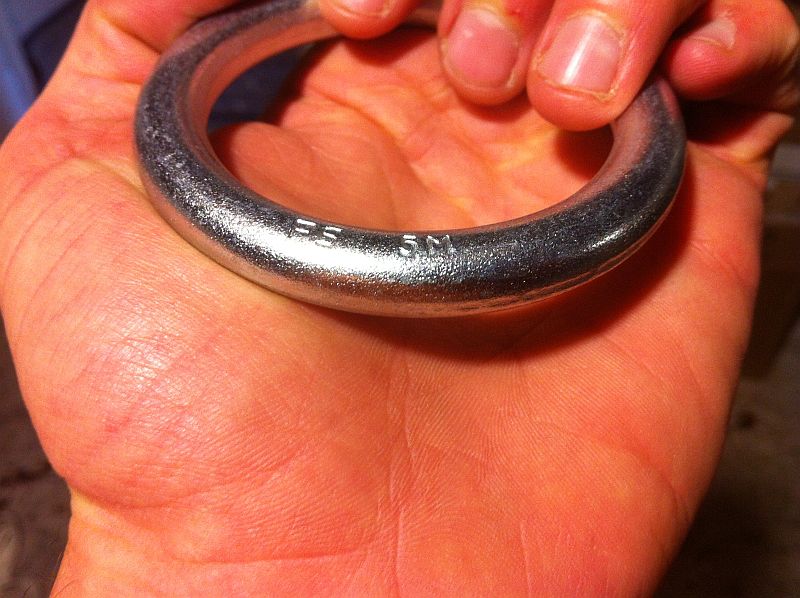
The material of your connection point is important mainly because of the strength characteristics certain materials have. Basically, you want to stick with either steel, titanium, or aircraft aluminum (alloy 6061 or 7075). All three of these materials are very strong with excellent weight characteristics.
The finish of your connection point is also quite important. You could have the perfect leash ring on the planet that meets all the above criterion, but if it has a rough finish it could very easily damage your line during a leash fall because of abrasion. The best finish is either soft anodization for aluminum connection points and chromate for steel connection points. Both of these finishes give the hardware a very smooth finish that slides well along the webbing and causes negligible damage from abrasion during a leash fall.
Given all of these criterion, the best possible way to connect your leash to your highline is using a pair of Forged Steel, Titanium, or Aluminum Rings with an inner diameter between 2 and 3 inches and a stock diameter of at least 3/8". These rings will give you a considerably large surface area to come in contact with the highline during a fall, are extremely strong, have the optimal geometry, are made from quality materials (this needs to be checked when purchasing), and have a very smooth finish.
Now that we have our connection point for our leash to our highline, how do we actually attach the leash to it (them)? Well, there are a number of ways to do this, but the most effective would be to tie a Figure-8 Follow-Through knot through the rings. I also like to put a small sleeve of 1" Slack-Spec Tubular on the part that is in contact with the rings for additional bend radius as well as abrasion protection.
Be sure that you leave at least 12" of tail on this knot!
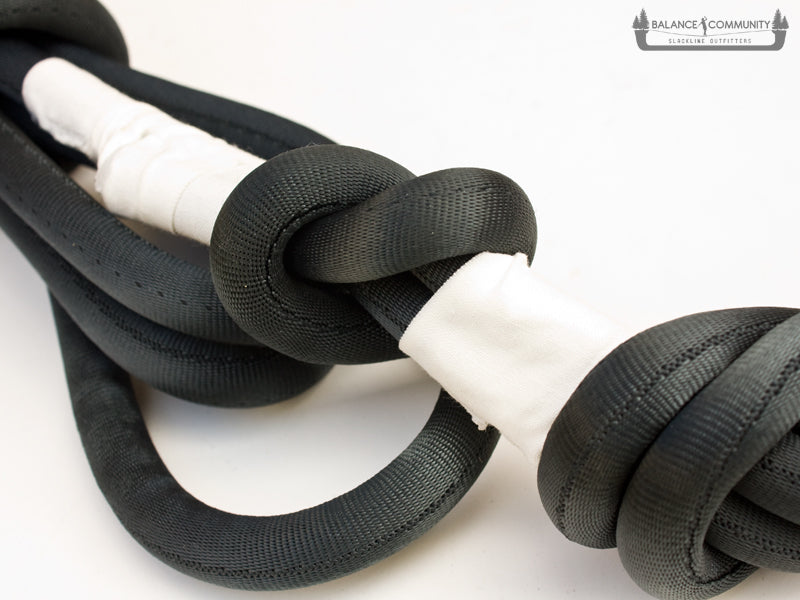
With the tail, you should tie a backup knot to be sure the tail does not slip through during a fall. I like to tie a stopper knot with this tail and then tape it to the leash, like in the picture to the left.
Okay, now that we have the bottom part of the leash taken care of, how do we attach the leash to our harness? Well, the best and most used way is to simply tie another Figure-8 Follow-Through knot going through both loops of your harness.
DO NOT TIE TO YOUR BELAY LOOP! Please use the picture below for reference. Your leash should be tied to both the waistband and the leg loops of your harness.
Be sure that you leave at least 12" of tail on the figure-8 knot for the backup knot!
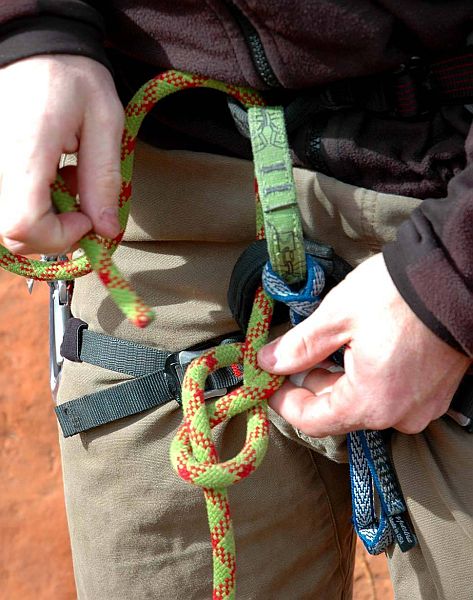
Again, you NEED to tie a backup knot on your harness tie-in. You can use the same kind of backup knot that you used to tie the leash to the rings.
That concludes this article on highline leash connection points. Up next is leash management and how to climb your leash after a leash fall. Feel free to ask questions below.

← Older Post Newer Post →
0 comments